1. Introduction
2. Shipping Label Settings
3. Arrange Shipment
4. Print Shipping Label
1. Introduction
If you are selling fresh vegetables, frozen food, or electronic items, the order fulfillment process could be a challenge for you. Great news! You can now process the Delivered By Seller orders from SiteGiant Order Processing. You may arrange the orders by using the courier services that supported the integration with SiteGiant ERP. Or, if you are using your own freight such as car or lorry delivery, you are able to arrange it and print your own shipping label.
2. Shipping Label Settings
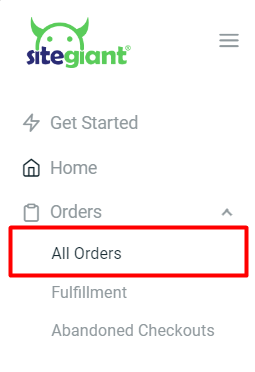
Step 1: Navigate to Orders on dashboard menu > All Orders
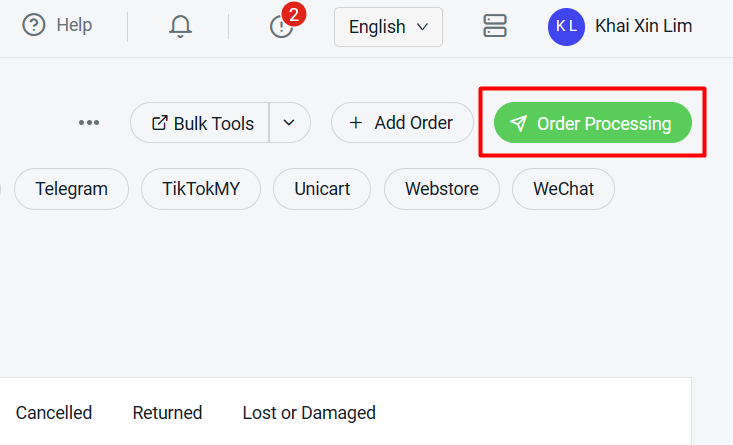
Step 2: Click on the Order Processing button
Step 3: Click on More(…) > Shipping Label Settings

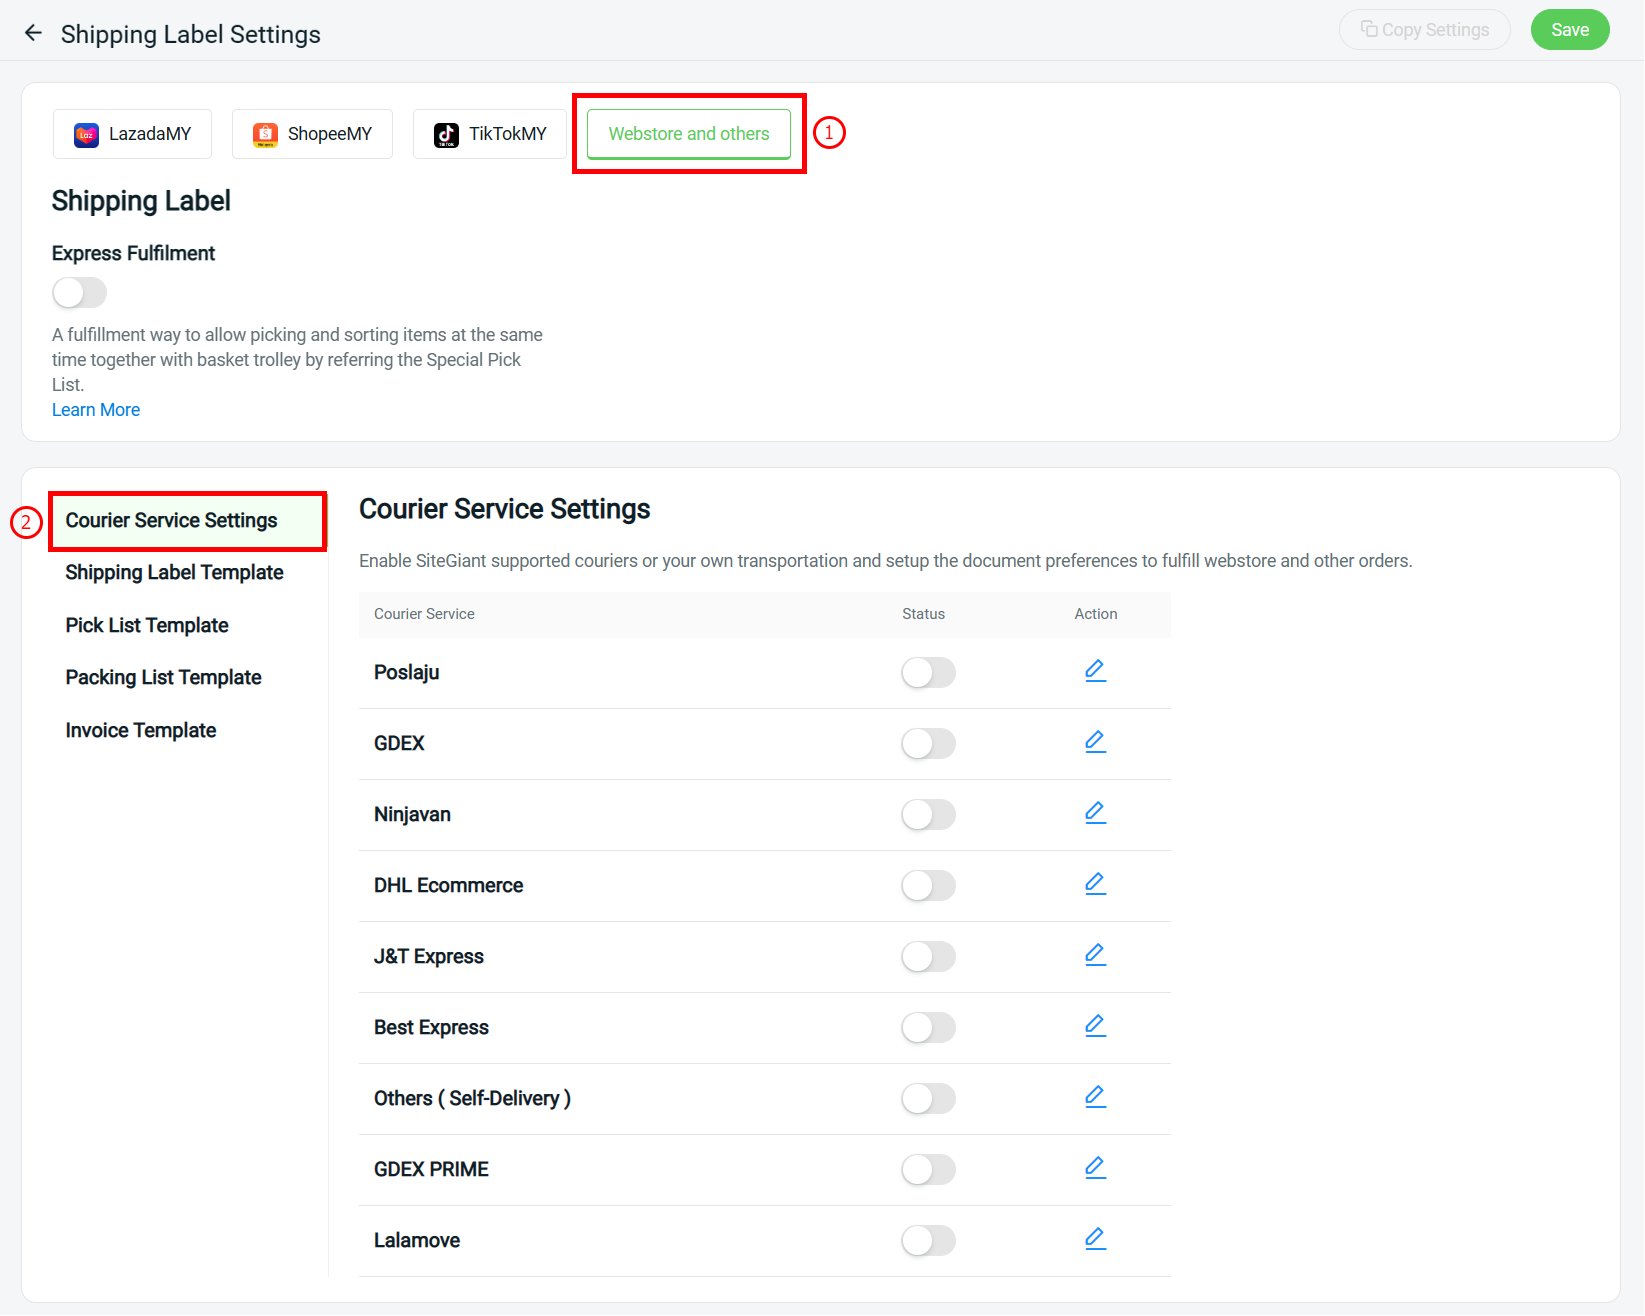
Step 4: Select Webstore and others tab > Courier Service Settings > enable the status of the courier service you wish to integrate
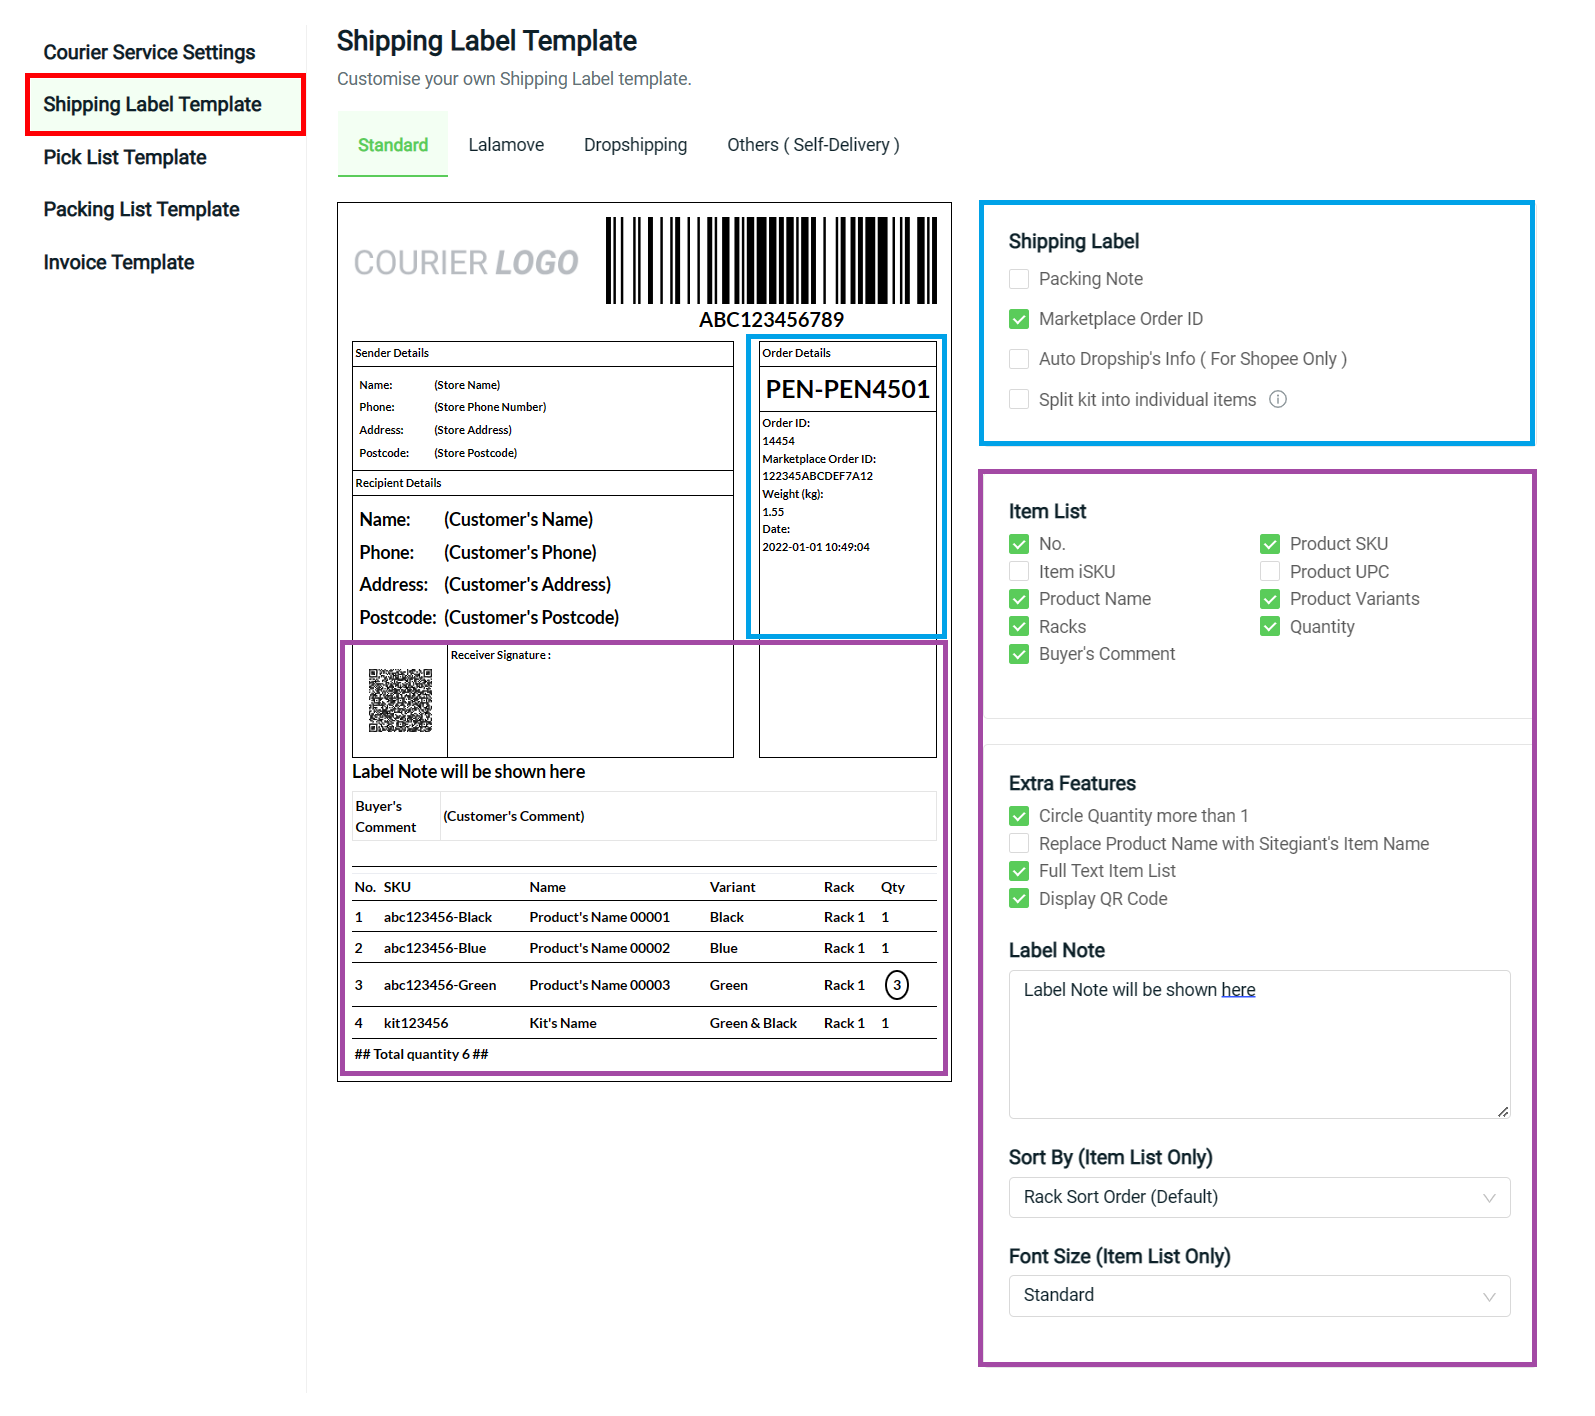
Step 5: Go to Shipping Label Template > choose Standard for all courier services except for Lalamove and others (self-delivery) > choose the info you wish to show on the shipping label
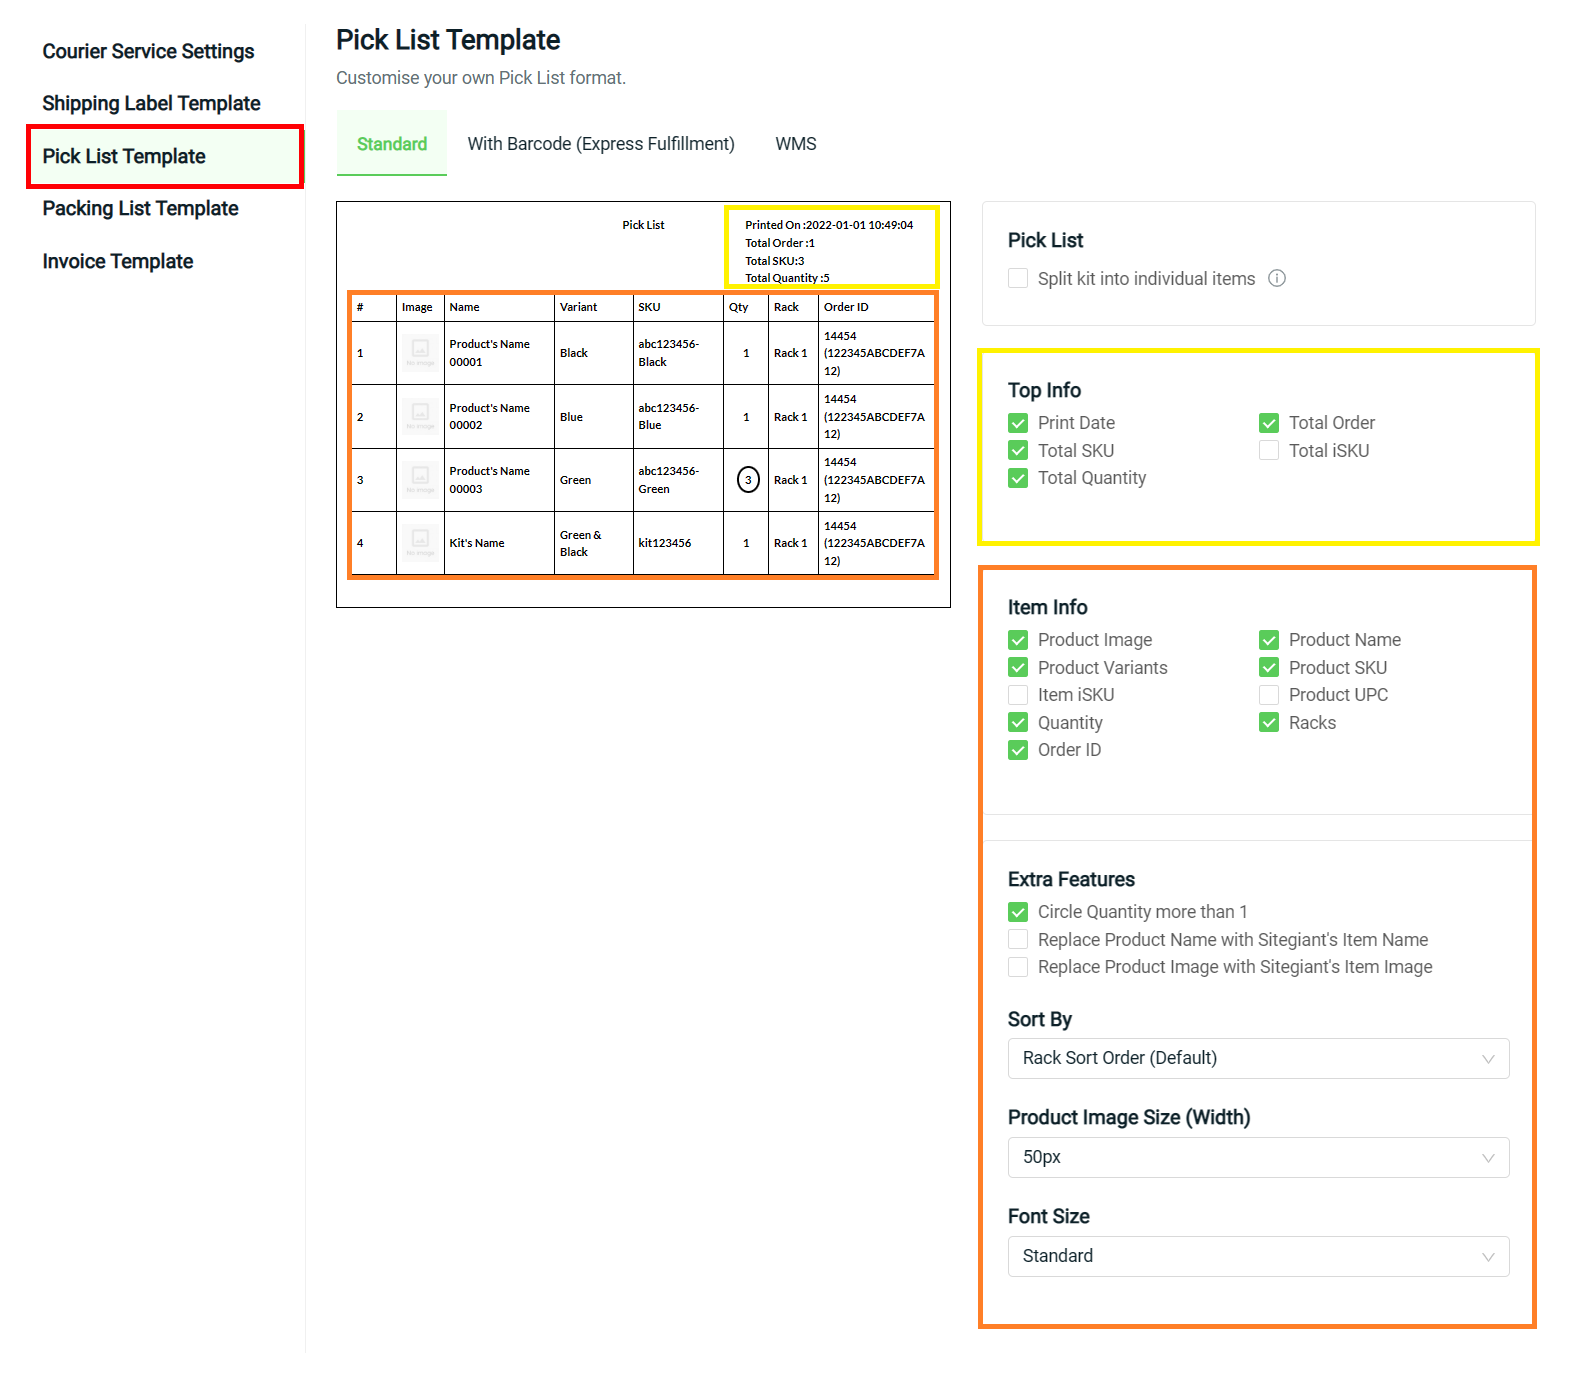
Step 6: Go to Pick List Template > customize the info you wish to show in the Pick List
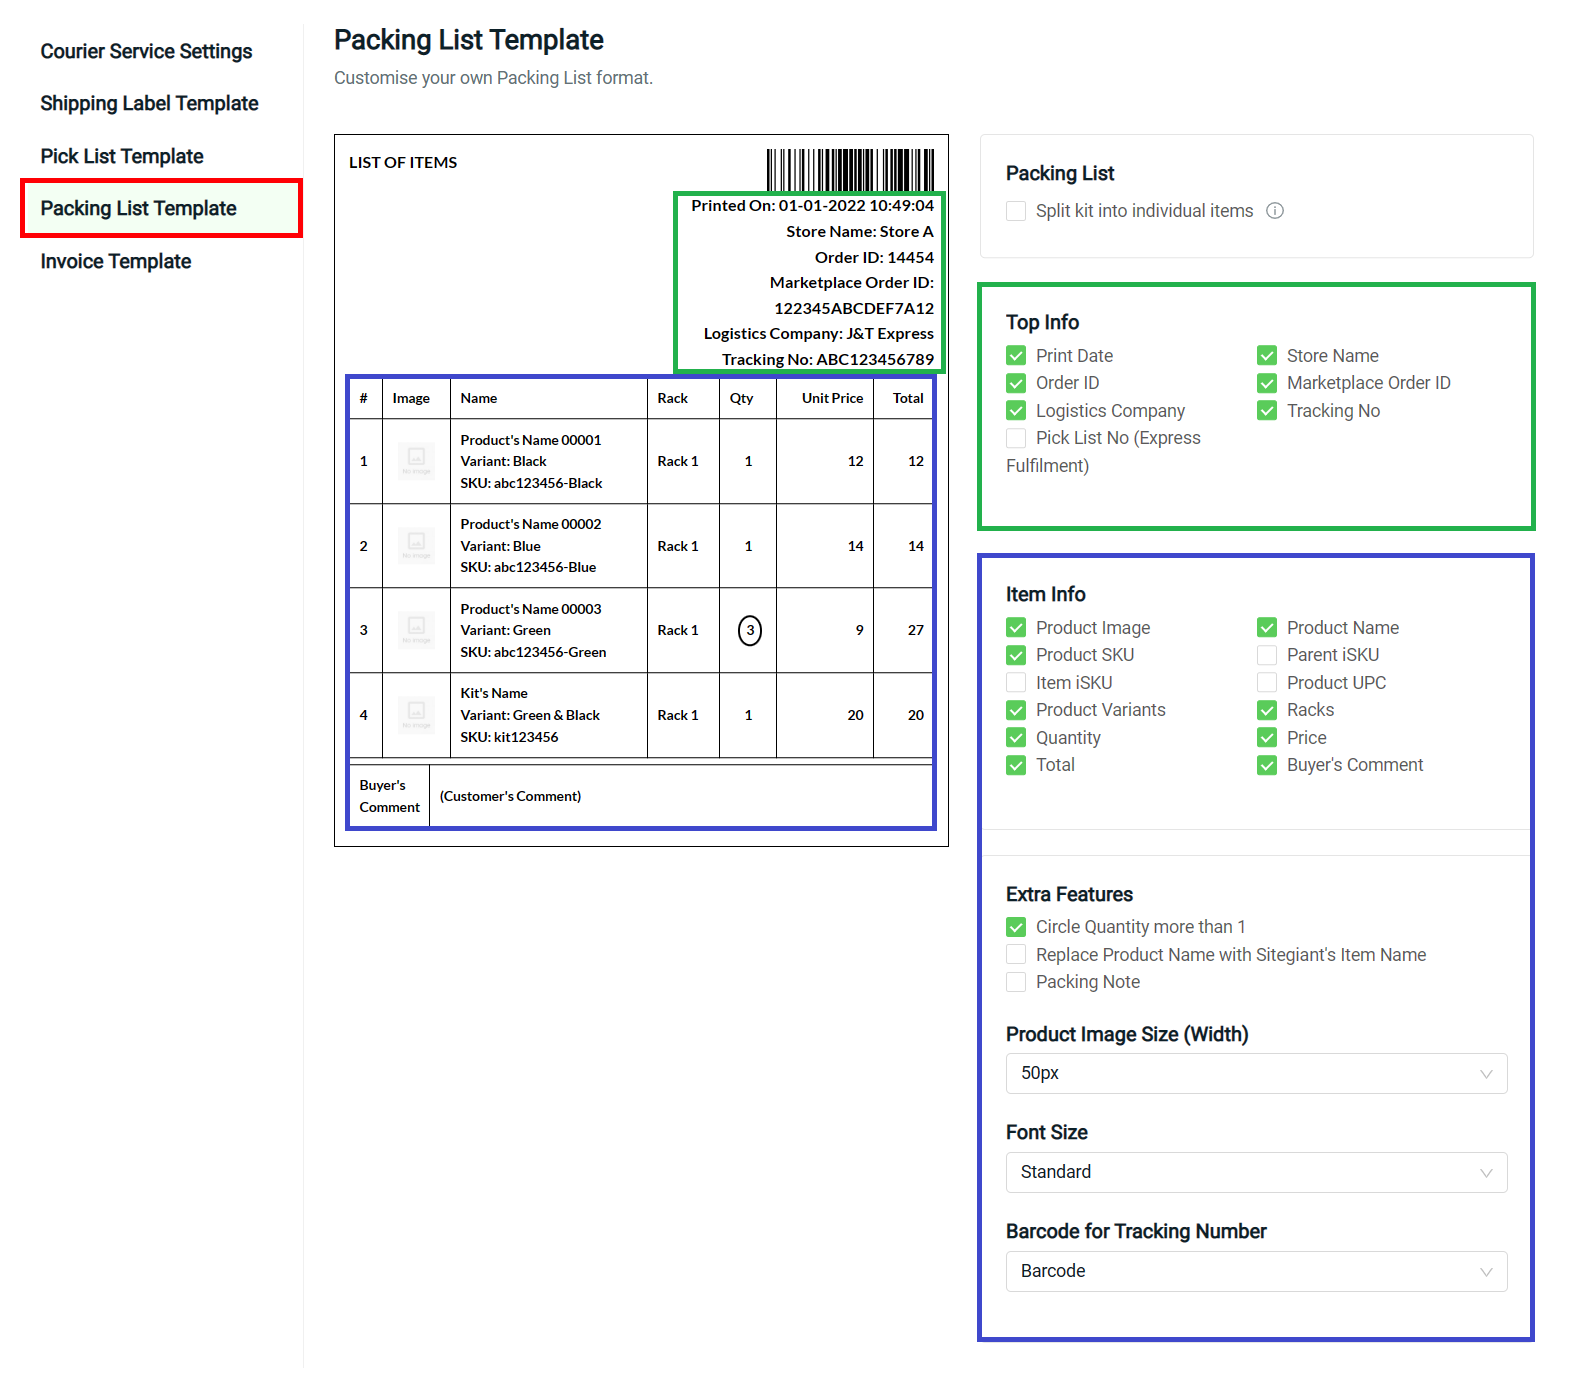
Step 7: Go to Packing List Template > customize the info you wish to show in the Packing List
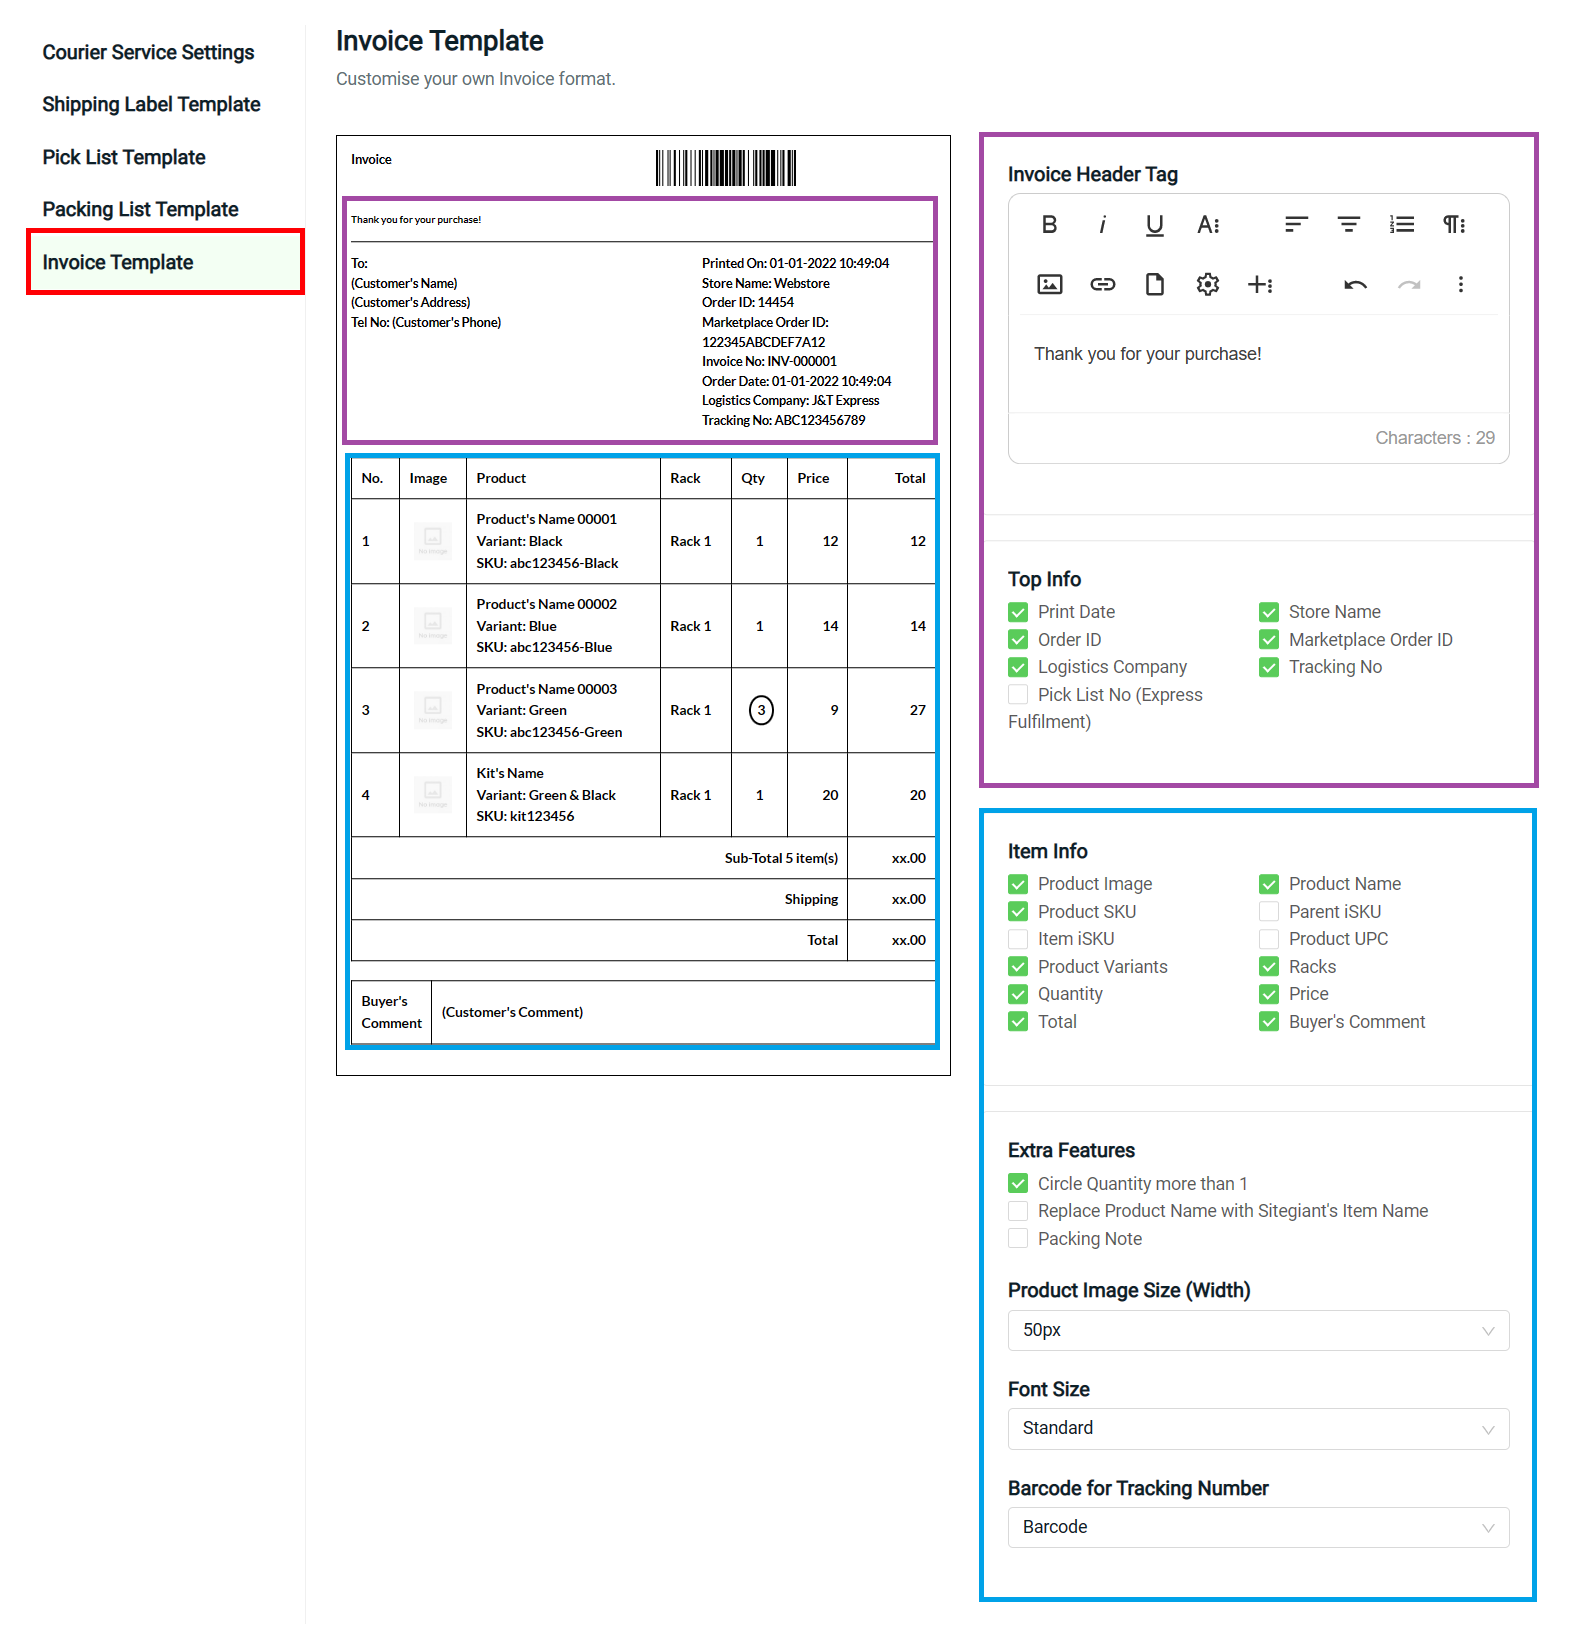
Step 8: Go to Invoice Template > customize the info that you wish to show in the Invoice
Step 9: Once done configuring all the shipping label settings, click on Save button on the top right to save changes
3. Arrange Shipment
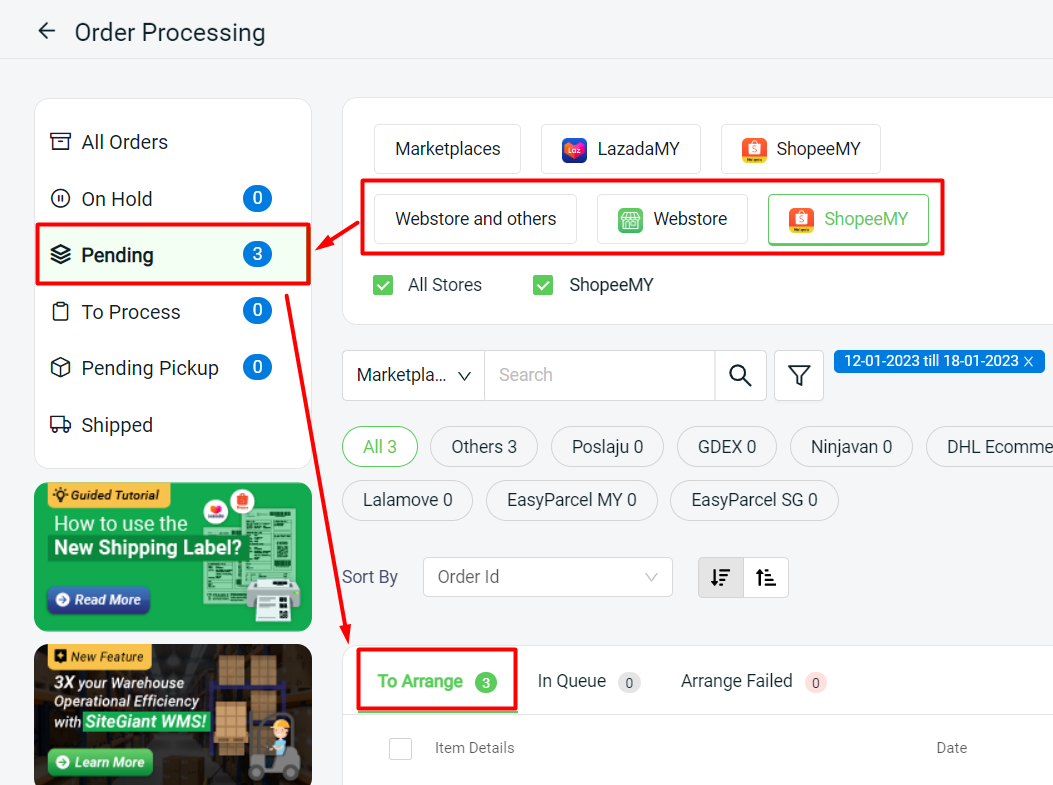
Step 1: Back to Order Processing page > select Shopee channel of Webstore and others tab > go to Pending > To Arrange tab
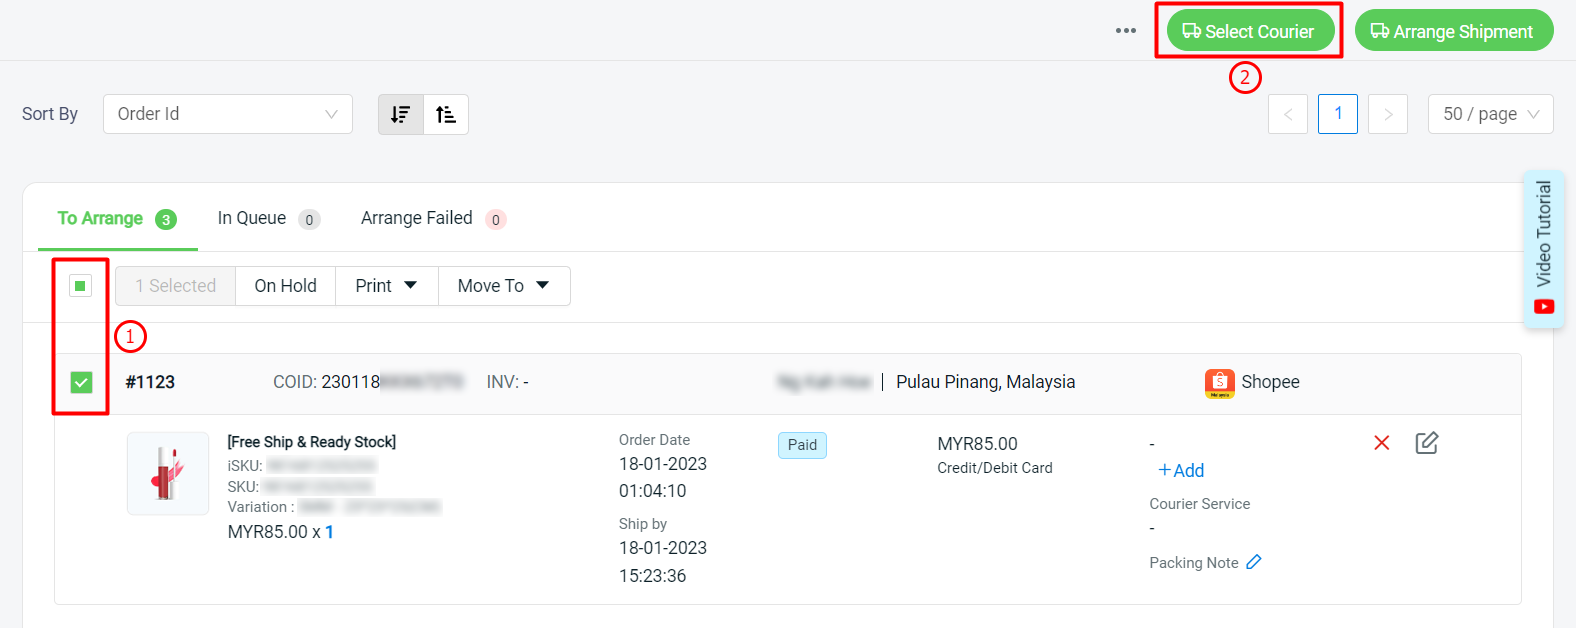
Step 2: Select the order(s) > click on Select Courier button
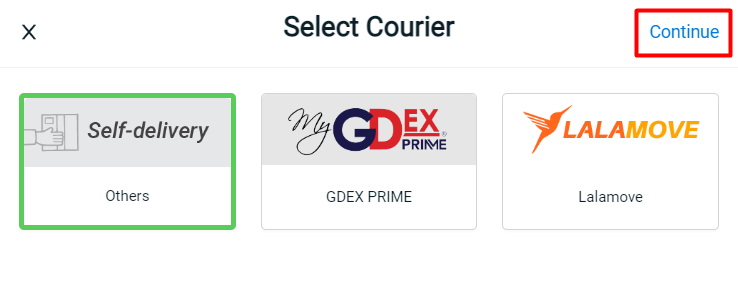
Step 3: Select the courier > Continue
Step 4: Select the order(s) again > click on Arrange Shipment button
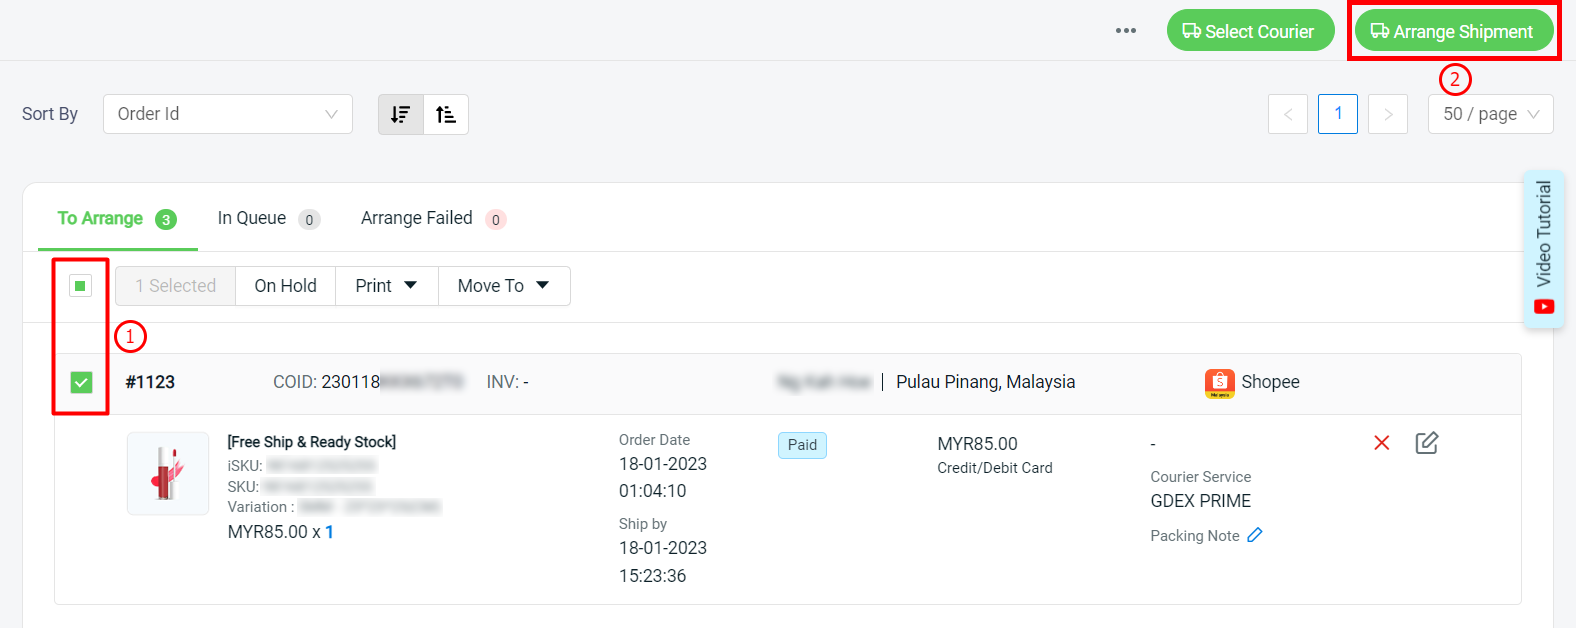
?Note: Only order(s) with same courier able to arrange shipment together.
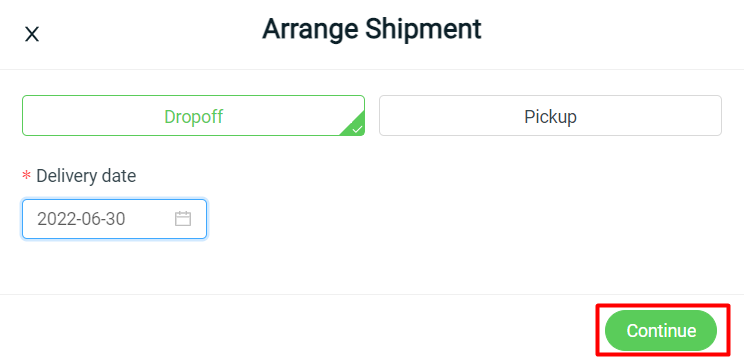
Step 5: Select Arrange Shipment Options for selected courier service e.g. Dropoff or Pickup, Delivery Date & Time etc. > Continue
Step 6: The order will be in In Queue tab and will move to To Process tab once it is arranged successfully. The tracking number will be updated to Shopee Seller Center.
4. Print Shipping Label
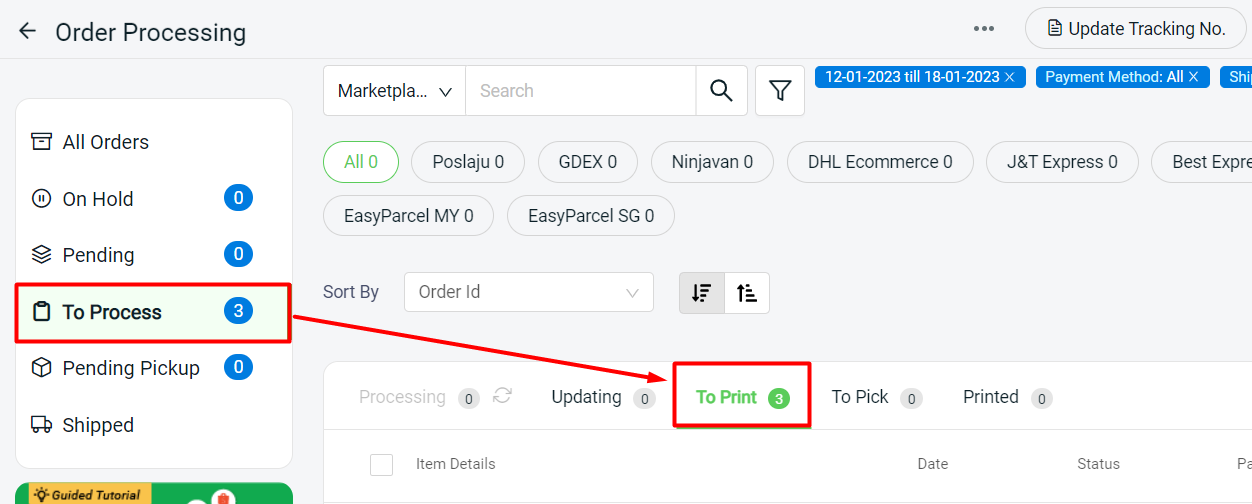
Step 1: Go to To Process > To Print tab
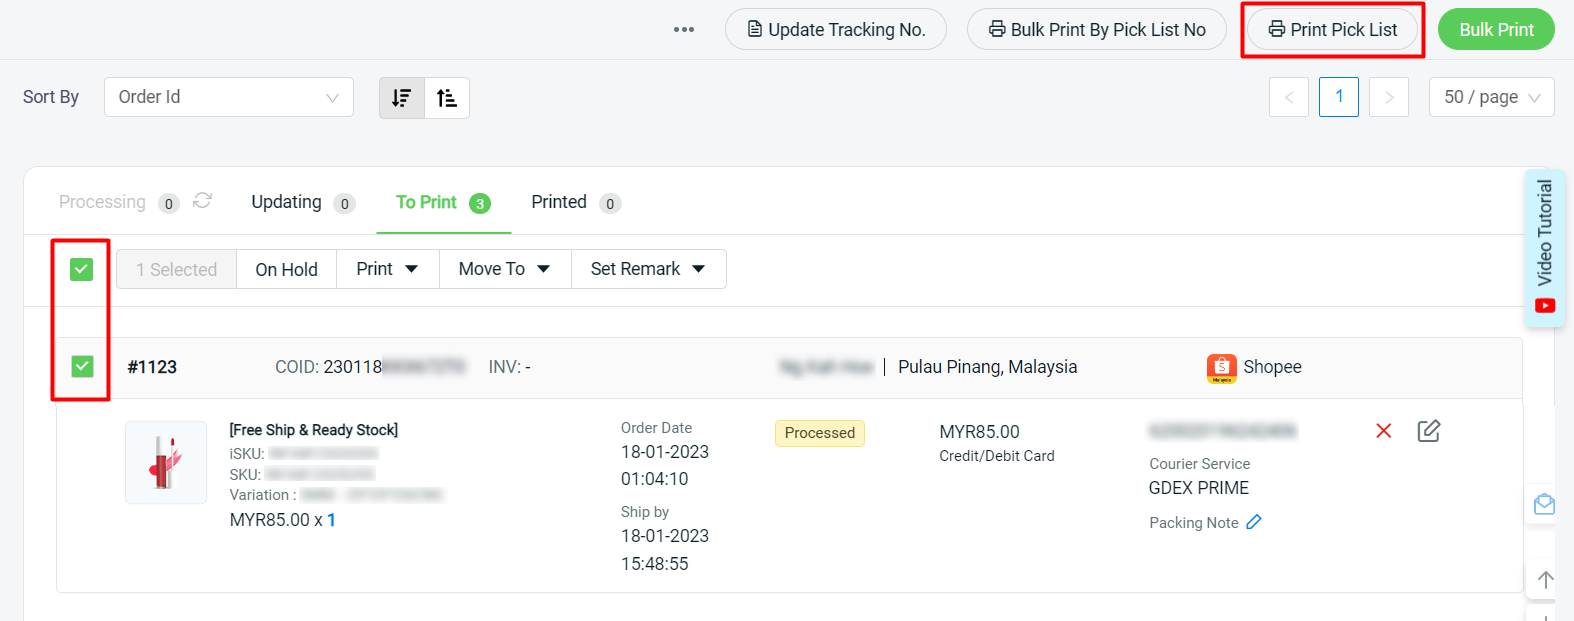
Step 2: You may print the Pick List before printing out the shipping label (optional)
Select the order(s) > Print Pick List
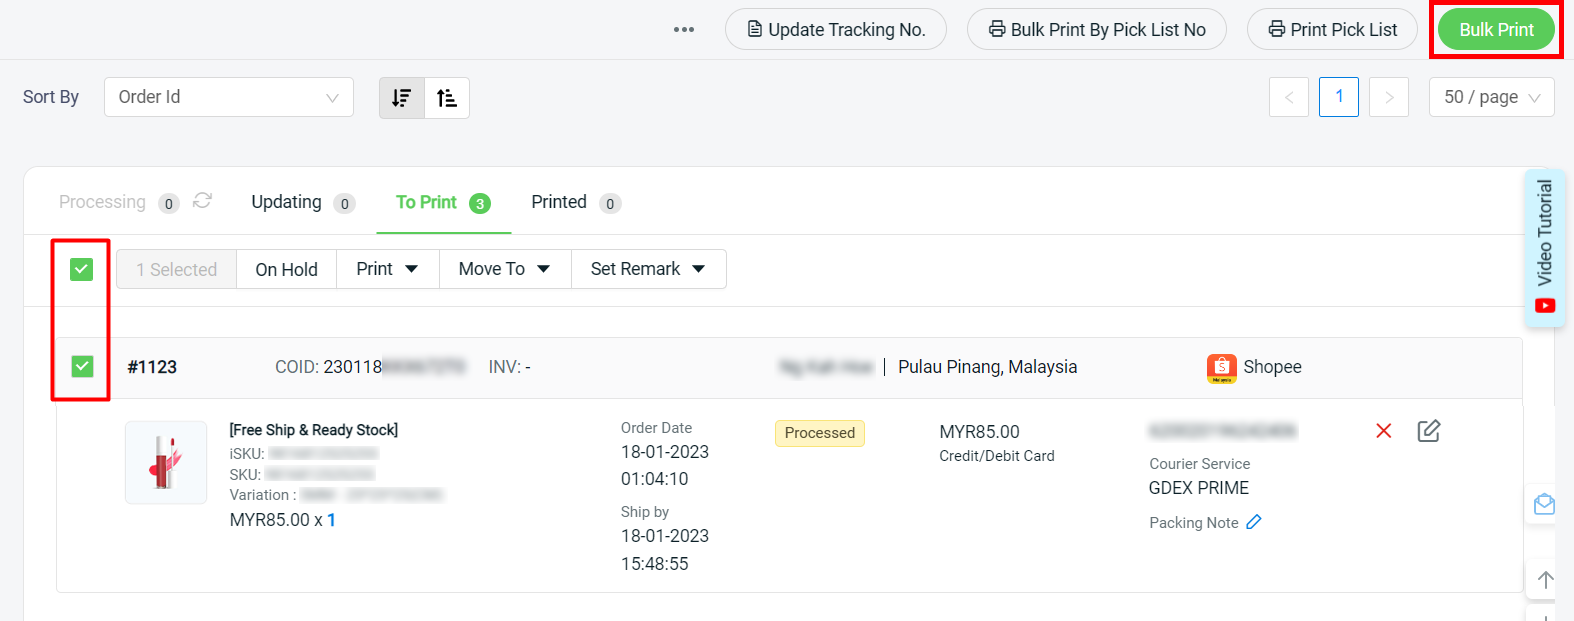
Step 3: Select the order(s) > click on Bulk Print button to print the shipping label
Step 4: The printed order(s) will move to To Process > Printed tab
