1. Introduction
2. Shipping Label Settings
3. Courier Service Settings
4. Shipping Label Template
5. Pick List Template
6. Packing List Template
7. Invoice Template
1. Introduction
Customize your Shipping Label for your webstore and others orders by configuring the setting on Courier Service Settings, Shipping Label Template, Pick List Template, Packing List Template, and Invoice Template.
2. Shipping Label Settings
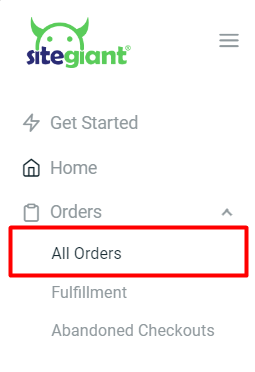
Step 1: Navigate to Orders > All Orders
Step 2: Click on the Order Processing button
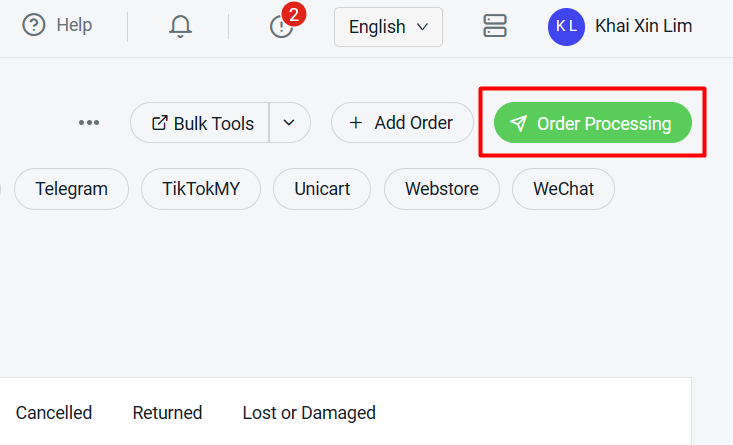
Step 3: Click on More(…) > Shipping Label Settings

Step 4: Select Webstore and others tab

?Tips: How To Process Order With Express Fulfillment
3. Courier Service Settings
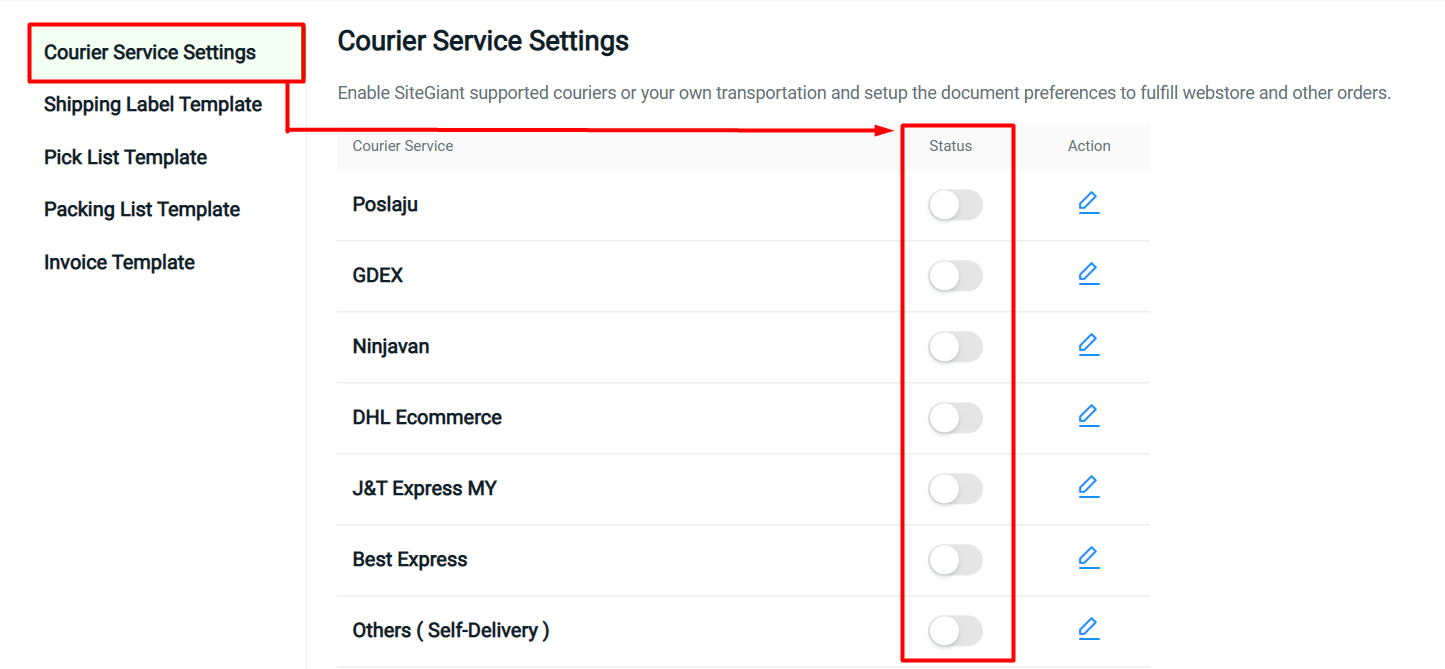
Step 1: Go to Courier Service Settings > enable the status of the courier service you wish to integrate e.g. Poslaju
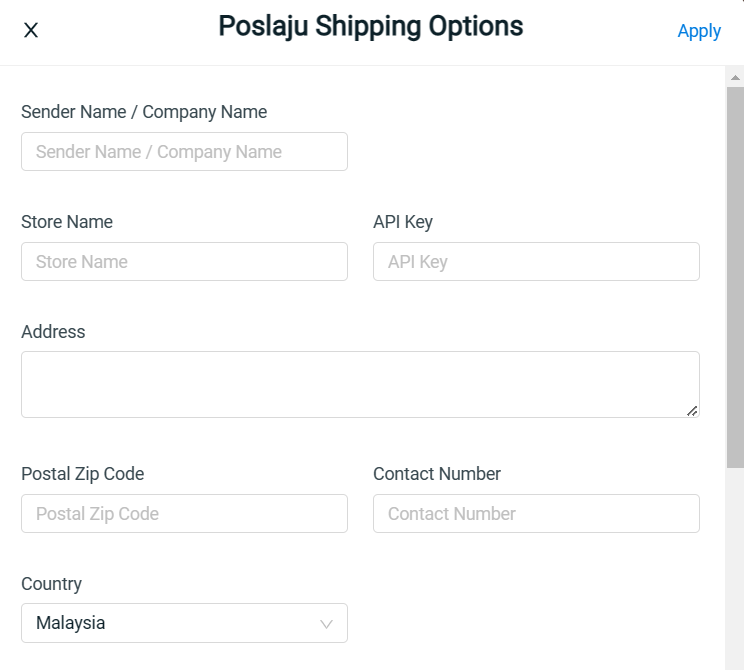
Step 2: Fill in Shipping Options such as sender details and the API Key retrieved from the courier service
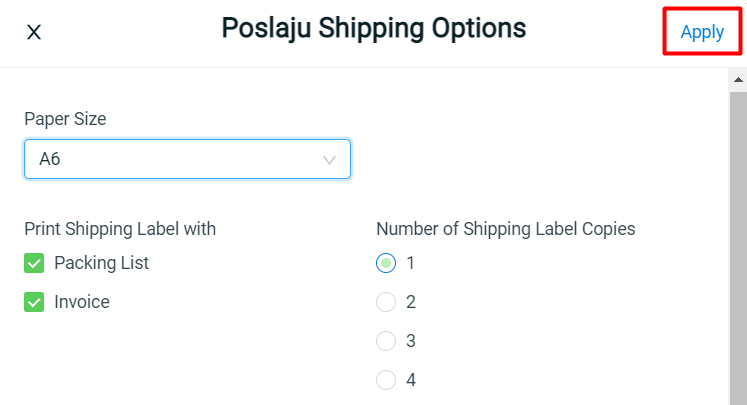
Step 3: Choose the Paper Size > choose to print shipping label with Packing List, Invoice, or both > select the Number of Shipping Label Copies > Apply
4. Shipping Label Template
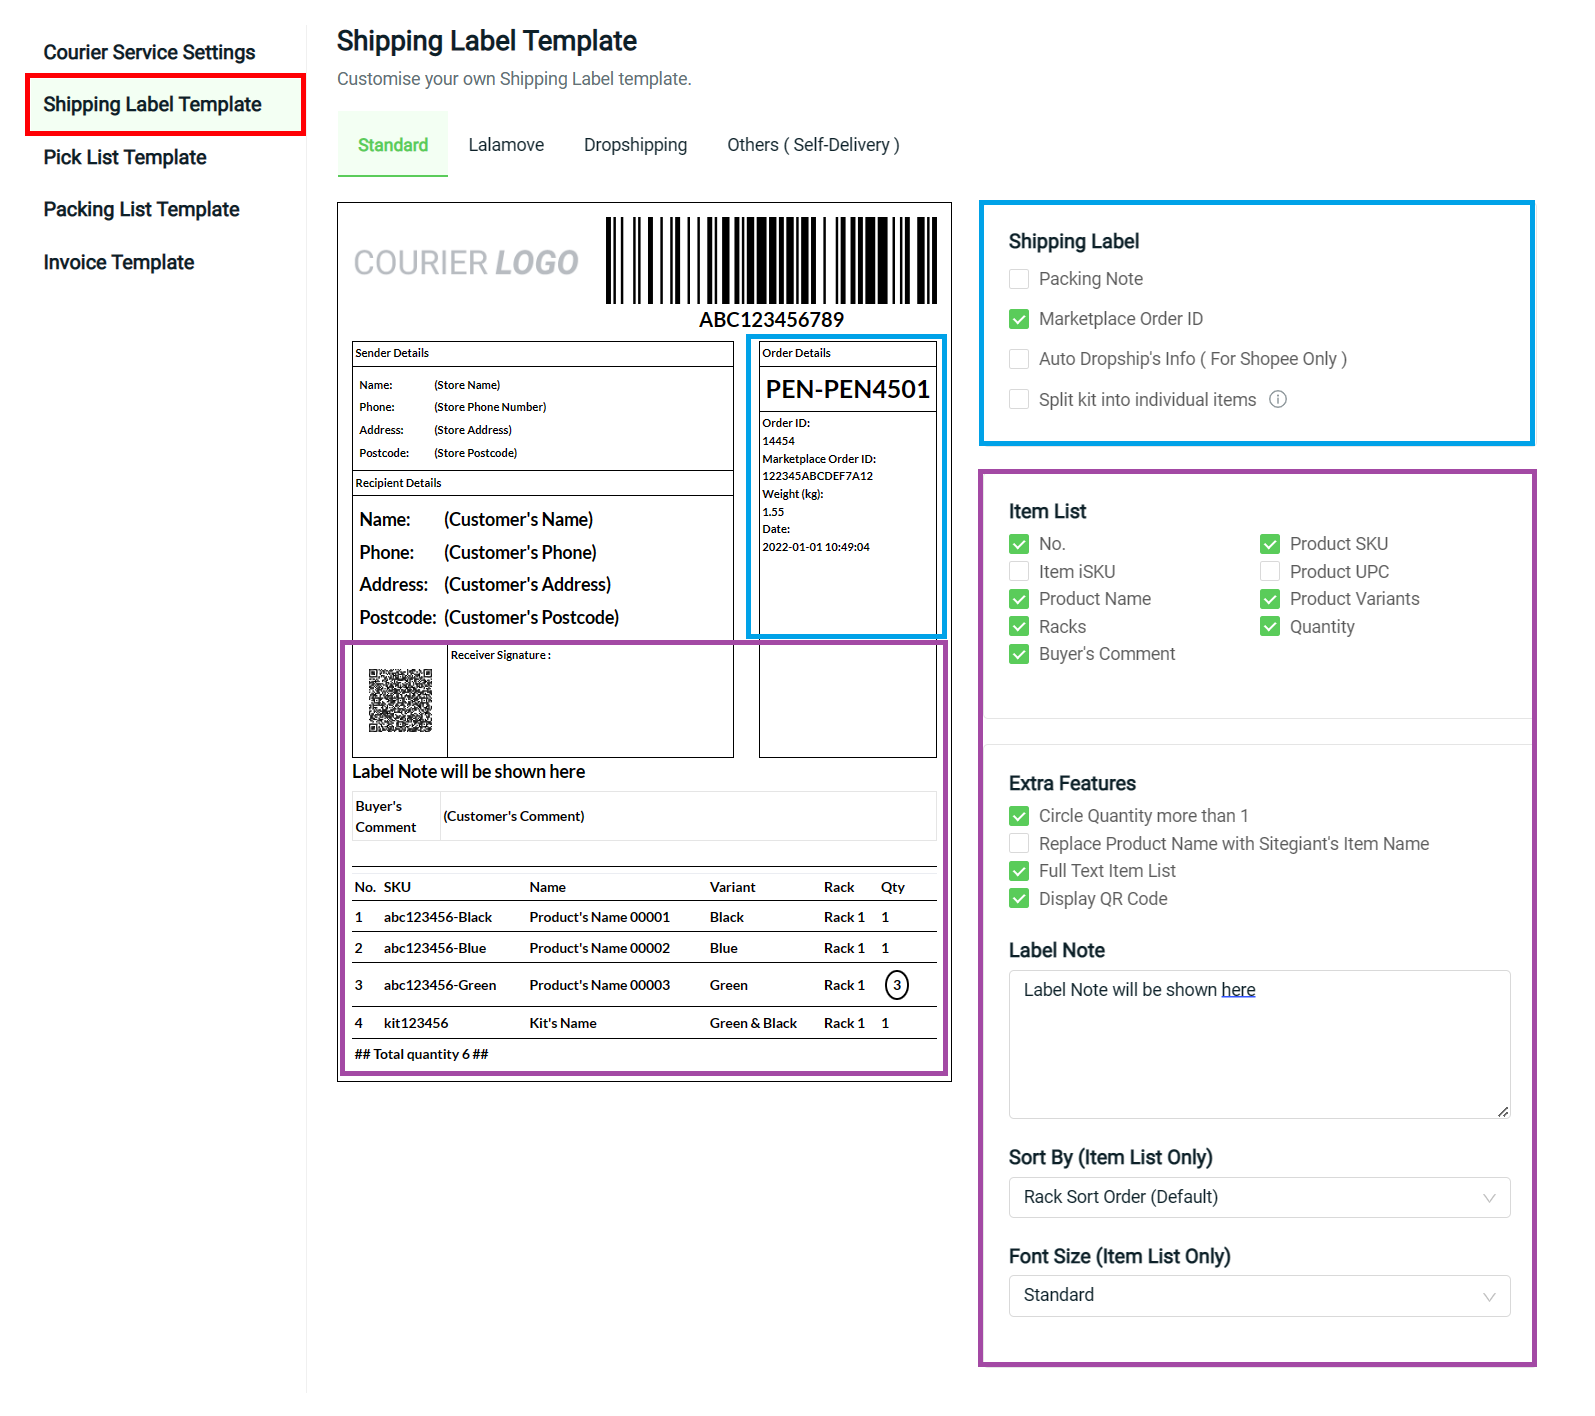
Step 1: Go to Shipping Label Template > choose Standard for all courier services except for Lalamove, Dropshipping and Others (Self-Delivery) > choose the info you wish to show on the shipping label
5. Pick List Template
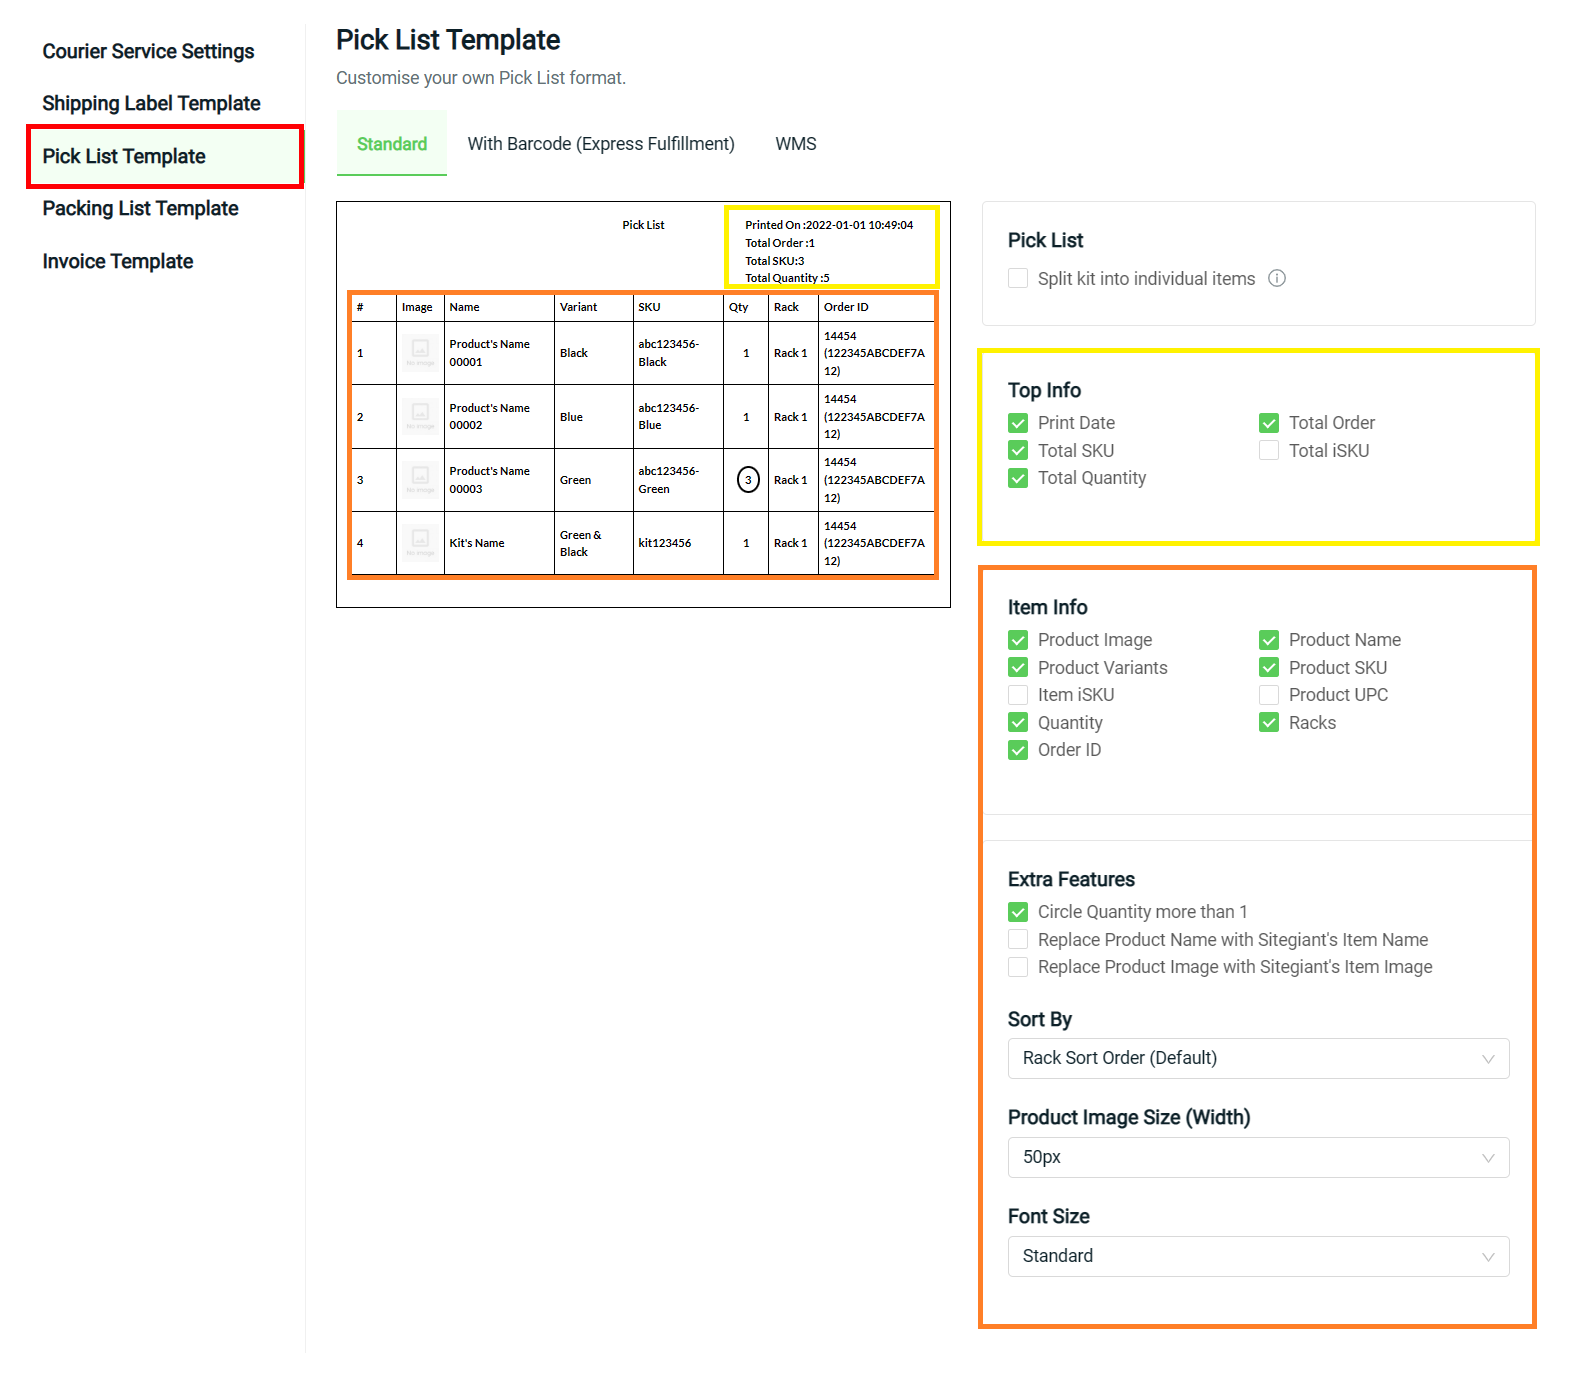
Step 1: Go to Pick List Template > customize the info you wish to show in the Pick List
6. Packing List Template
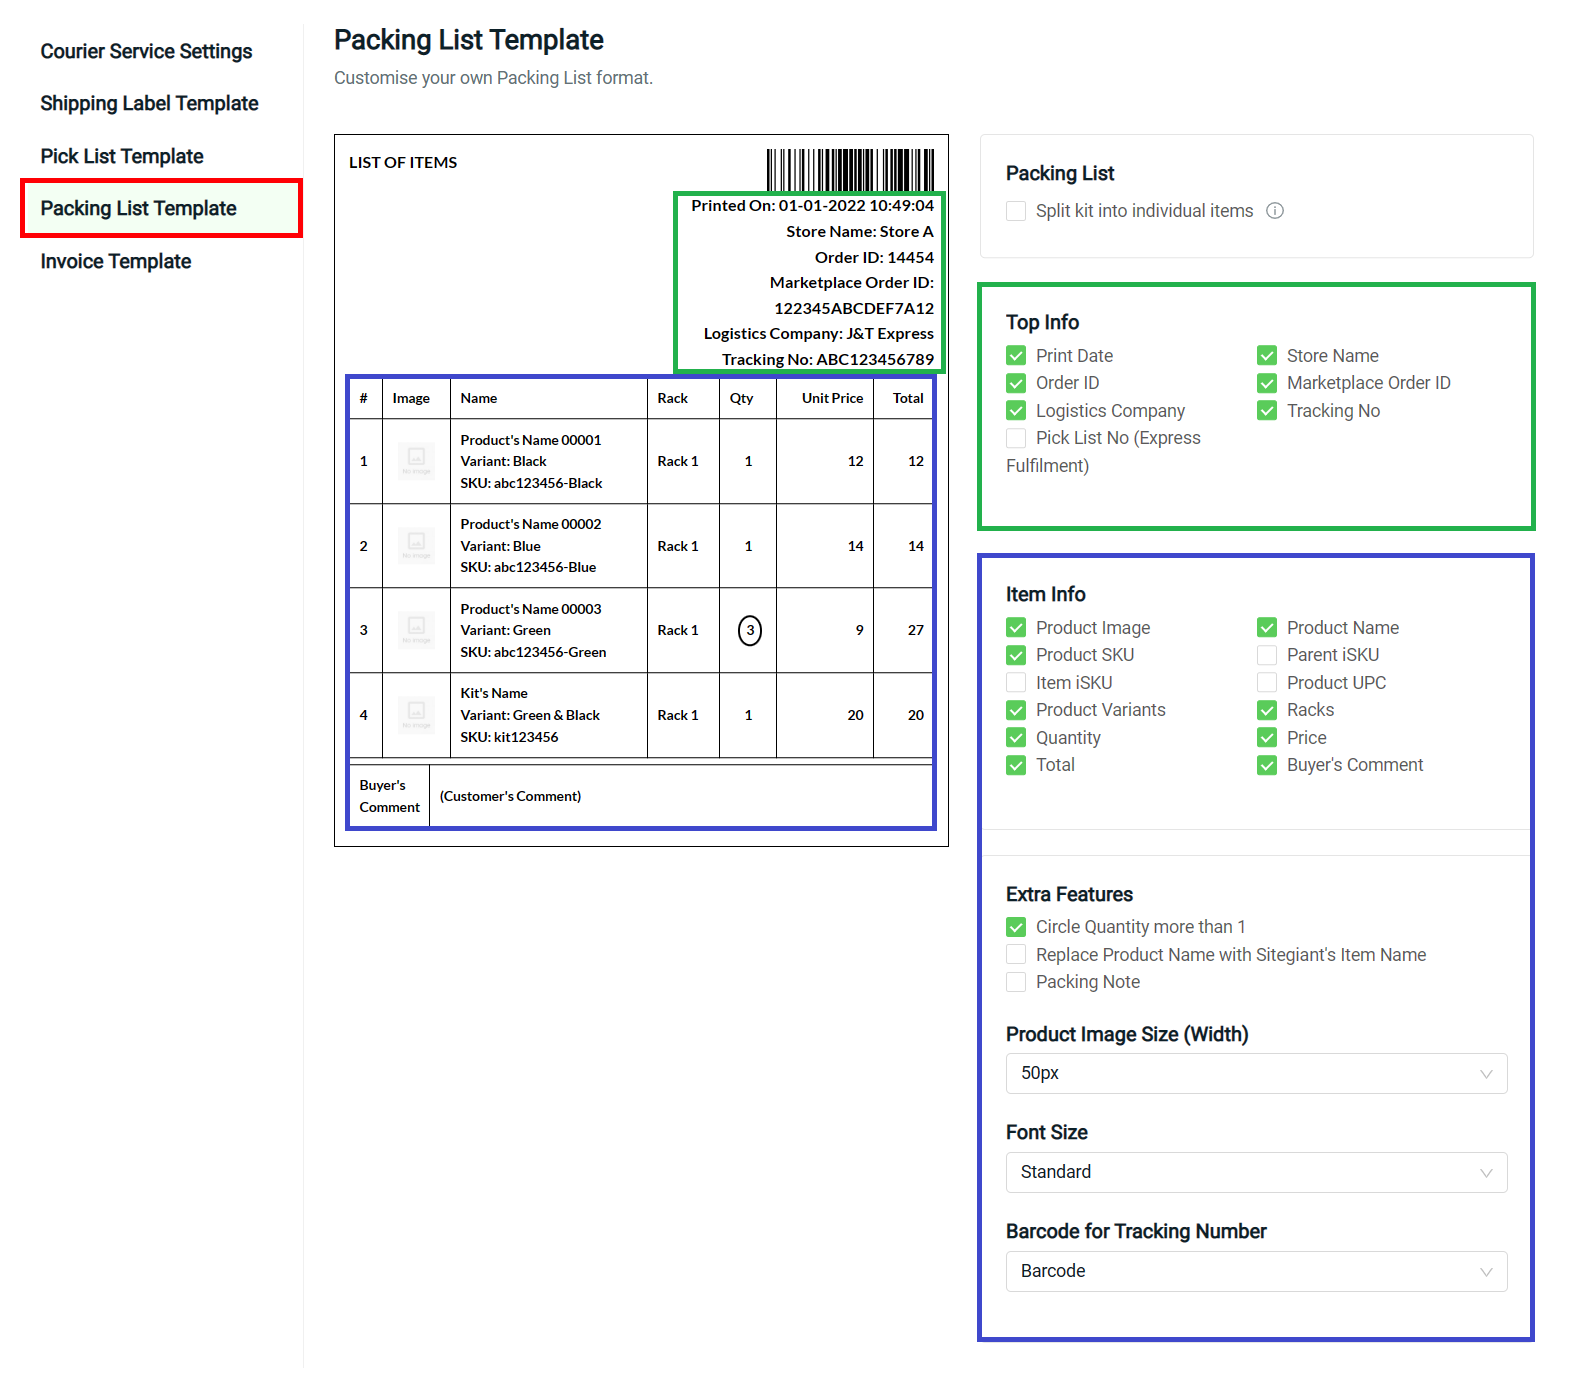
Step 1: Go to Packing List Template > customize the info you wish to show in the Packing List
7. Invoice Template
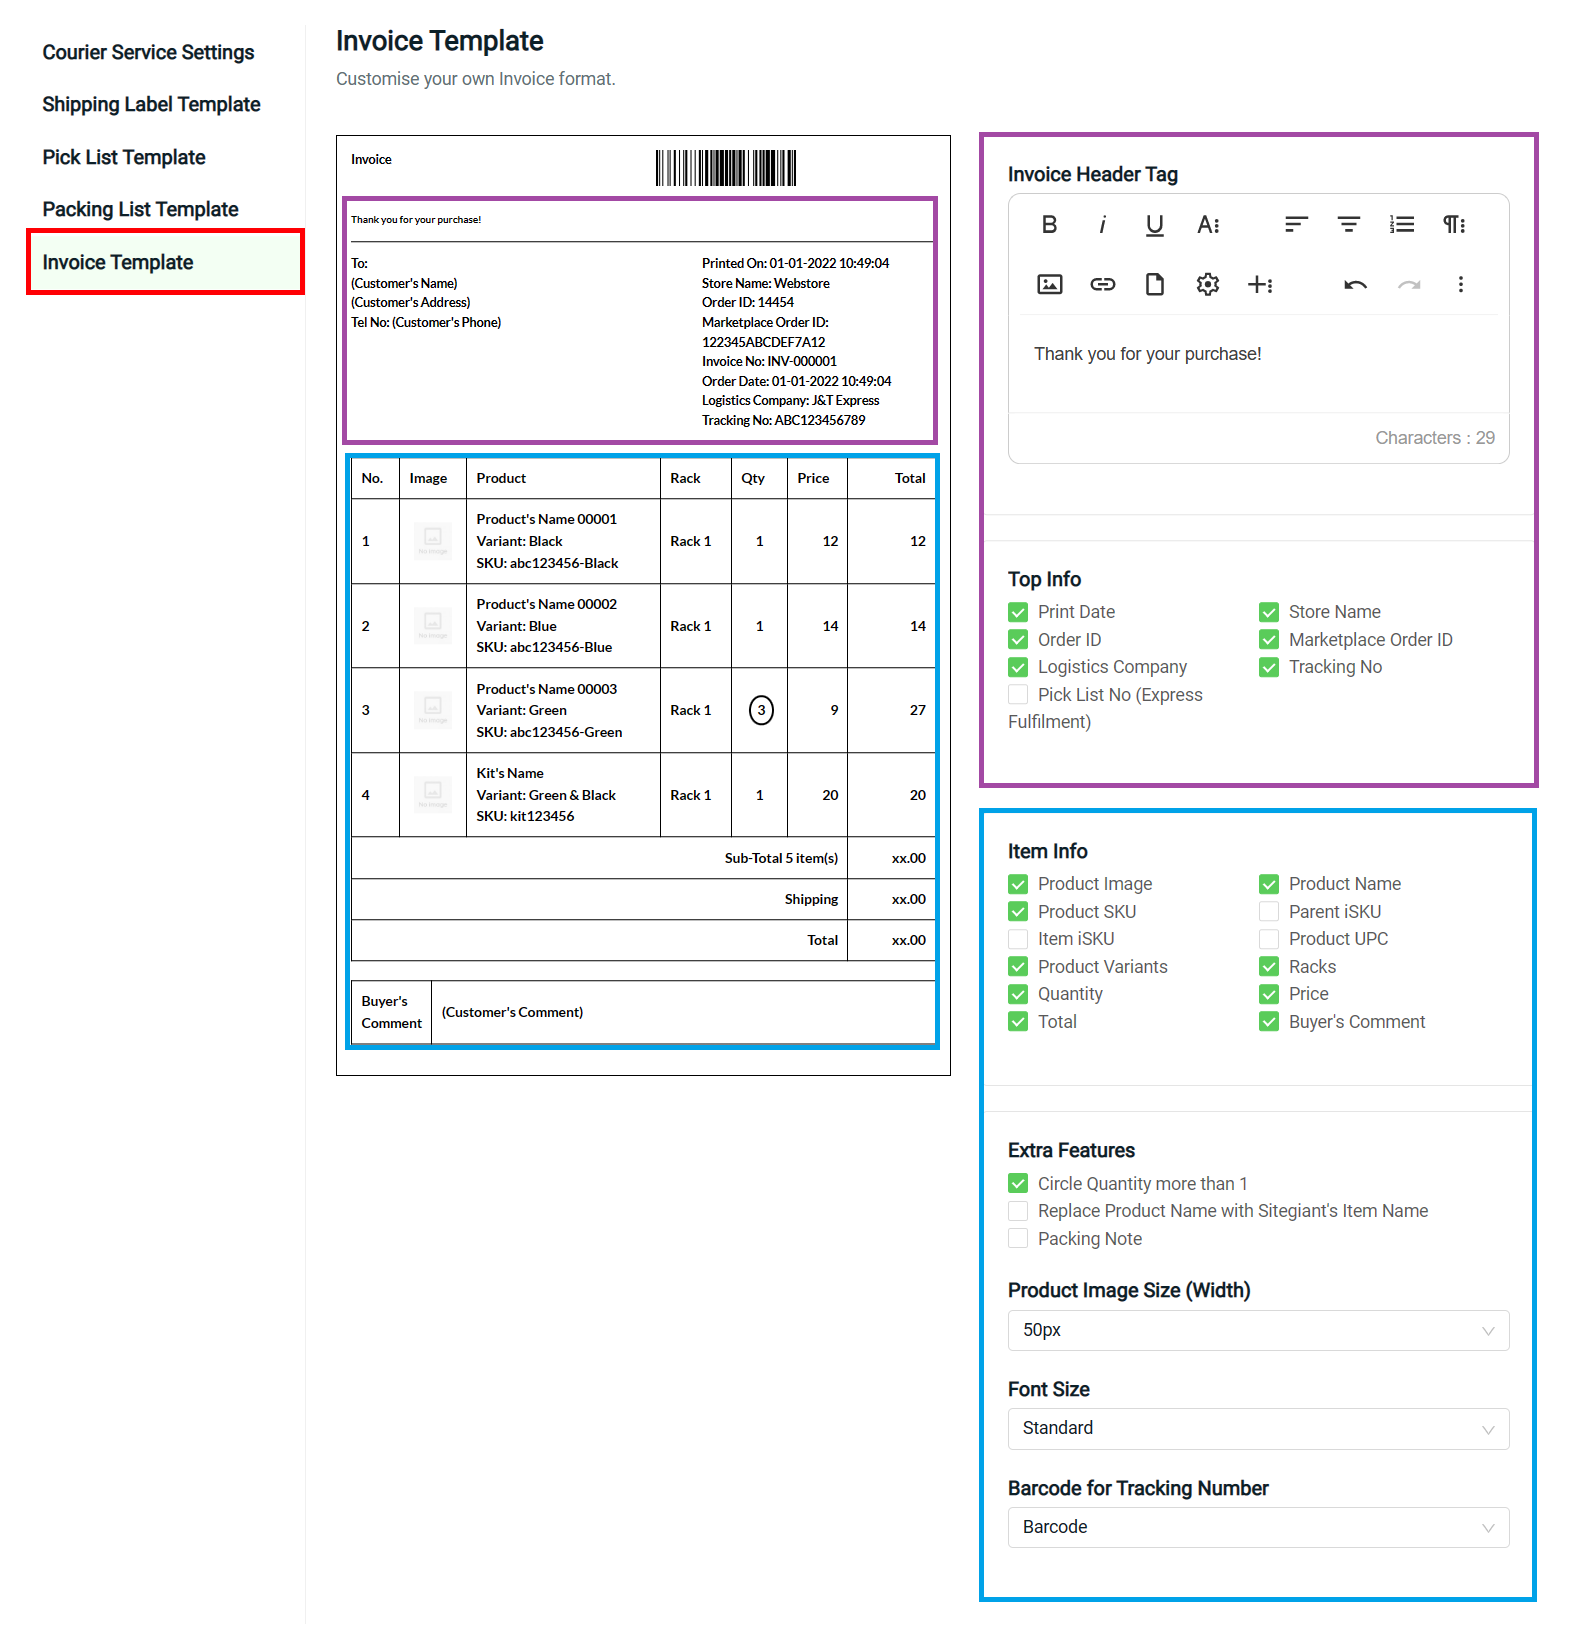
Step 1: Go to Invoice Template > customize the info that you wish to show in the Invoice
Once done with all Shipping Label Settings, click on the Save button on the top right to save changes.
