1. Introduction
2. Set Picking Zone For Item Rack
3. Analyse Picking Zone Report
1. Introduction
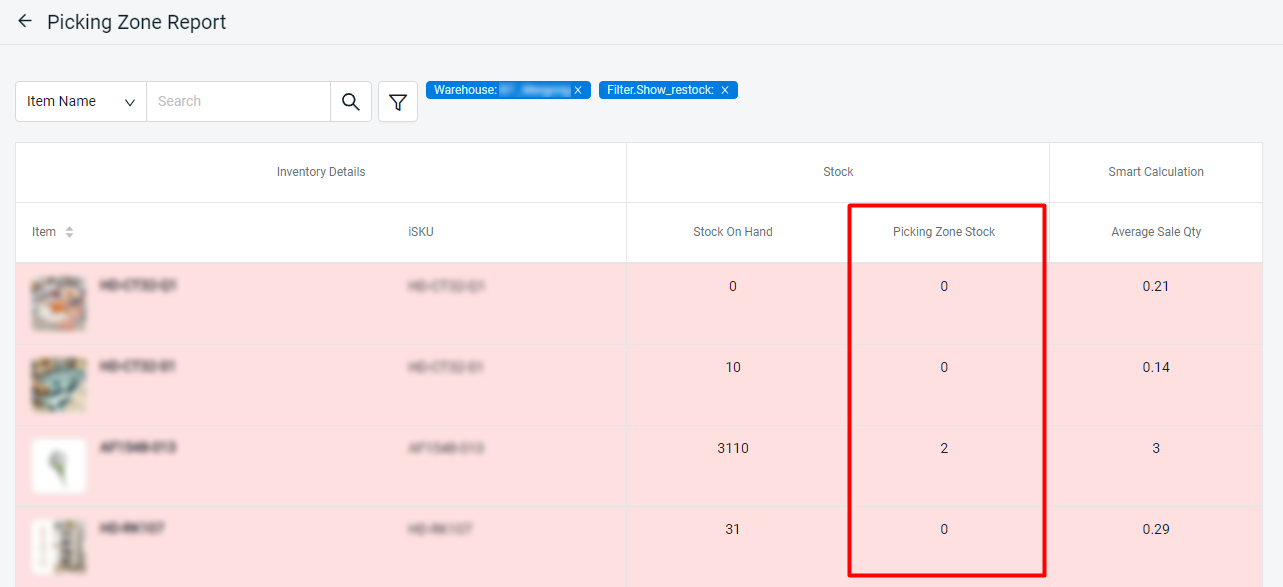
Picking Zone Report is a smart monitoring feature of your picking zone stock levels and you can filter out the item that needs to restock based on daily sales. This report is suitable for those items allocated in multiple locations in a warehouse.
2. Set Picking Zone For Item Rack
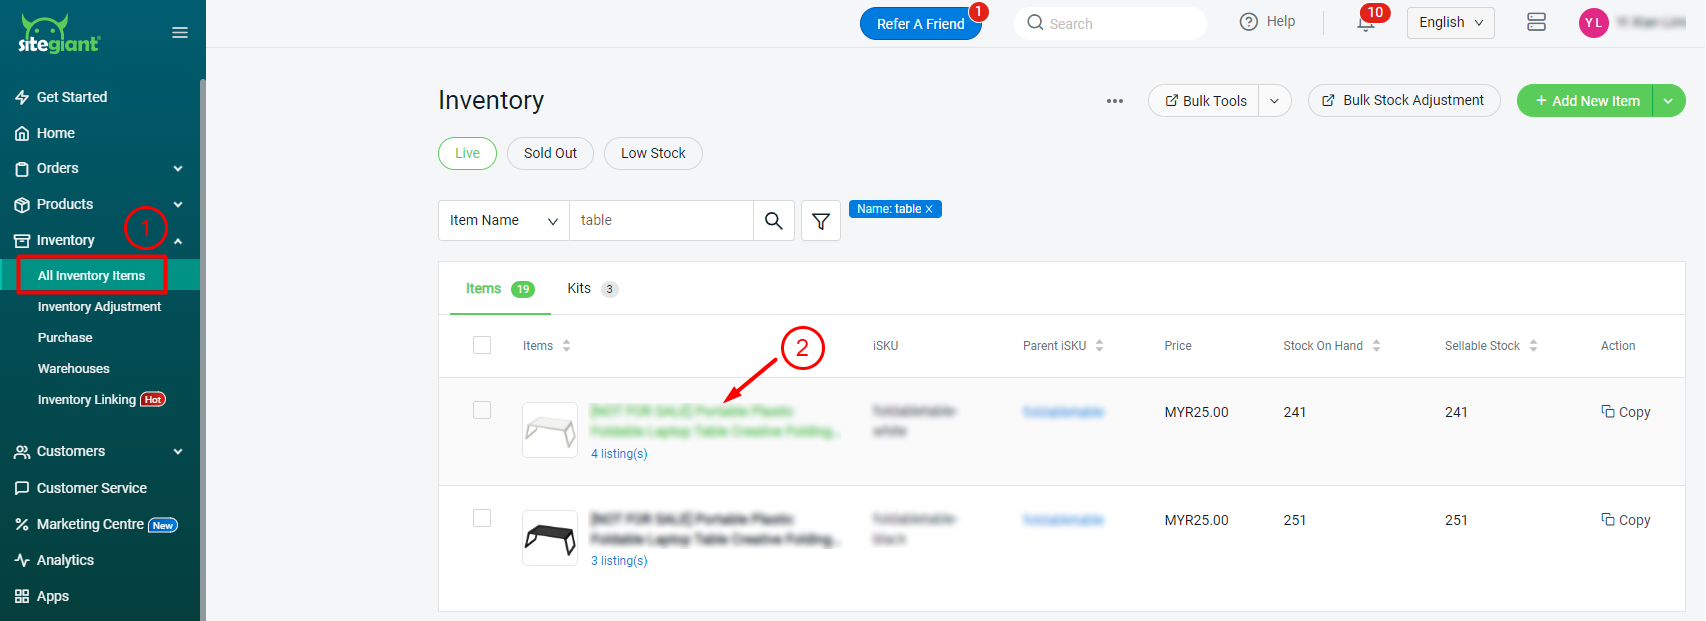
Step 1: Go to Inventory > All Inventory Items > Edit Item.
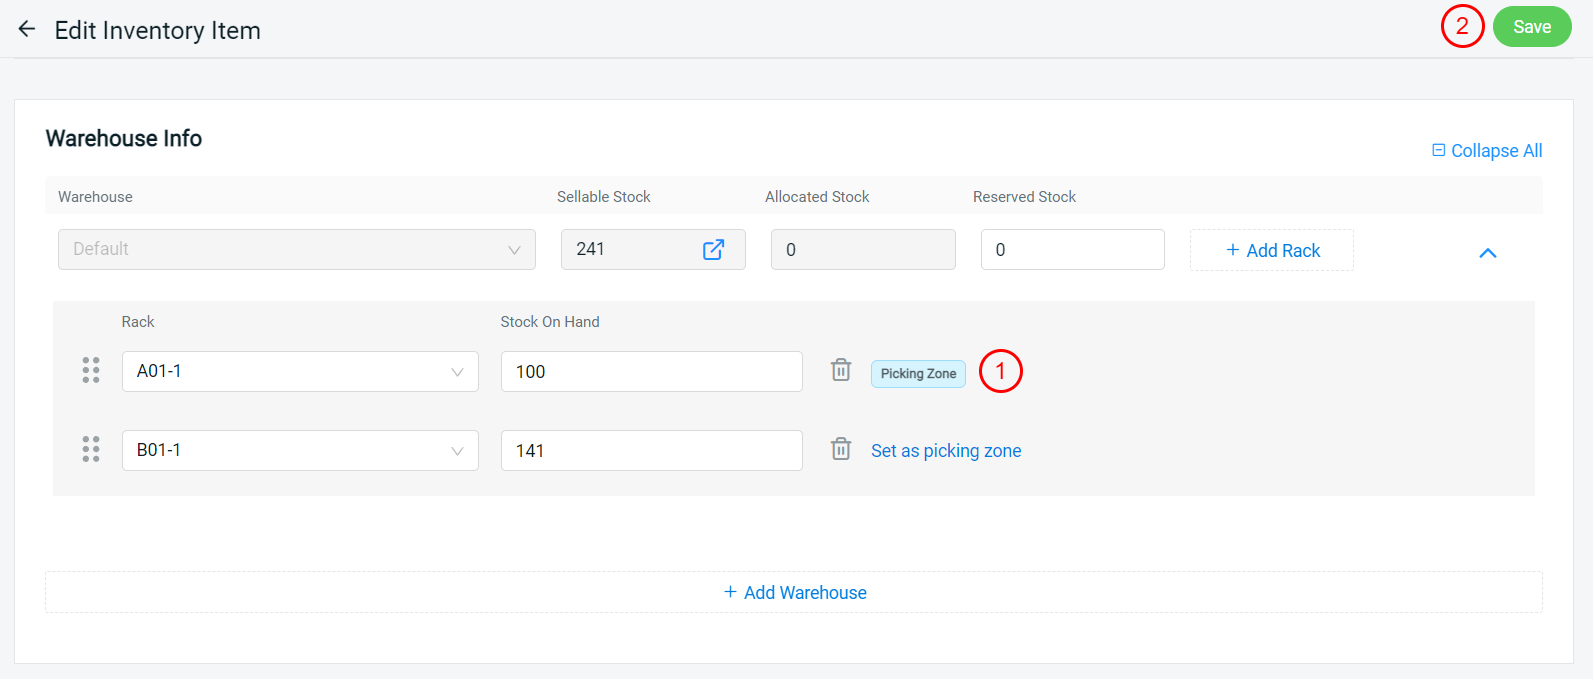
Step 2: Set as Picking Zone for the rack > Save.
?Tips: You can bulk set the picking zone for the item rack via Excel. Learn more on How To Bulk Assign Item To Rack With Excel (Batch Edit).
3. Analyse Picking Zone Report
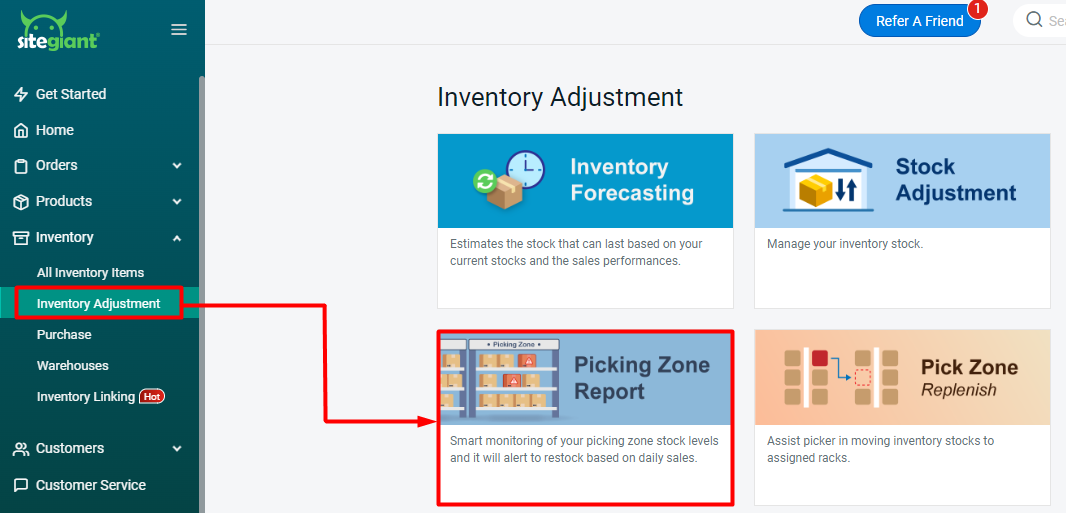
Step 1: Navigate to Inventory > Inventory Adjustment > Picking Zone Report.
Step 2: Filter > ‘Tick’ Show Items need to restock > Apply.
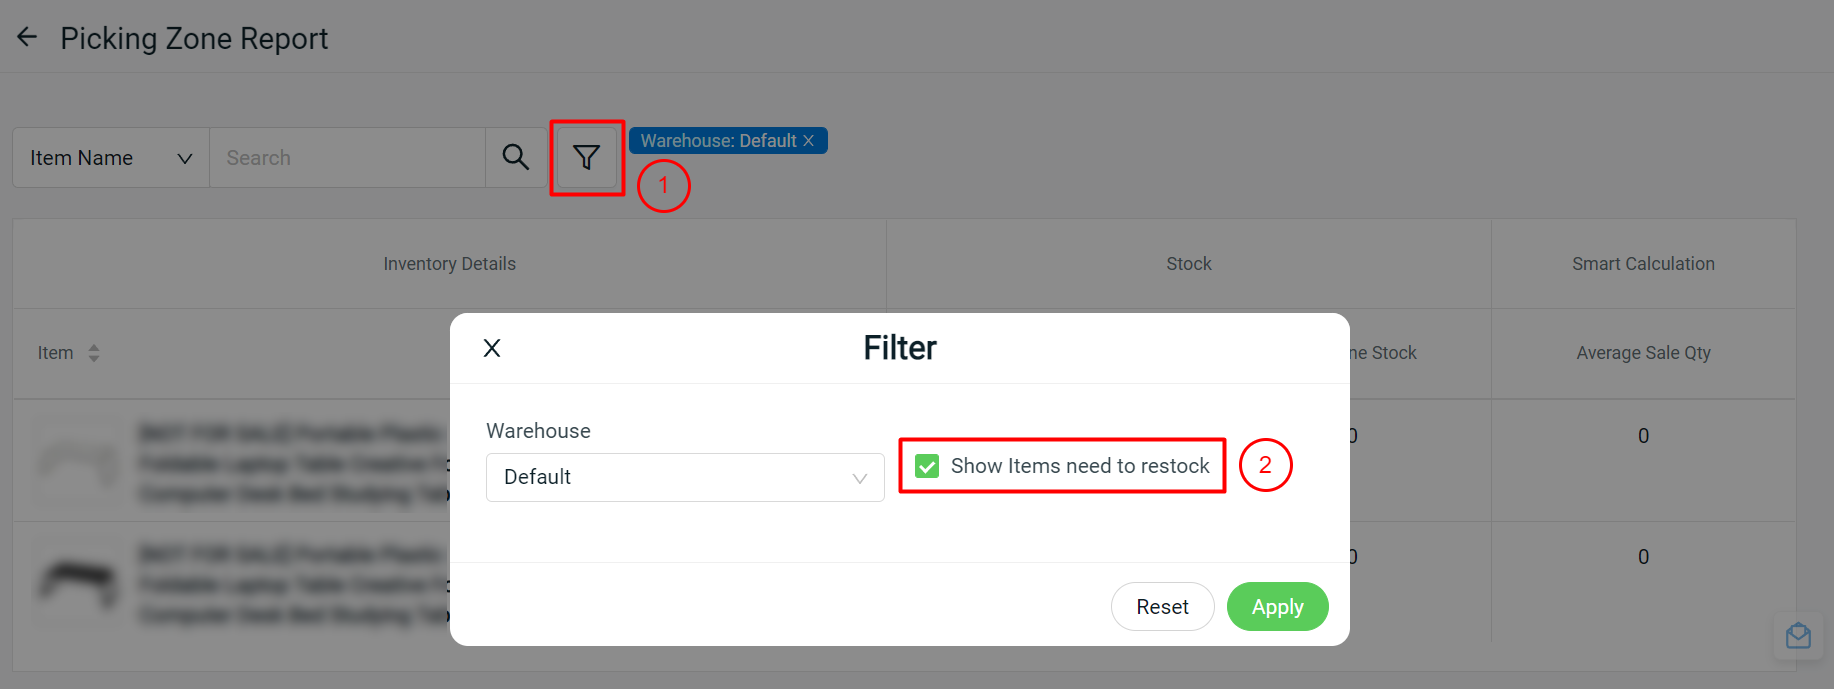
Step 3: Refer to the Picking Zone Stock and perform stock replenishment.
