1. Introduction
2. Add Social Media
1. Introduction
Social Media allows you to have more interactions with your visitors by allowing them to follow your Facebook, Instagram, and TikTok accounts and subscribe to your YouTube channel.
2. Add Social Media
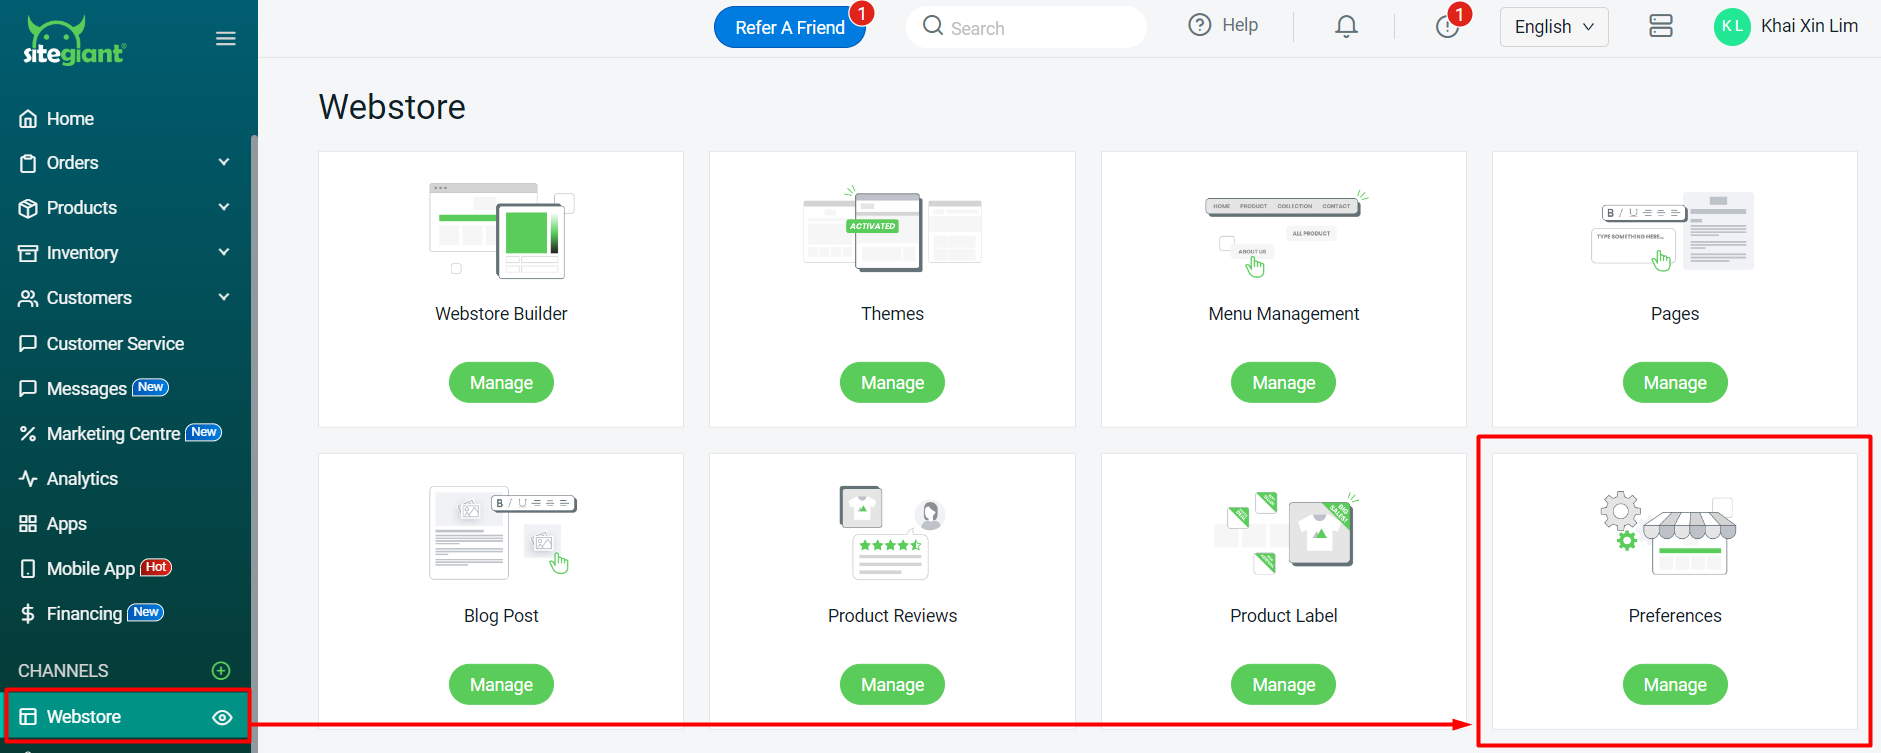
Step 1: Navigate to Webstore channels on the sidebar menu > Preferences.
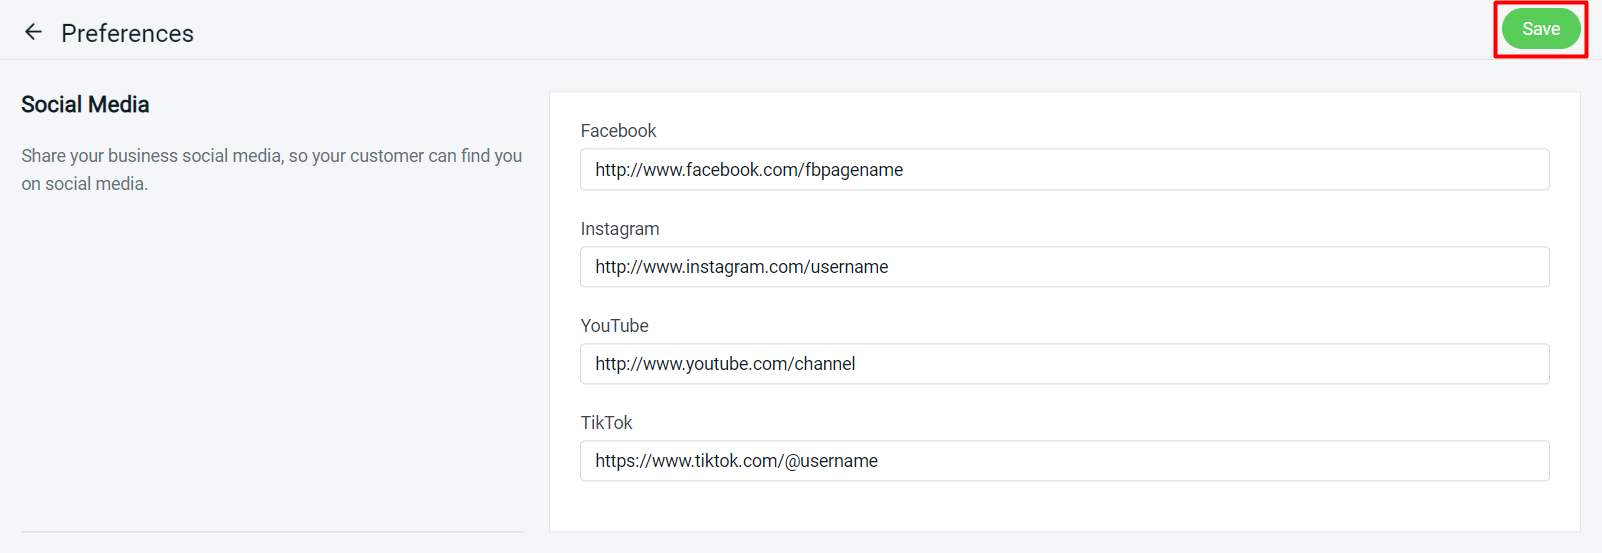
Step 2: Scroll down to the Social Media section, insert the URL to its relative fields > Save.
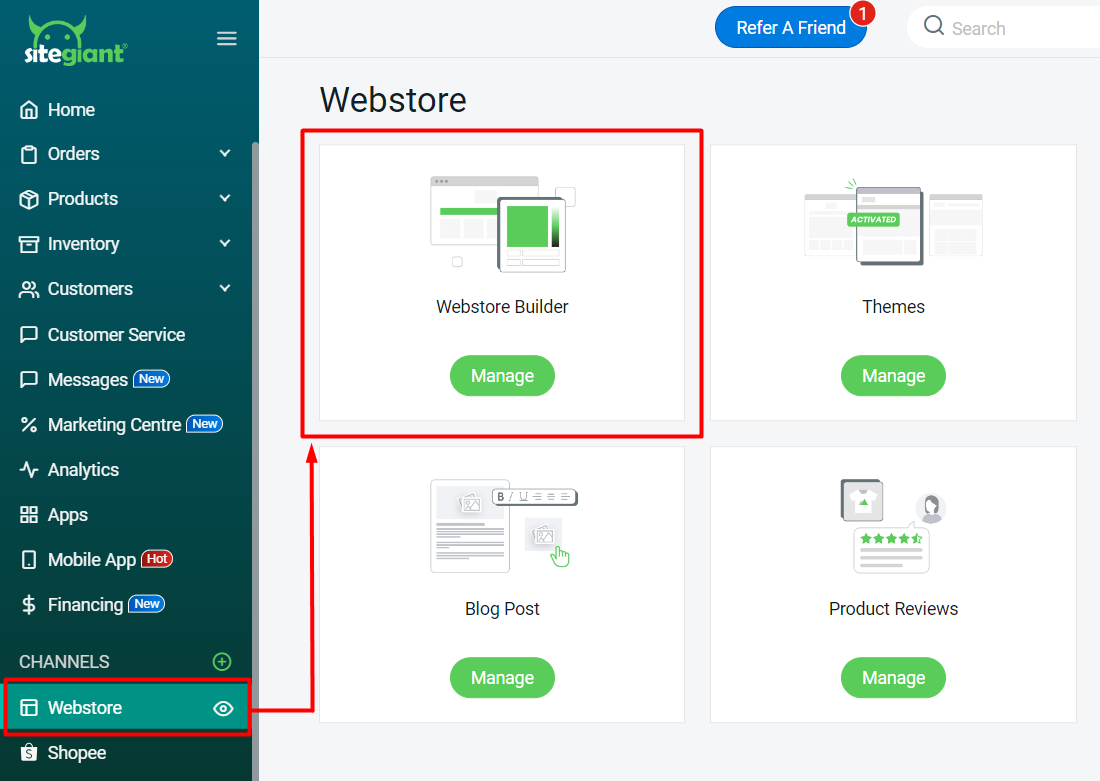
Step 3: Back to the Webstore channels page> go to Webstore Builder.
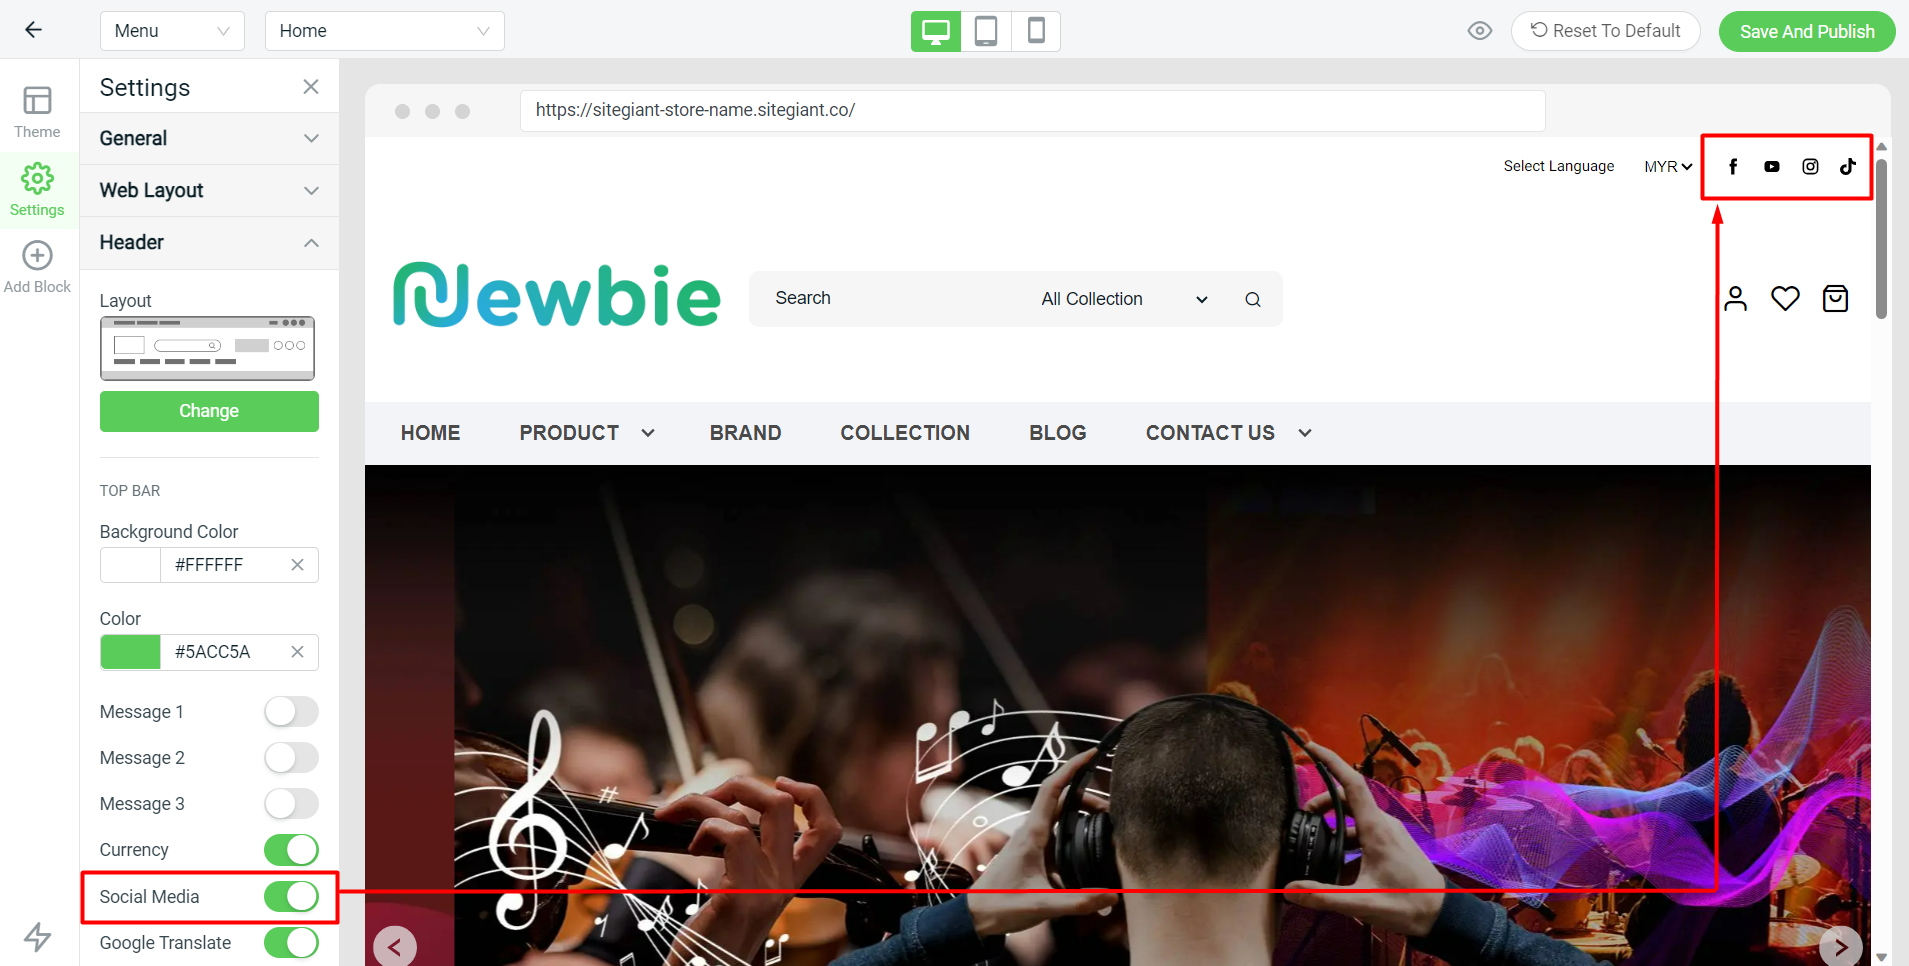
Step 4: If you wish to show the Social Media on the Header, you may choose Header Layout 6 or Layout 7.
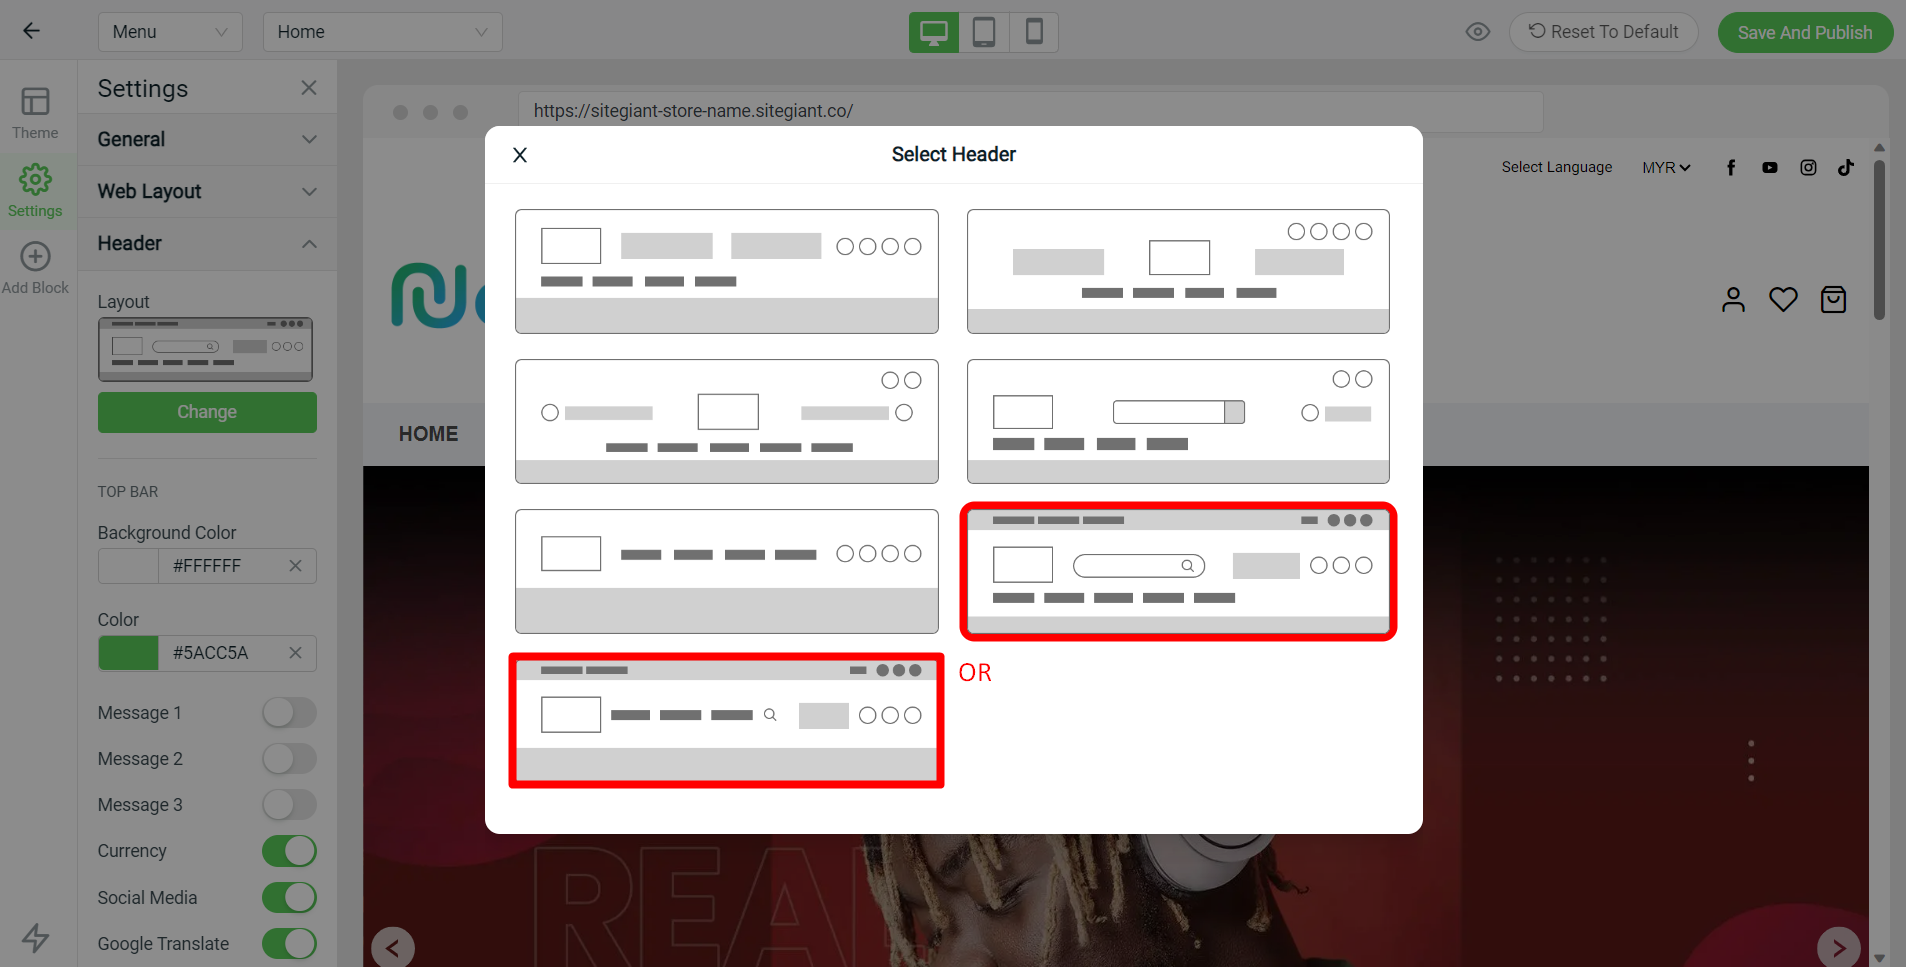
Step 5: Make sure the Social Media status is enabled in Header Settings.
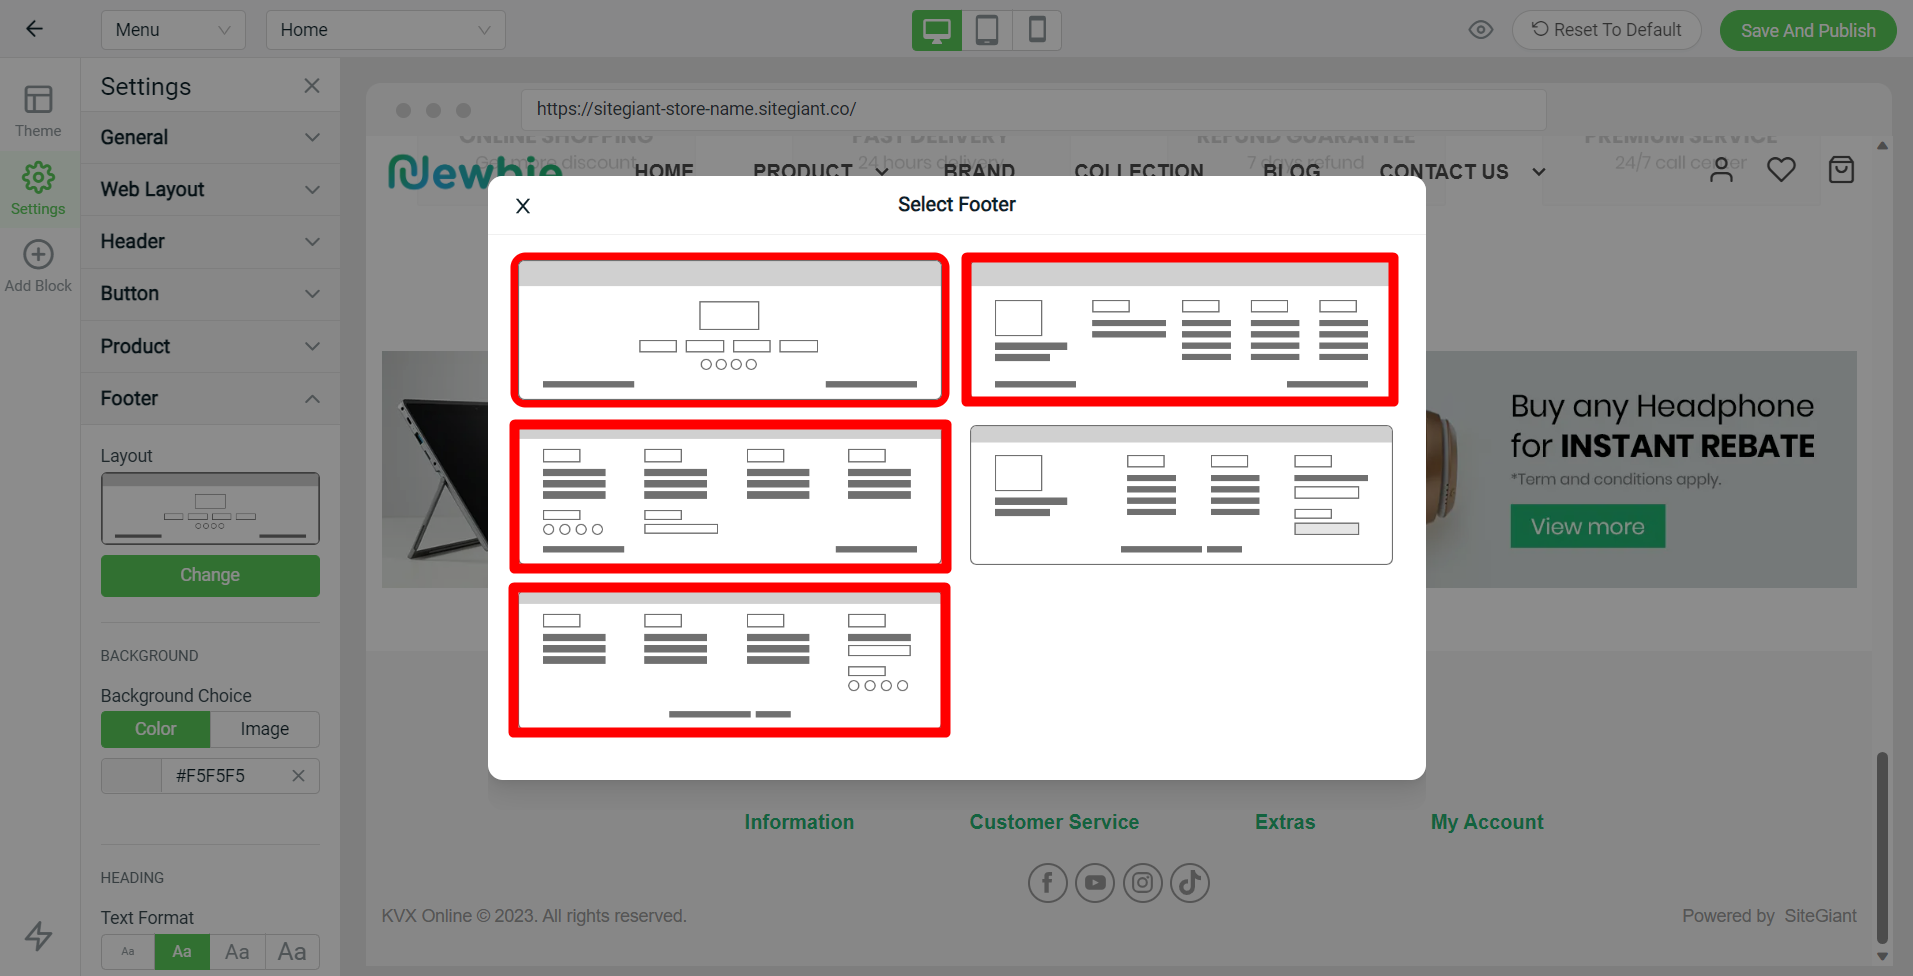
Step 6: If you wish to show the Social Media on the Footer, you may choose Footer Layout 1, Layout 2, Layout 3 or Layout 5.
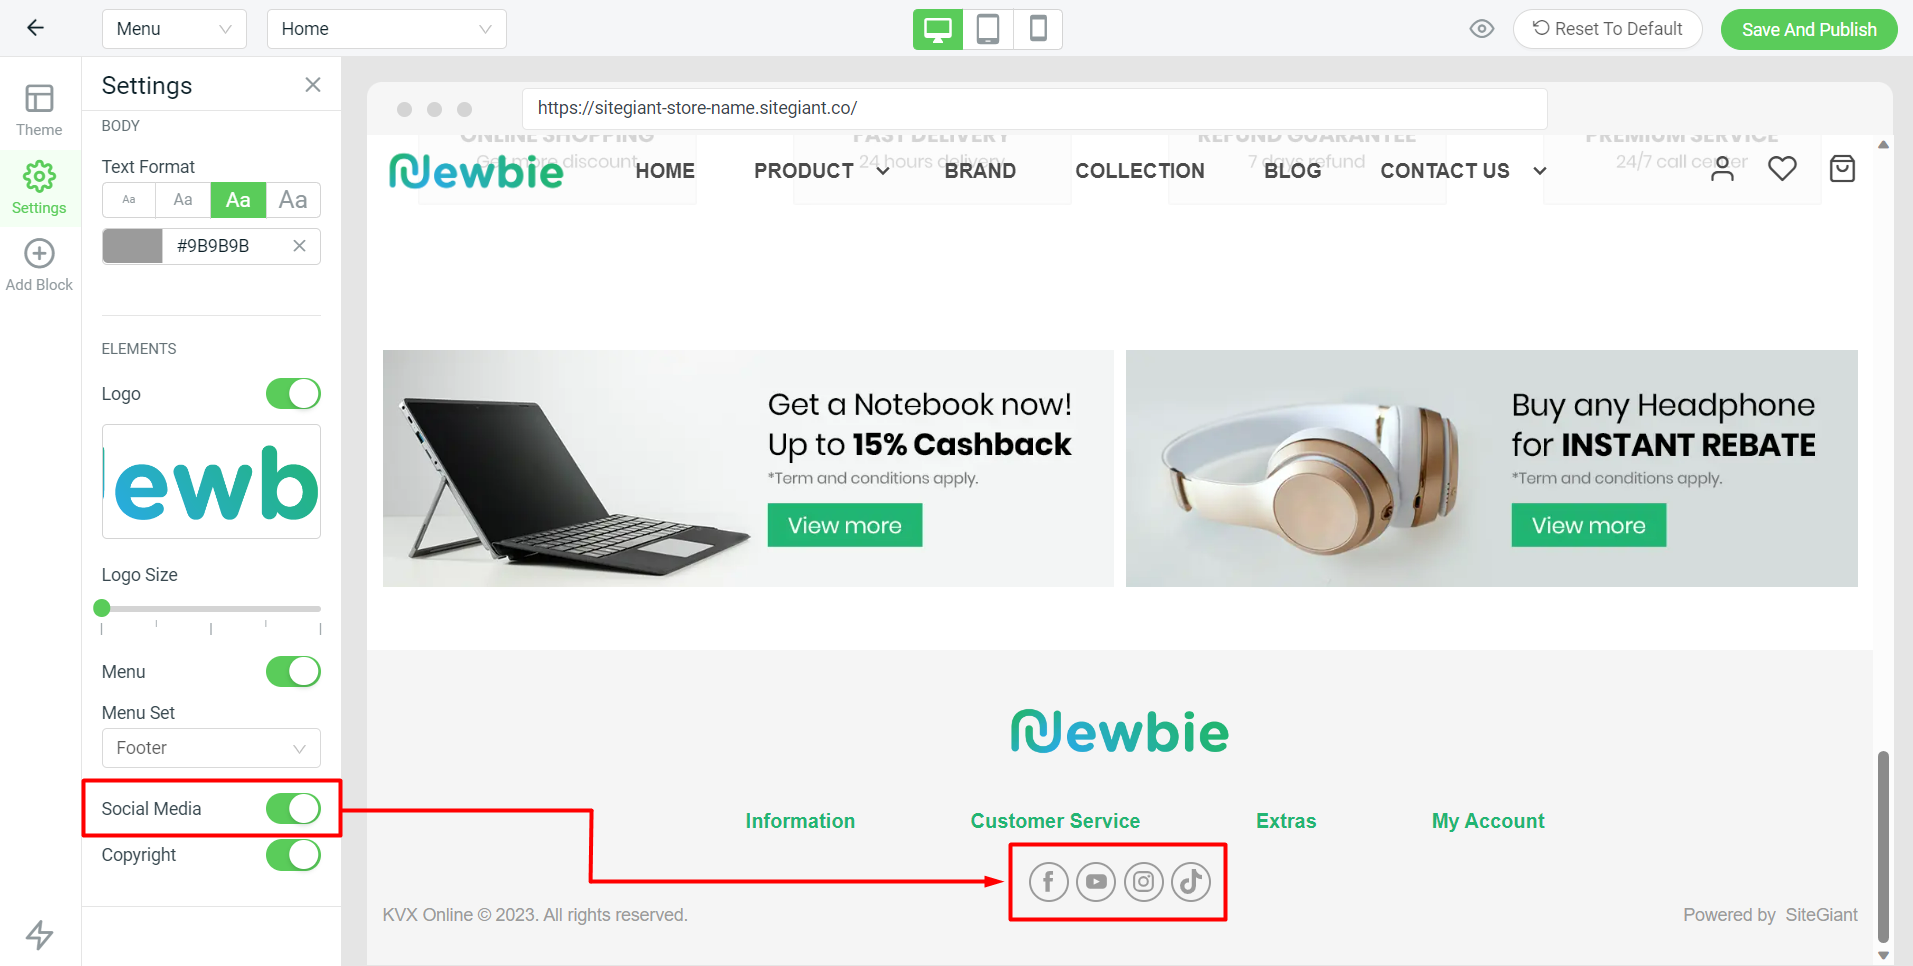
Step 7: Make sure the Social Media status is enabled in Footer Settings.
Step 8: Once it is done, click on the Save And Publish button on the top right.
