1. Introduction
2. Add Product Property
3. Input Type: Text
4. Input Type: Dropdown
5. Input Type: Radio
6. Input Type: Checkbox
7. Input Type: Attachment
1. Introduction

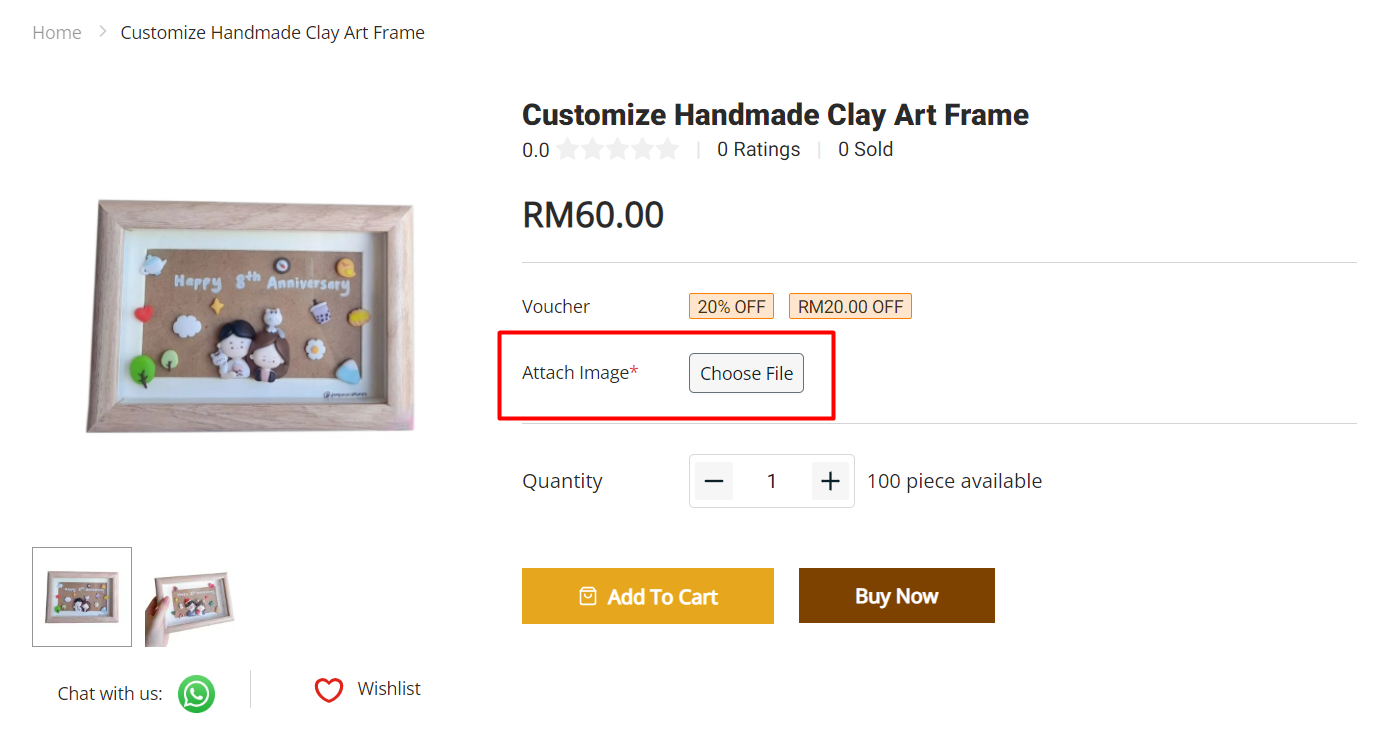
Some sellers provide customised services and products, enabling customers to fill in their requirements while purchasing them. You can create custom input fields like Text, Dropdown, Radio, Checkbox and Attachment. Then, you can gather customers’ information based on their input, and fulfil the order to their requirement.
2. Add Product Property
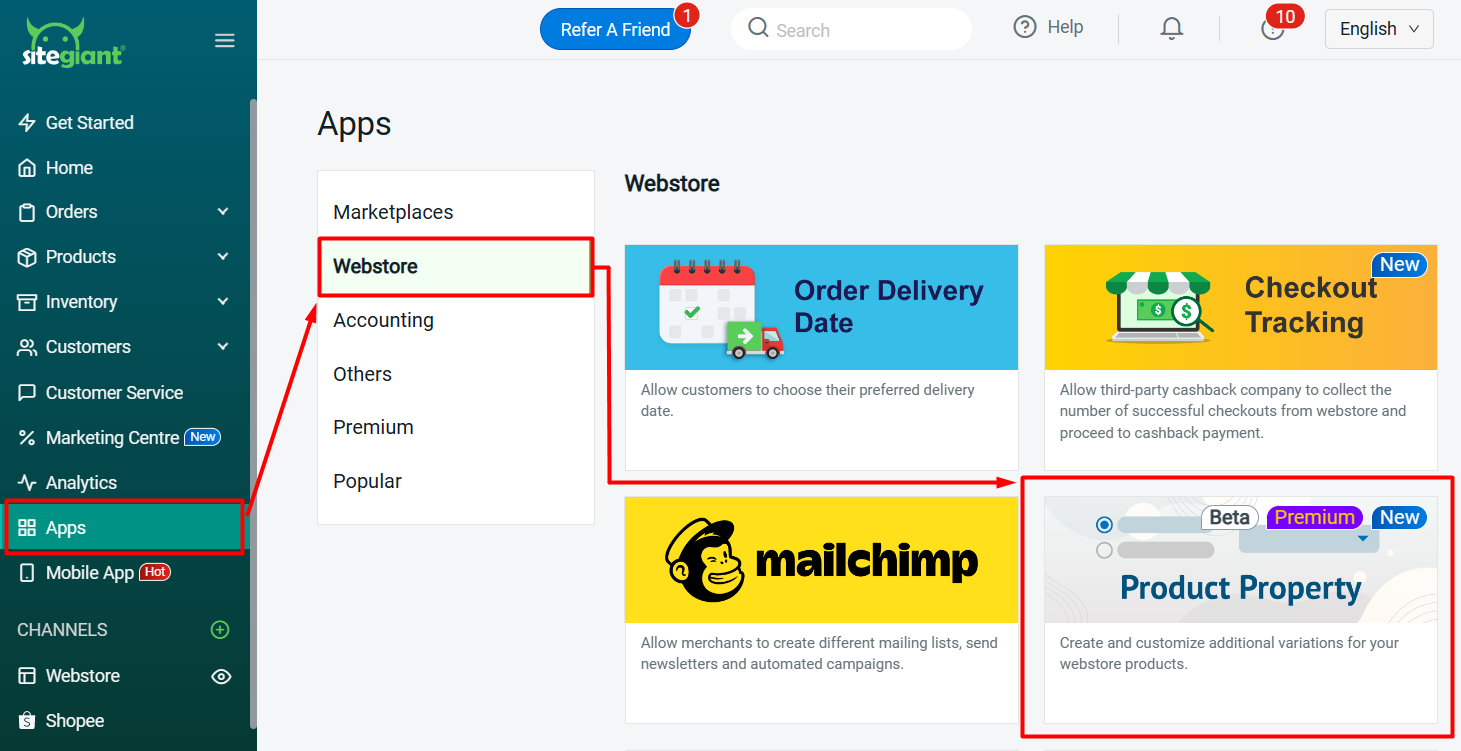
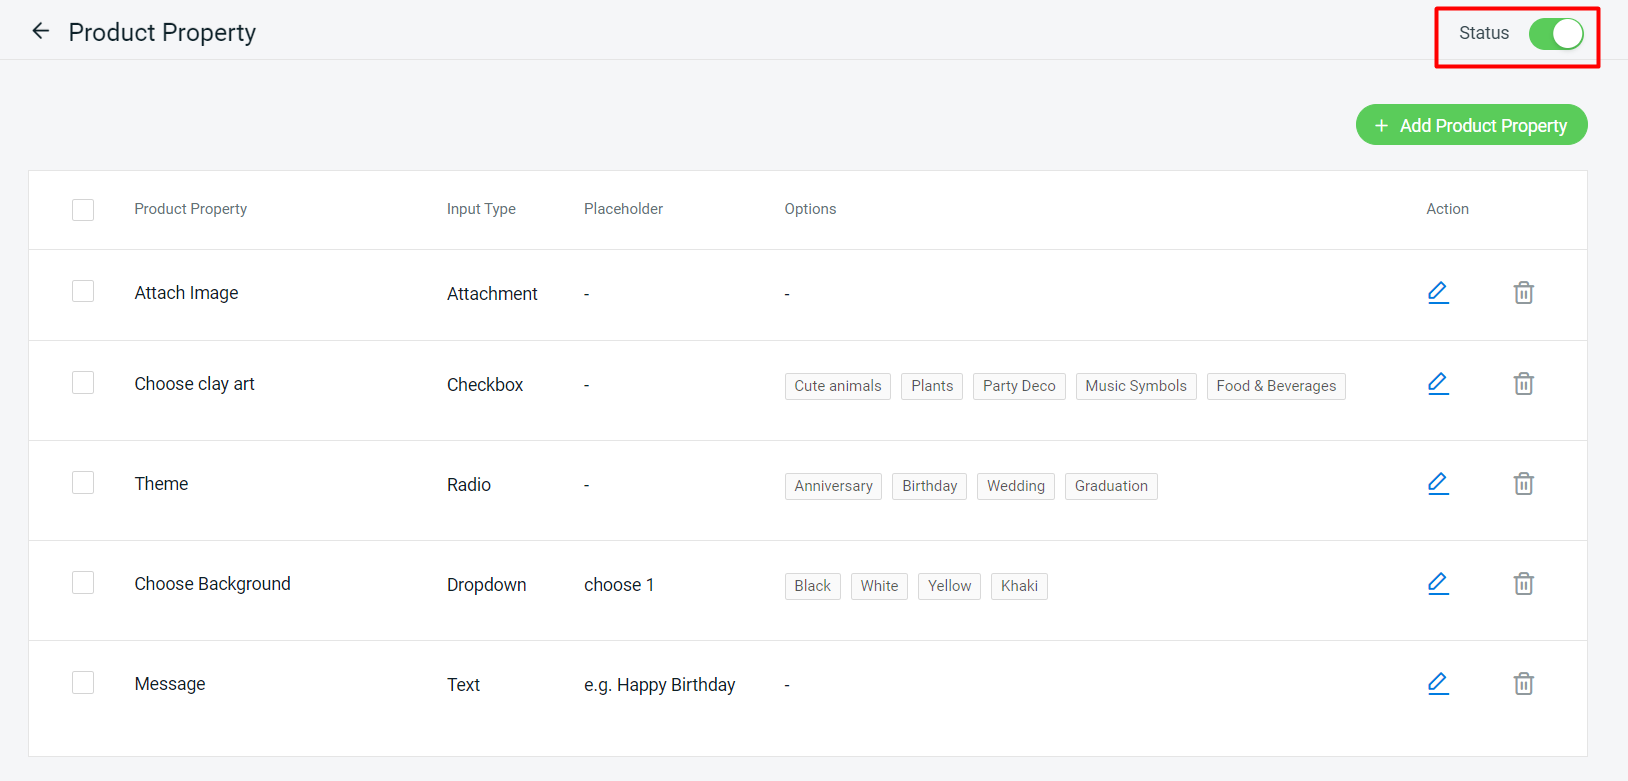
Step 1: Navigate to Apps > Webstore > Product Property.
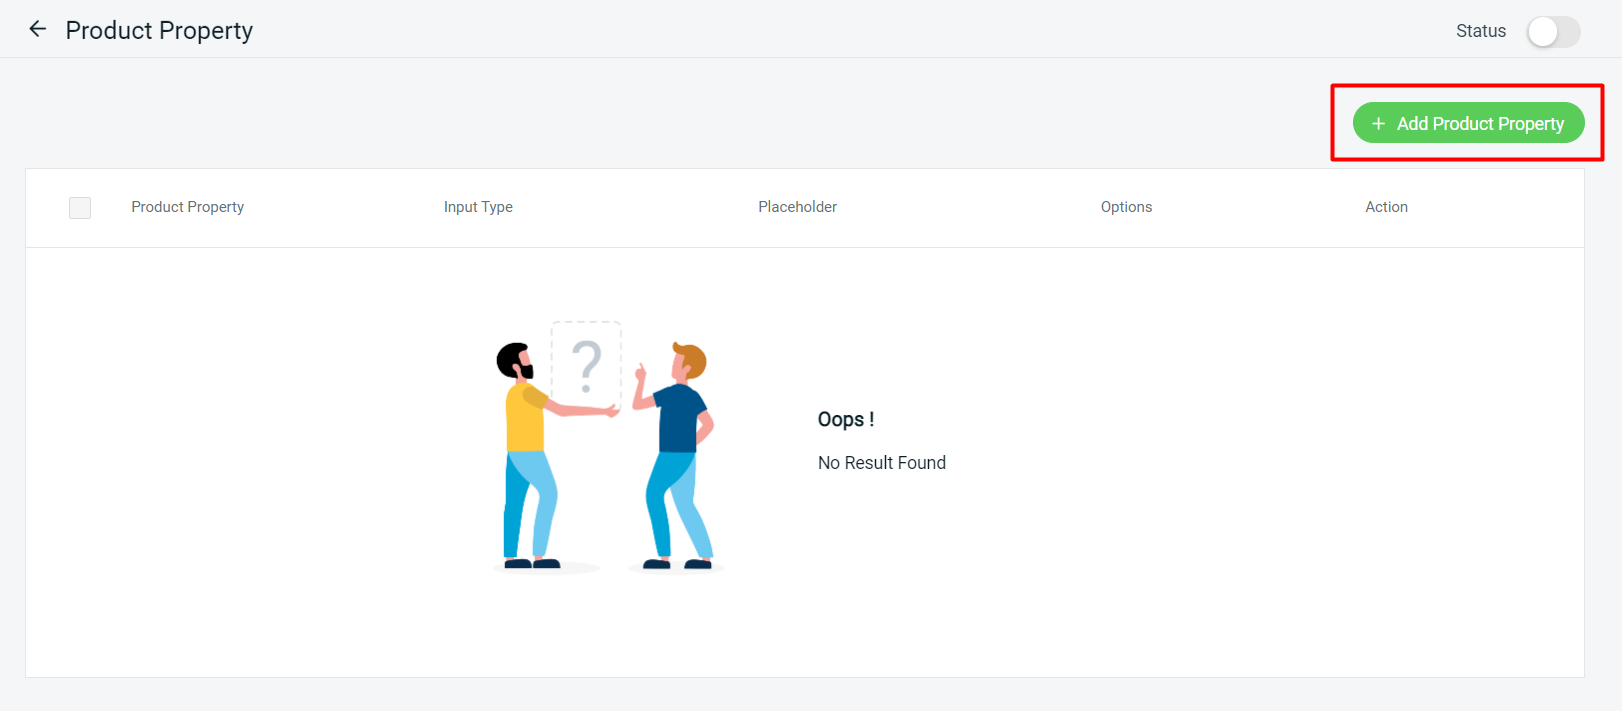
Step 2: Click on the + Add Product Property button.
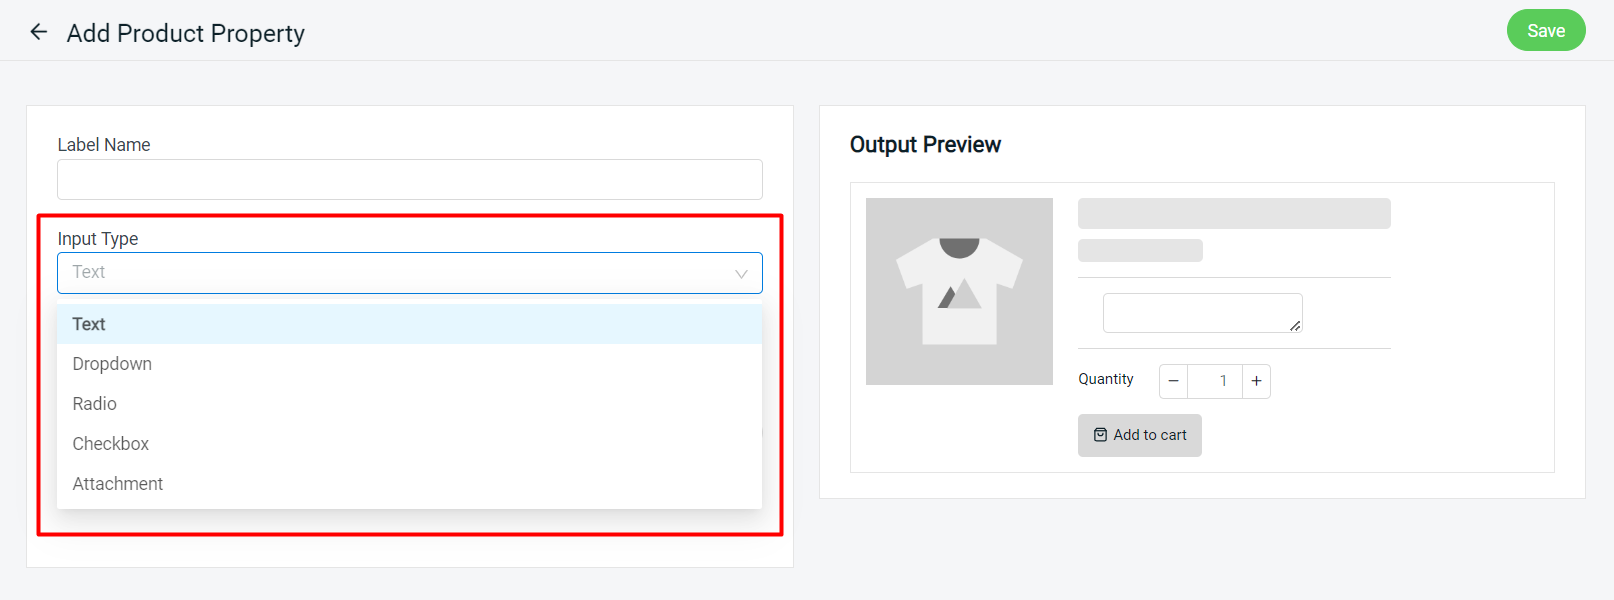
Step 3: Choose Input Type.
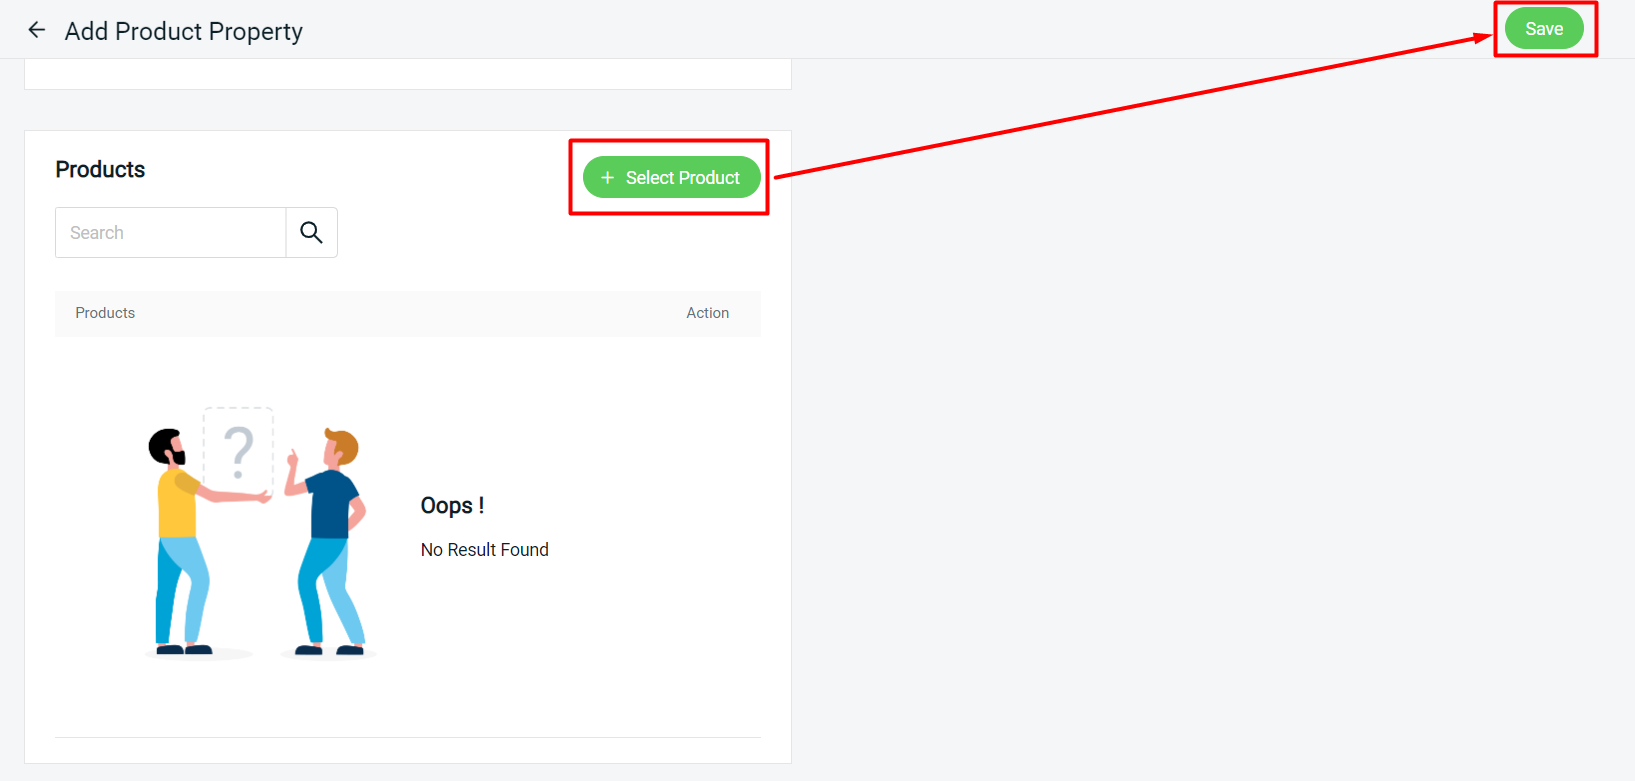
Step 4: Select the product you wish to add for this Input Type > Save.
Step 5: Make sure the Status is ON.
3. Input Type: Text
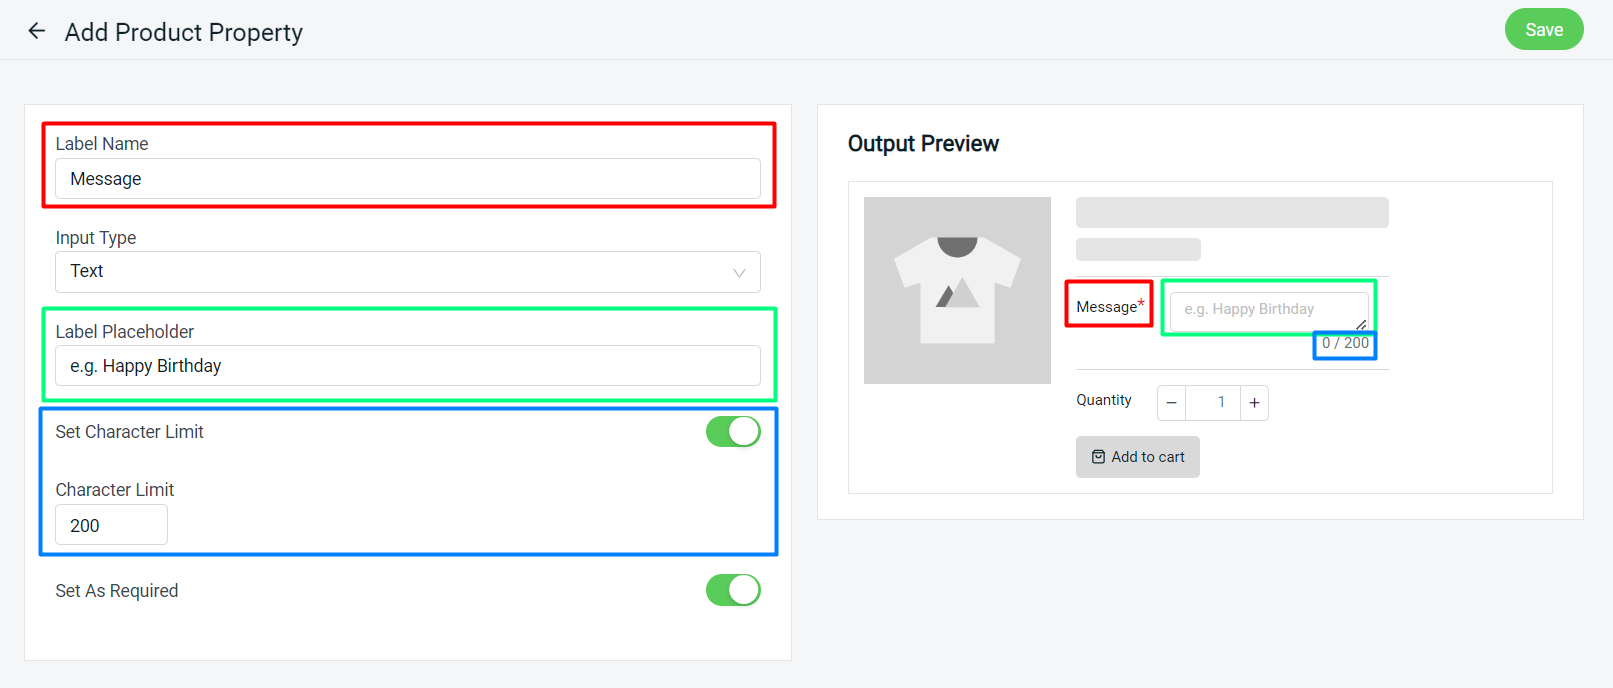
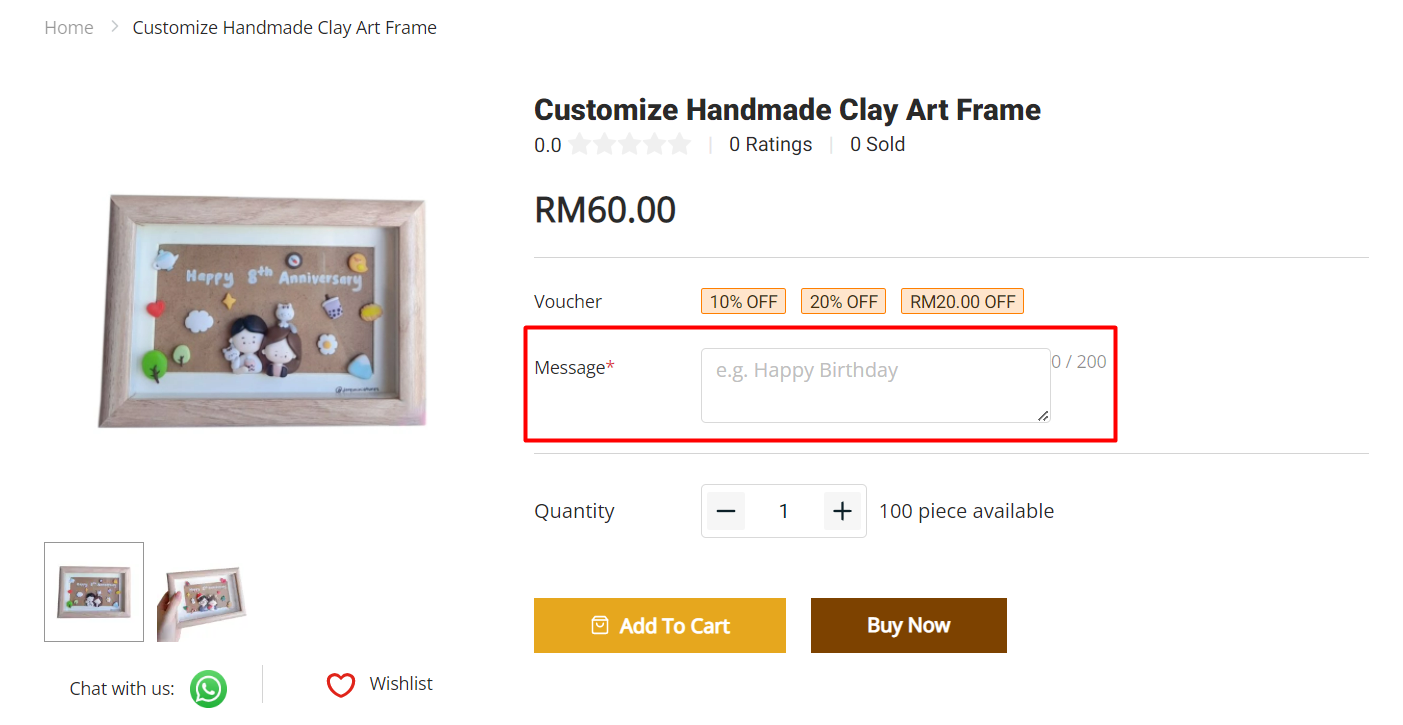
Text input type allows the customer to leave down their remarks or messages for the product.
Step 1: Fill in the Label Name and Label Placeholder > set Character Limit if you wish to have a limitation on the personalized content > set if it is a Required field for the customer to fill in.
Preview:
4. Input Type: Dropdown
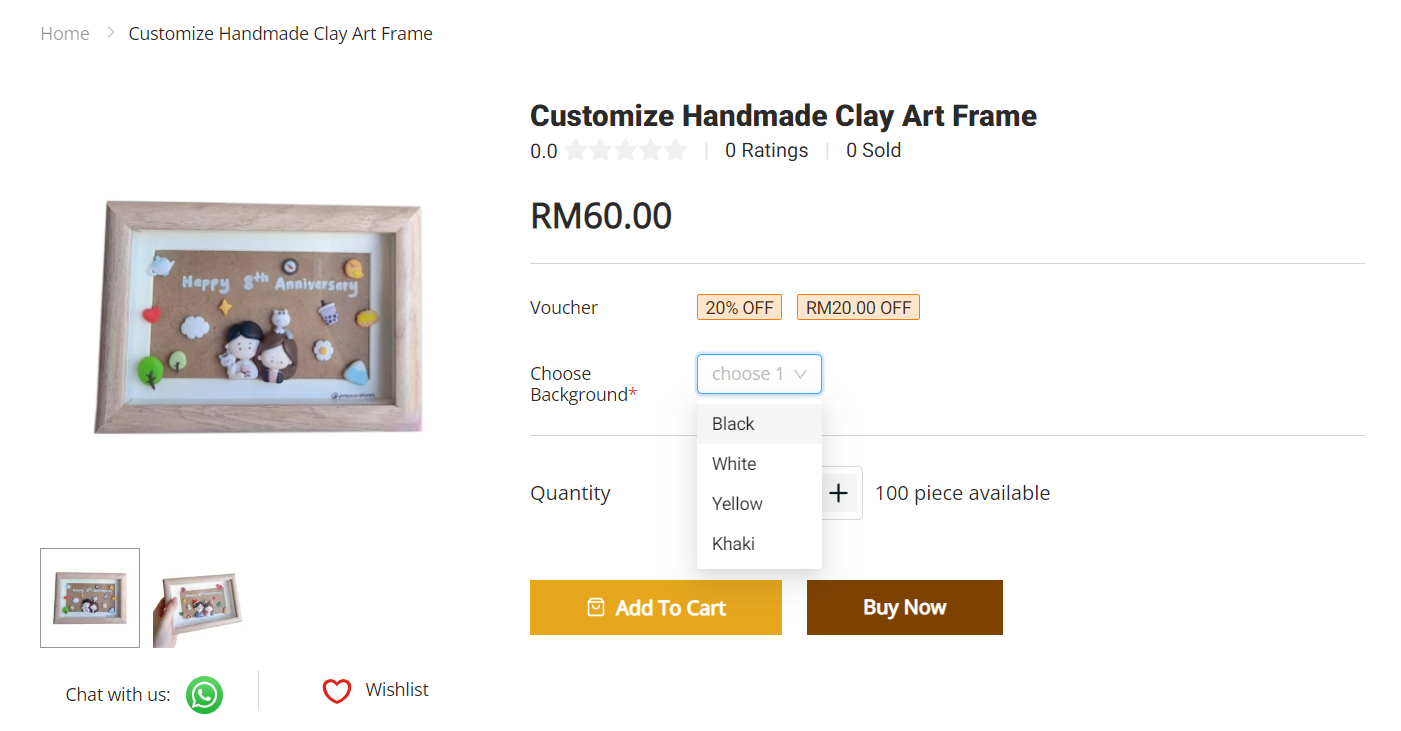
You can set options for customers to choose from by using the Dropdown input type.
Step 1: Fill in the Label Name and Label Placeholder > fill in the Option Values > set if it is a Required field for the customer to select.
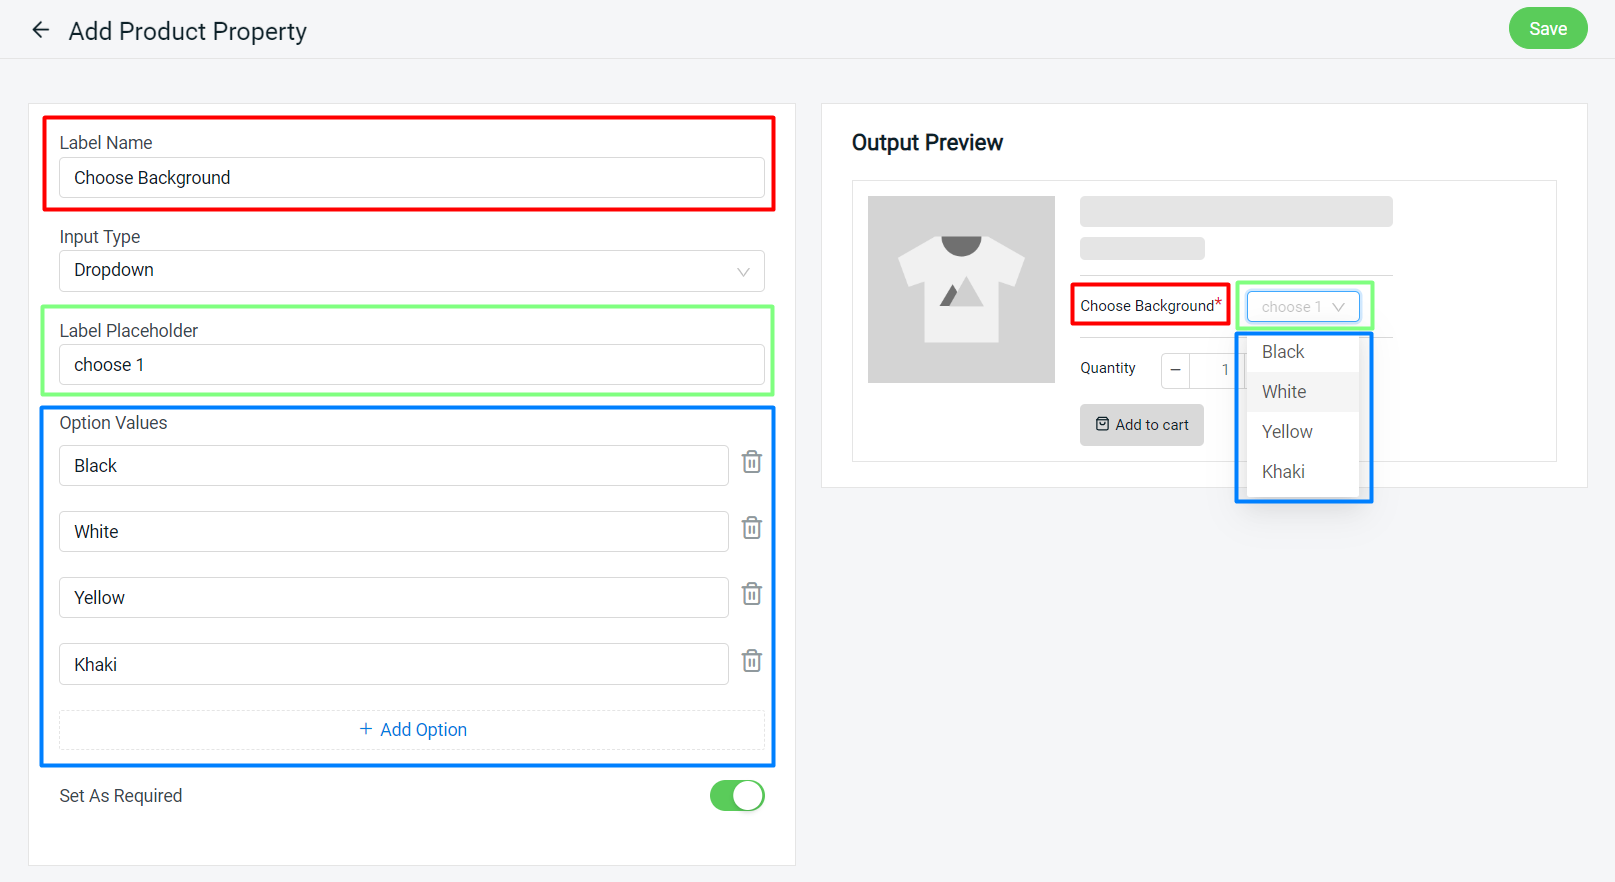
?Note: Customers can only select 1 option value for the Dropdown input type.
Preview:
5. Input Type: Radio
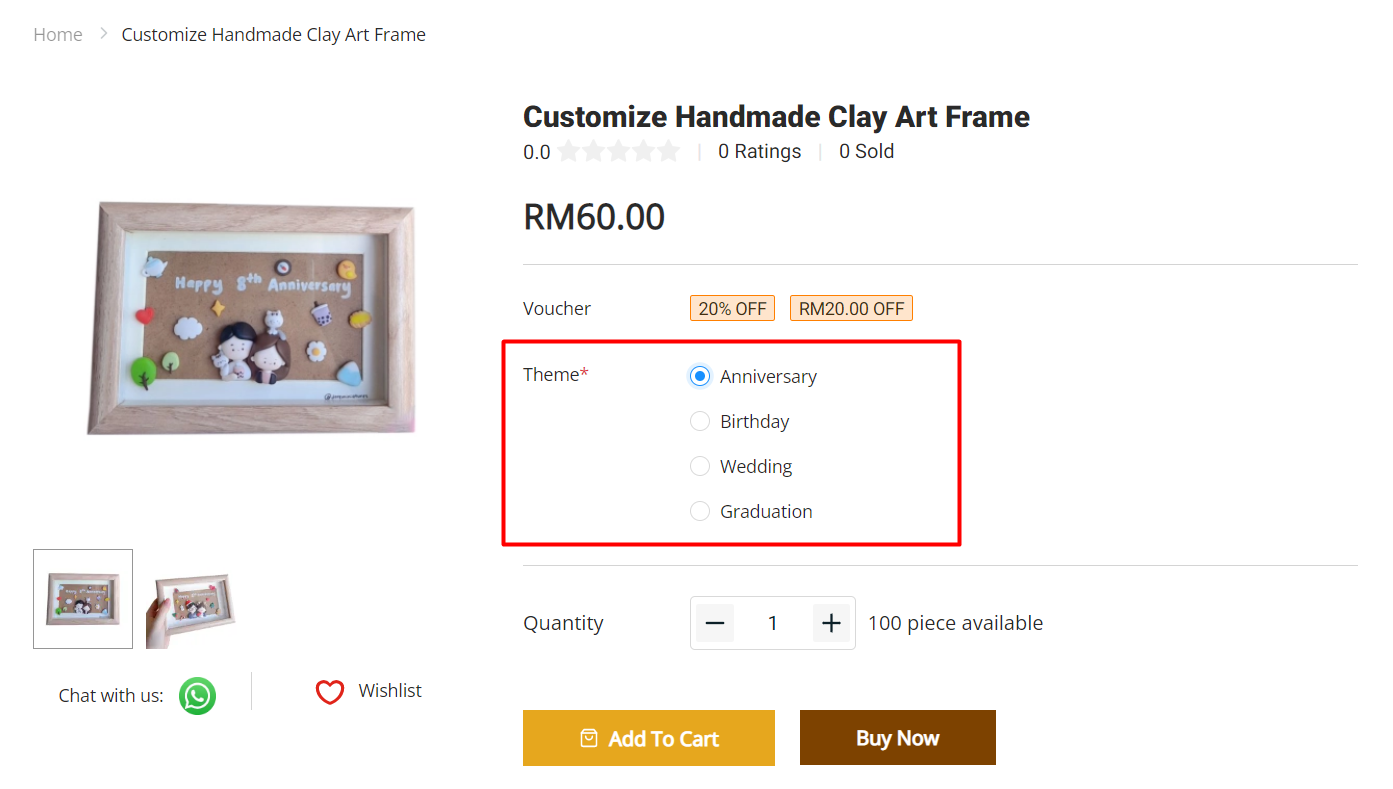
Radio input type can let your customers read all the options at a glance and choose.
Step 1: Fill in the Label Name > fill in the Option Values > set if it is a Required field for the customer to choose.
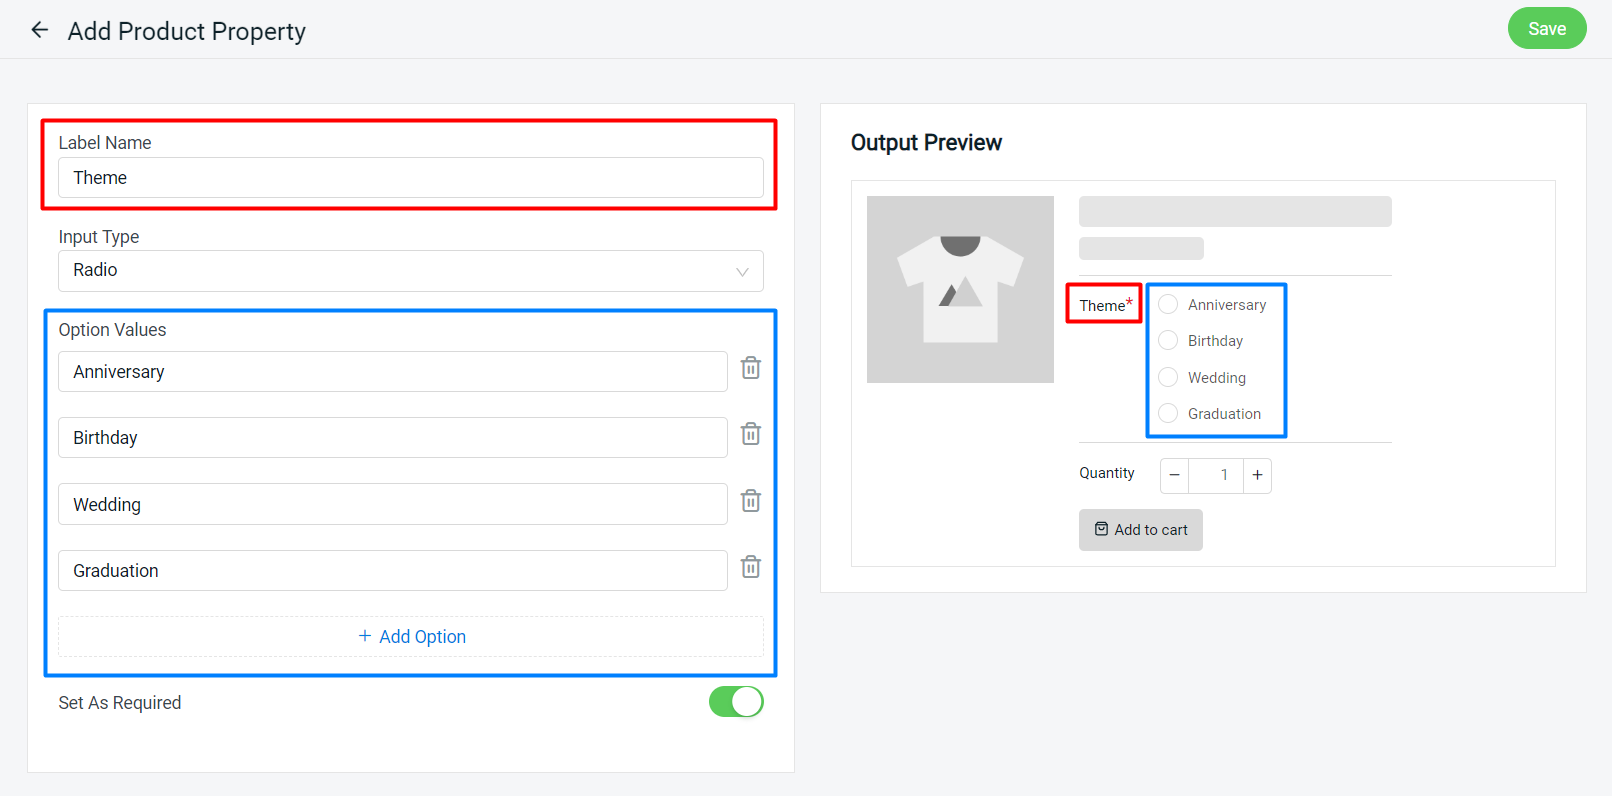
?Note: Customers can only select 1 option value for the Radio input type.
Preview:
6. Input Type: Checkbox
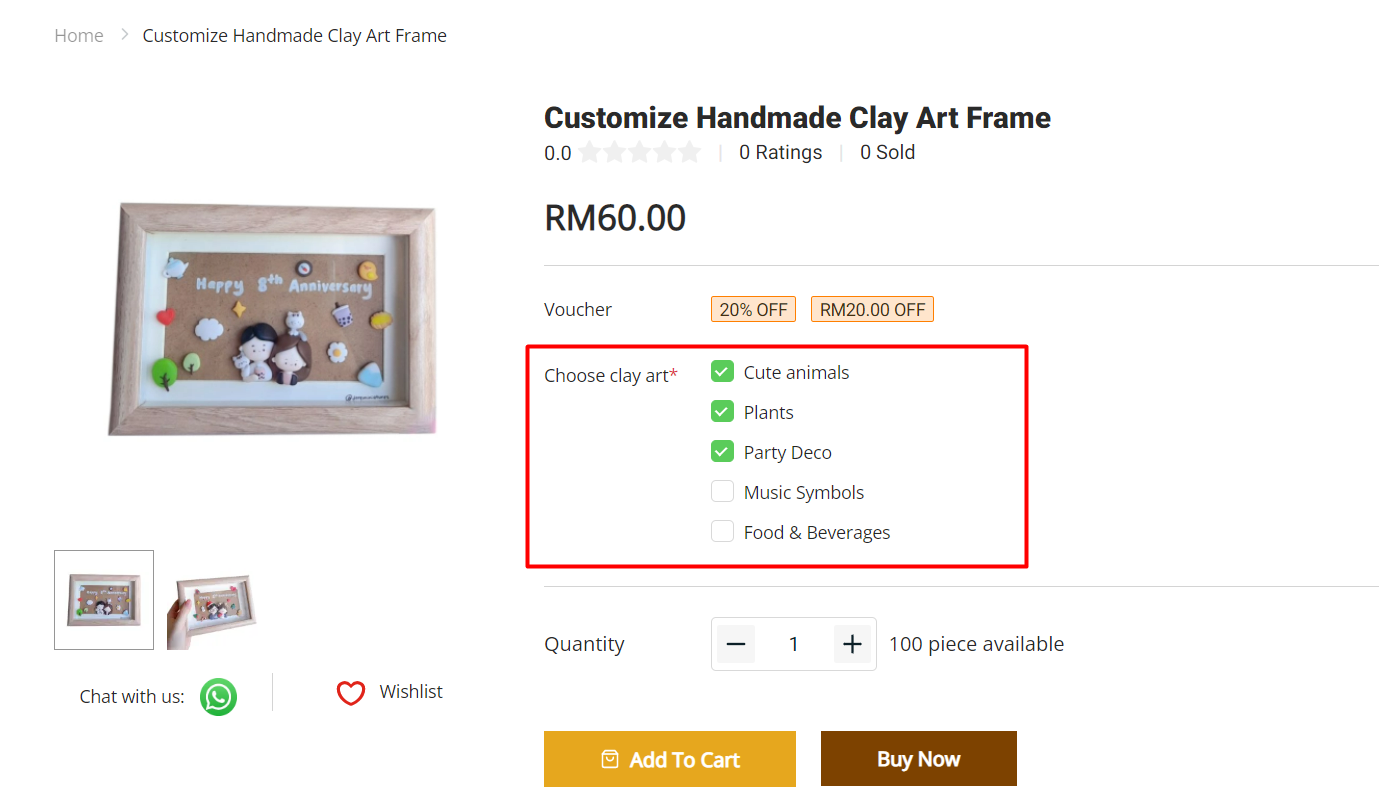
The checkbox input type is a perfect type to use when you want the customers to be able to select one or more options.
Step 1: Fill in the Label Name > fill in the Option Values > set if it is a Required field for the customer to choose.
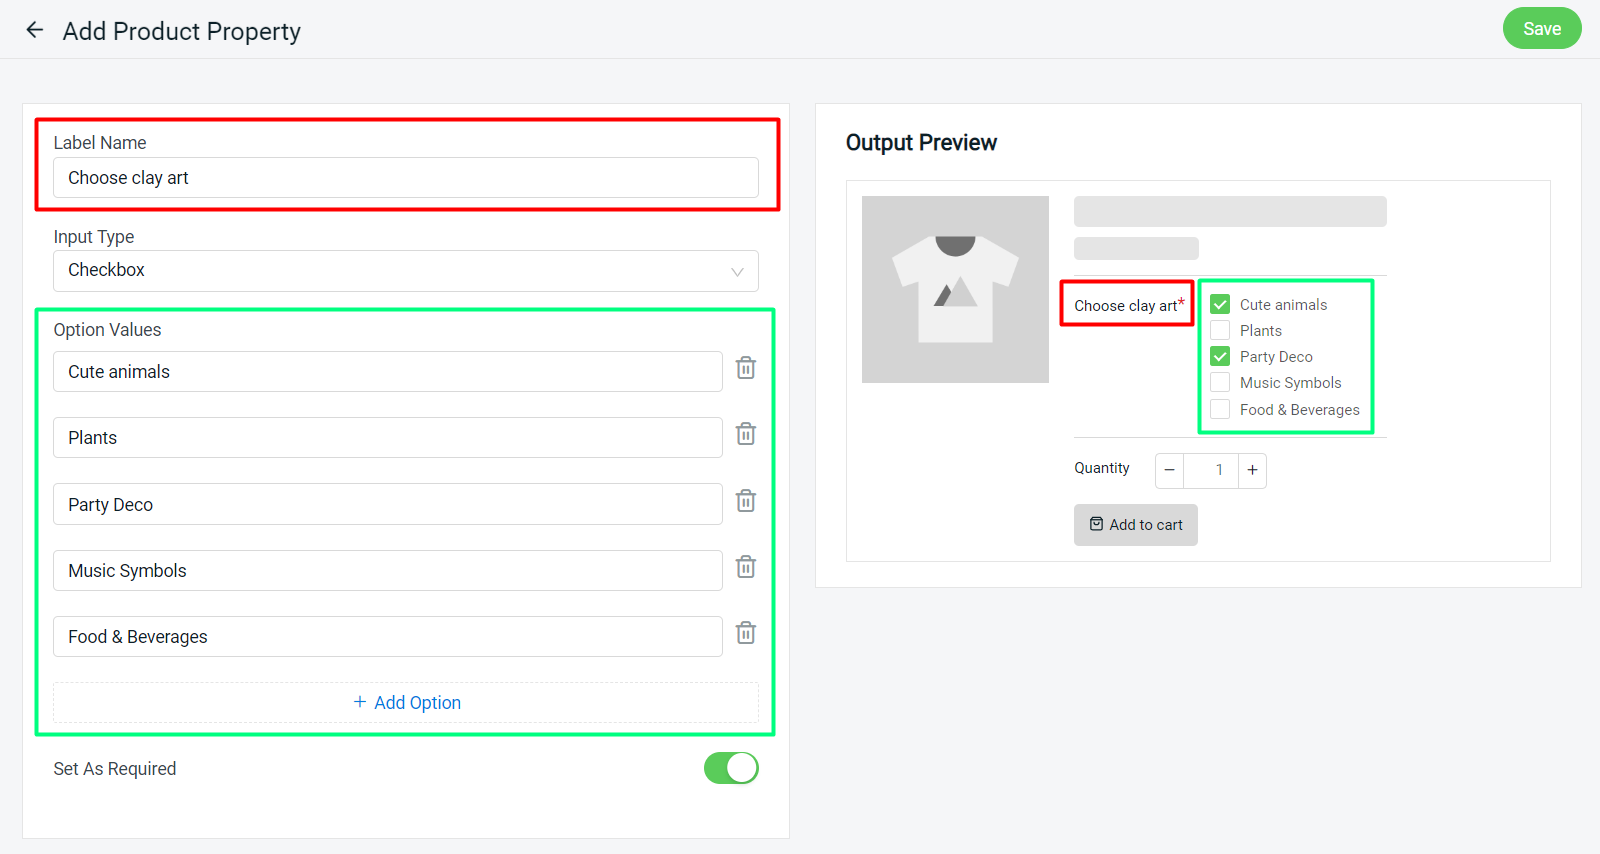
?Note: Customers can only select multiple option values for the Checkbox input type.
Preview:
7. Input Type: Attachment
The attachment input type allows customers to upload the image or file for sellers to customize the product.
Step 1: Fill in the Label Name > set if it is a Required field for the customer to upload the file.

?Note: Only supports JPG, JPEG, PNG and PDF format.
Preview:
