1. Introduction
2. Basic Information
3. Settings
4. Add New Block
1. Introduction

No IT knowledge or skills in building a webstore for your online business? No worries! By using our all-in-one Webstore Builder, you can create a stunning online store within a short period. You are able to select the styles that are suitable for your online webstore. Simple and easy-to-use tool to design your webstore such as theme colors, logo, and banner slides.
2. Basic Information
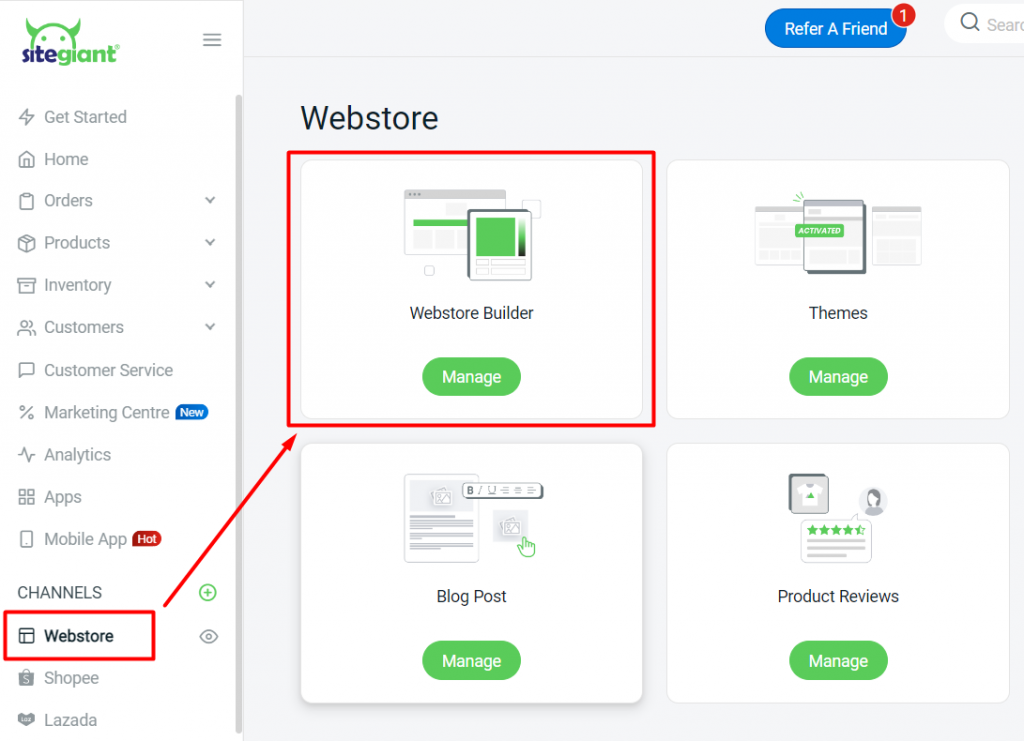
Step 1: Navigate to Webstore > Webstore Builder
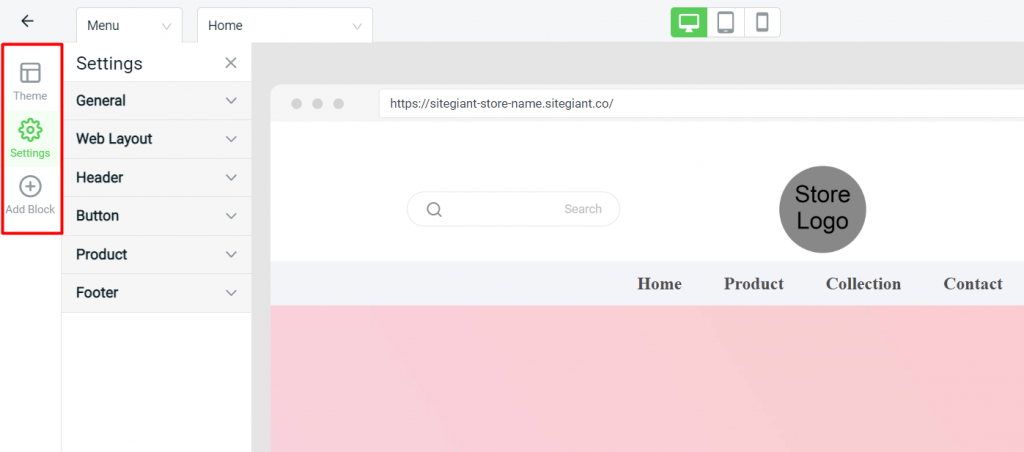
Step 2: On the left menu, there are Theme, Settings, and Add Block
?Note:
Theme: Pick one of your favourite themes as the webstore layout - Learn more
Settings: It allows you to customize the design of the webstore based on the content you built
Add Block: It allows you to add content on webstore
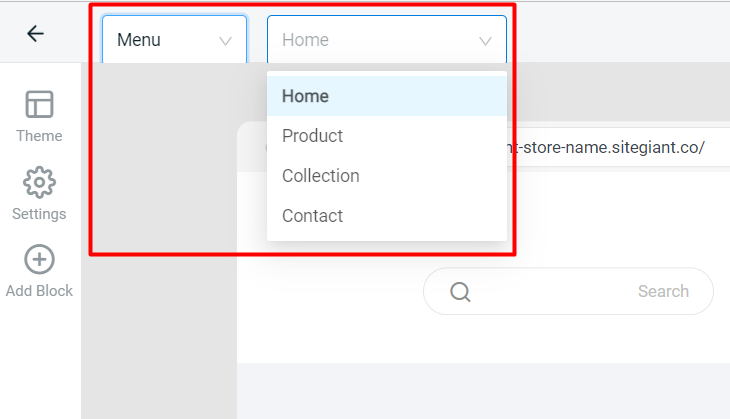
Step 3: You can choose your webstore page to add blocks and edit
Step 4: You can preview the outcome in desktop, tablet, and mobile view

3. Settings
I. General – Settings for font family, text format, and color

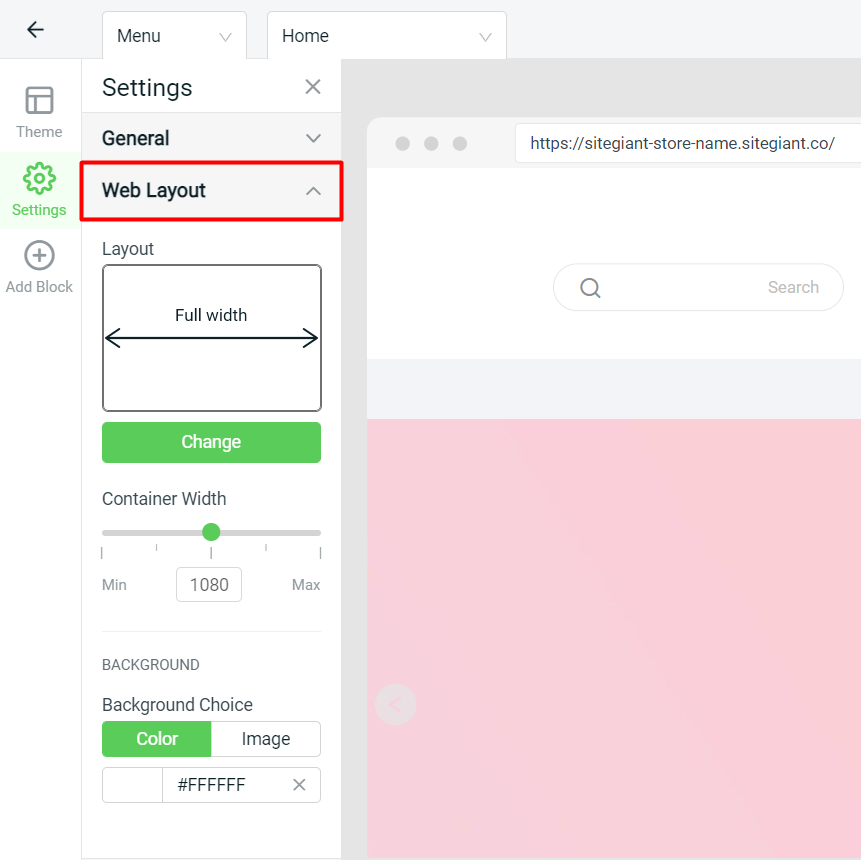
II. Web Layout – Settings for the webstore layout, width, and background
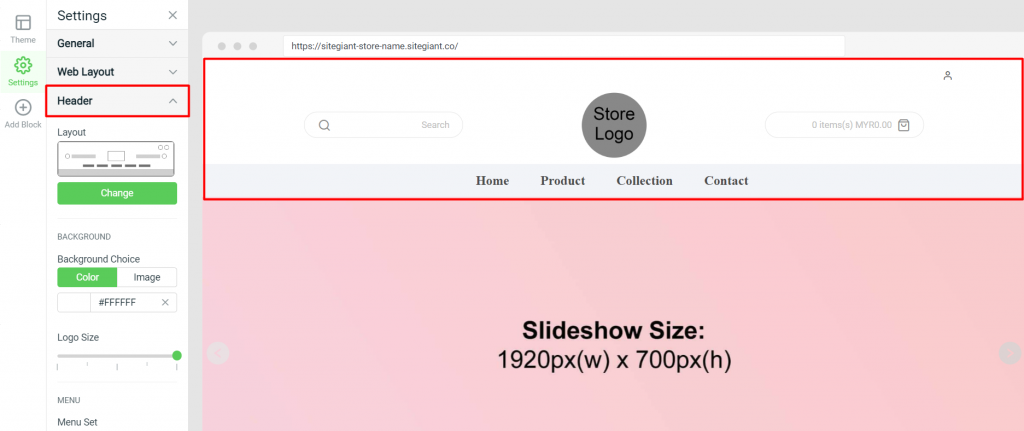
III. Header – Settings for header layout, background, menu, and icon
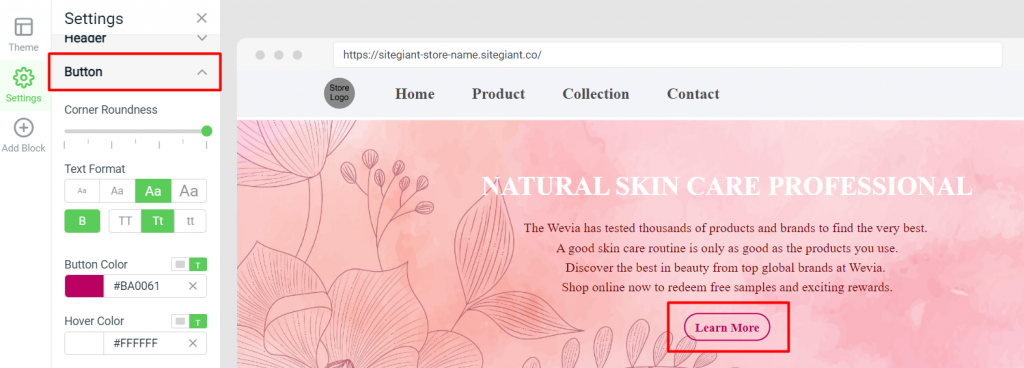
IV. Button – Settings for the button format and color
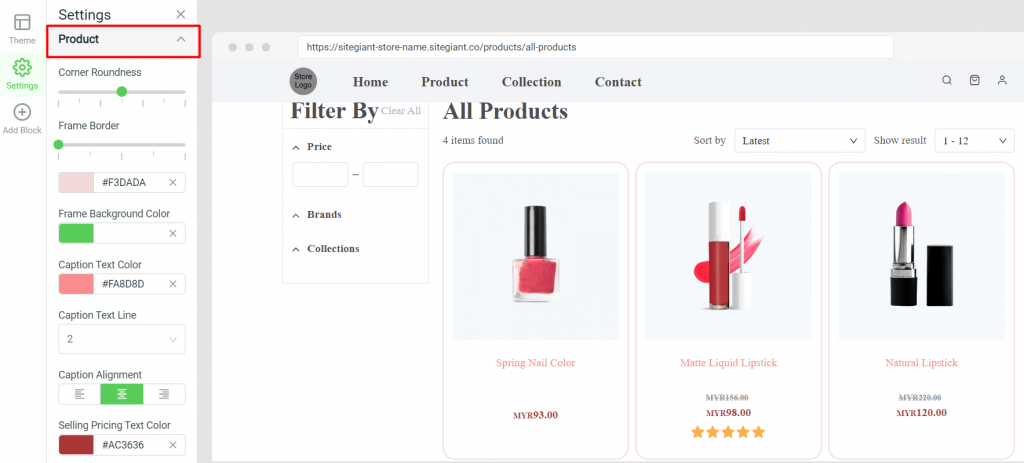
V. Product – Settings for the product frame, text alignment, and color
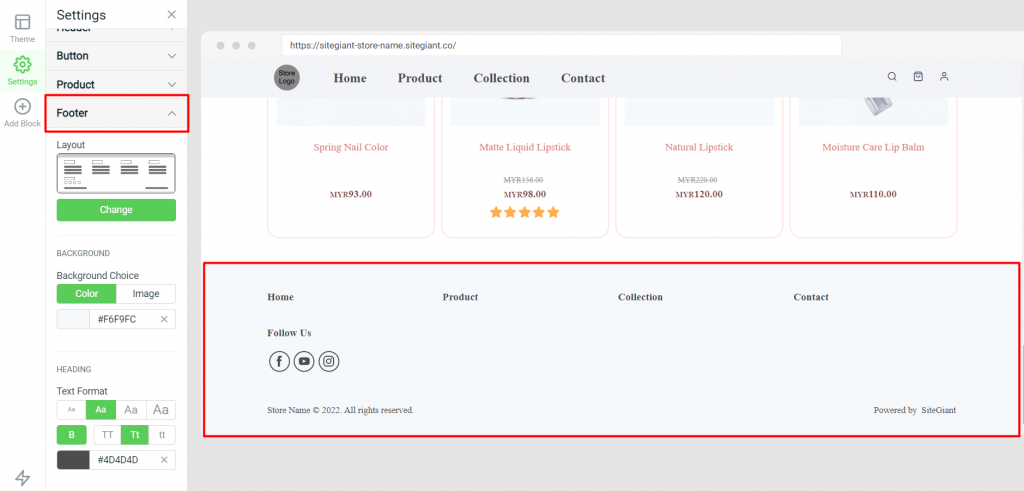
VI. Footer – Settings for footer layout, background, text format, and elements
4. Add New Block
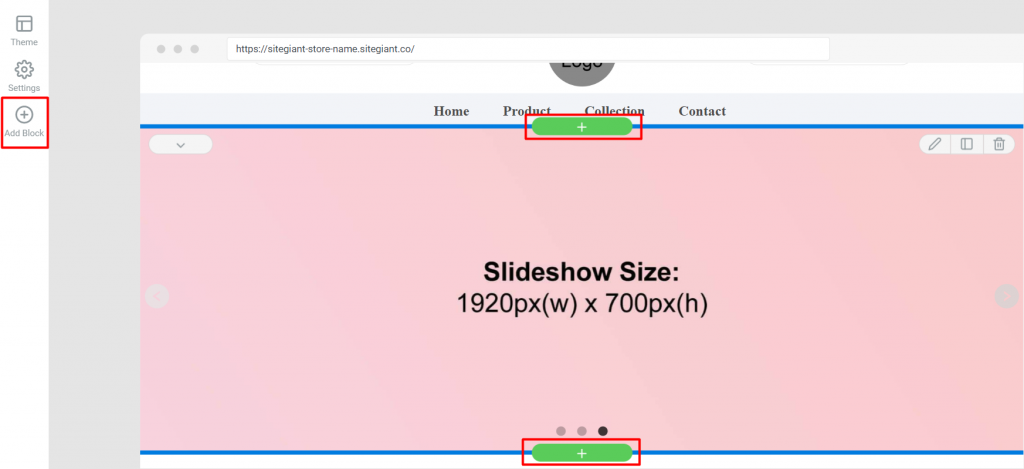
Step 1: Click on the Add Block on the left menu or the + button on the top and bottom of the block to add more content to the webstore page
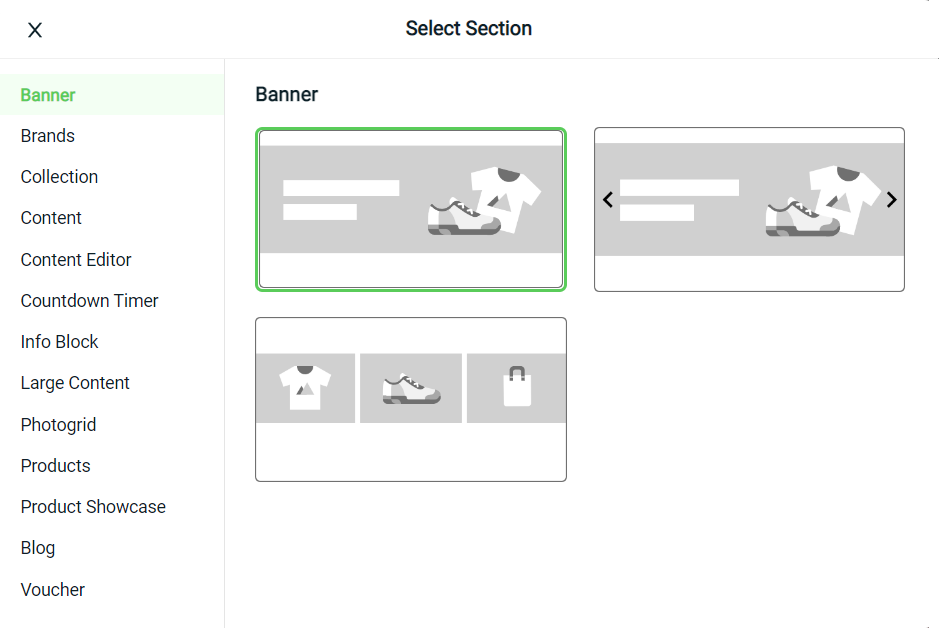
Step 2: Select the content block that you wish to add and select the layout
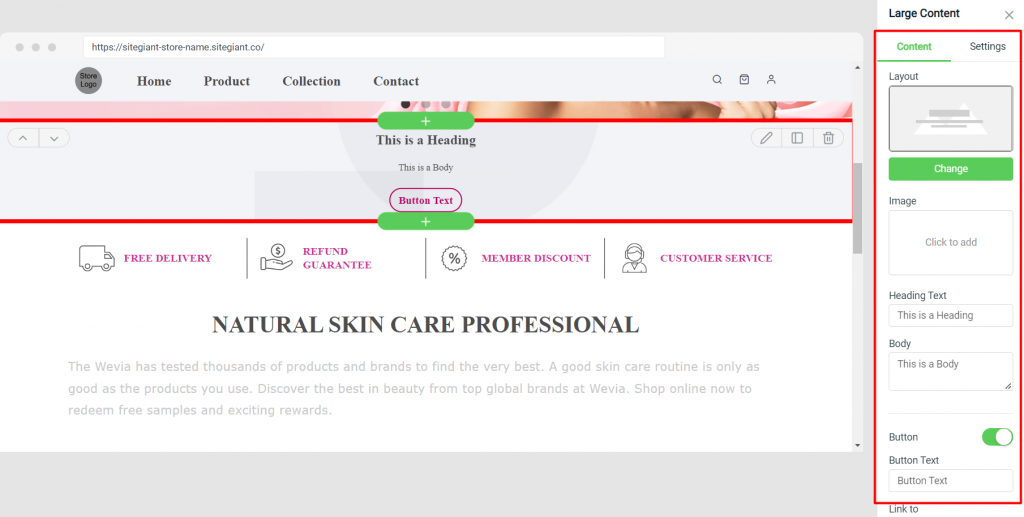
Step 3: After adding a new block, you can edit the block content and settings on the right
Step 4: You are able to arrange the sequence, edit or delete the block by clicking on the block
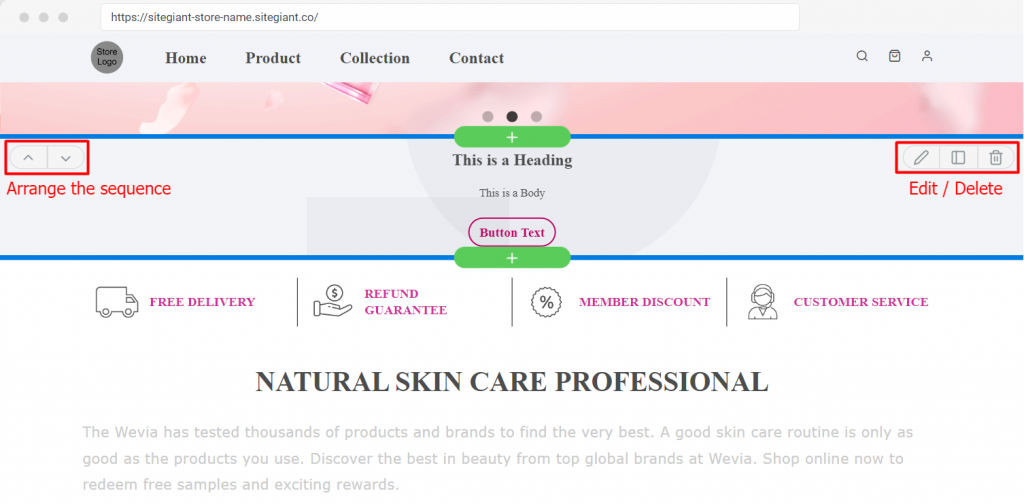
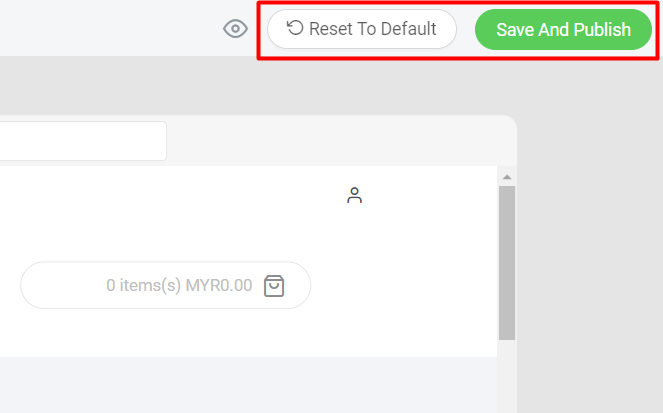
Step 5: Once you have done the webstore design, click Save And Publish to apply the changes. Or, you can click Reset To Default if you are not satisfied with the design, and all settings will be reset to the default theme.
