1. 簡介
2. 獲取 Revenue Monster API 金鑰
3. 設置 Revenue Monster 支付網關
4. 測試使用 Revenue Monster 結帳(客戶角度)
1. 簡介

Revenue Monster 支付網關是馬來西亞企業尋求全面解決方案來管理線上支付的強大而多功能的選擇。Revenue Monster 接受多種支付方式,包括線上銀行和電子錢包。
📌注意:請確保您已經在 Revenue Monster 註冊了帳戶以進行串接。如果您還沒有帳戶,可以在這裡註冊。
2. 獲取 Revenue Monster API 金鑰
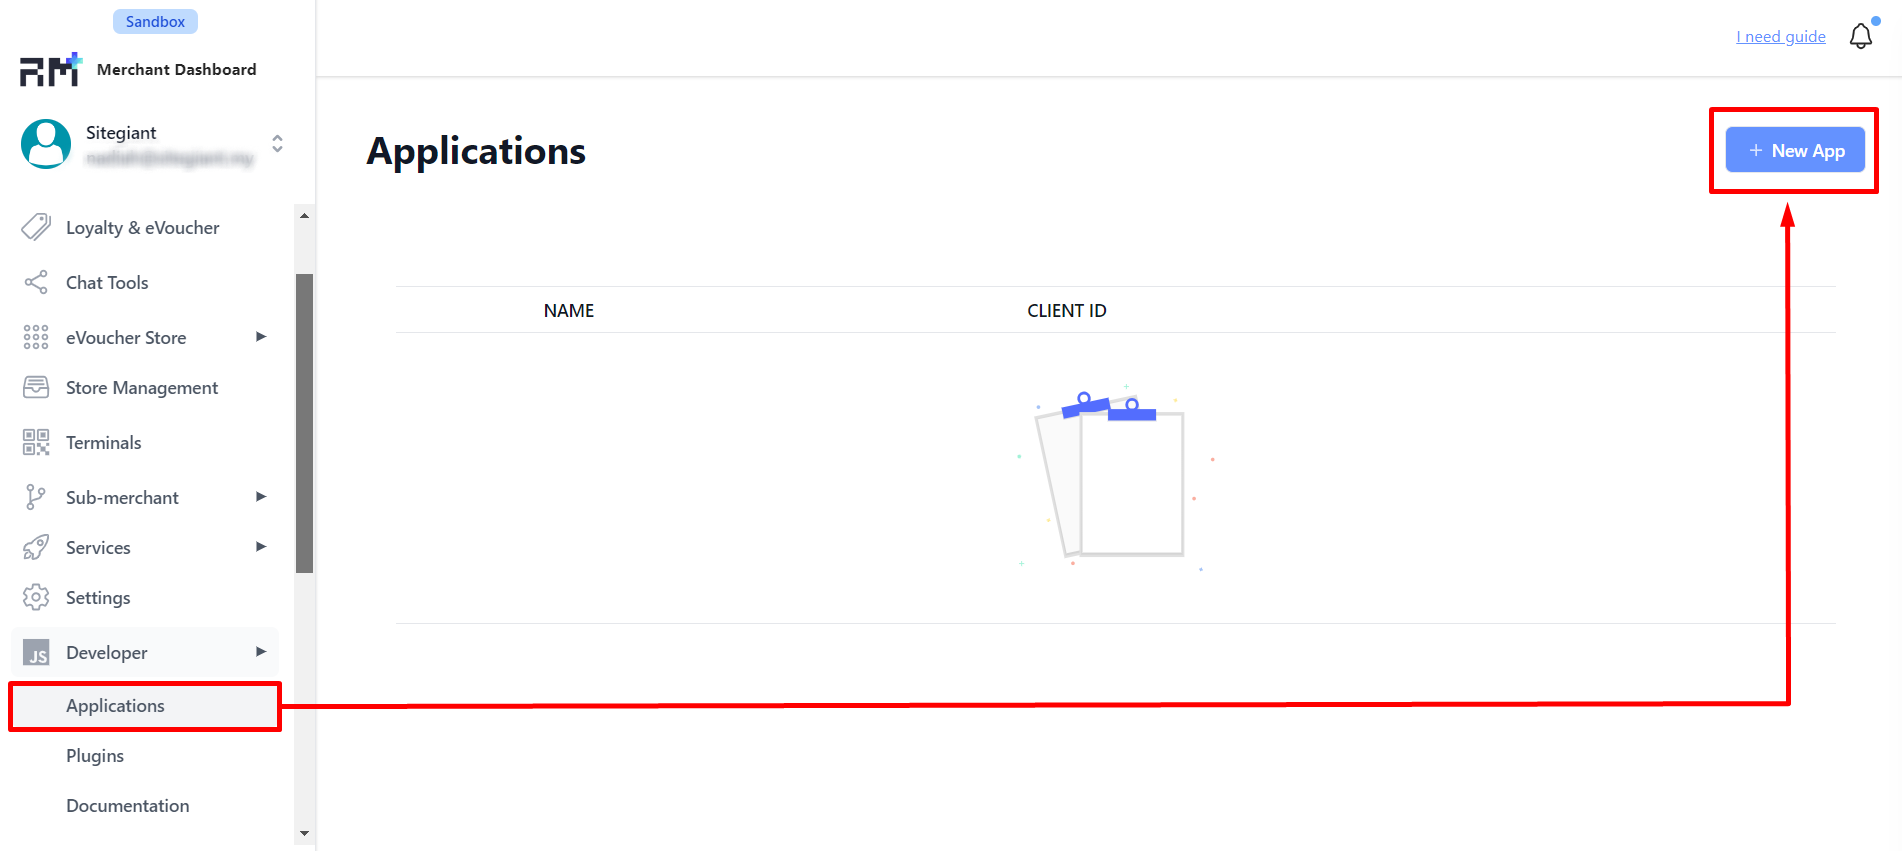
步驟一:登入您的 Revenue Monster 帳戶 > 前往左側欄中的 Developers > Applications > 點擊 + New App。
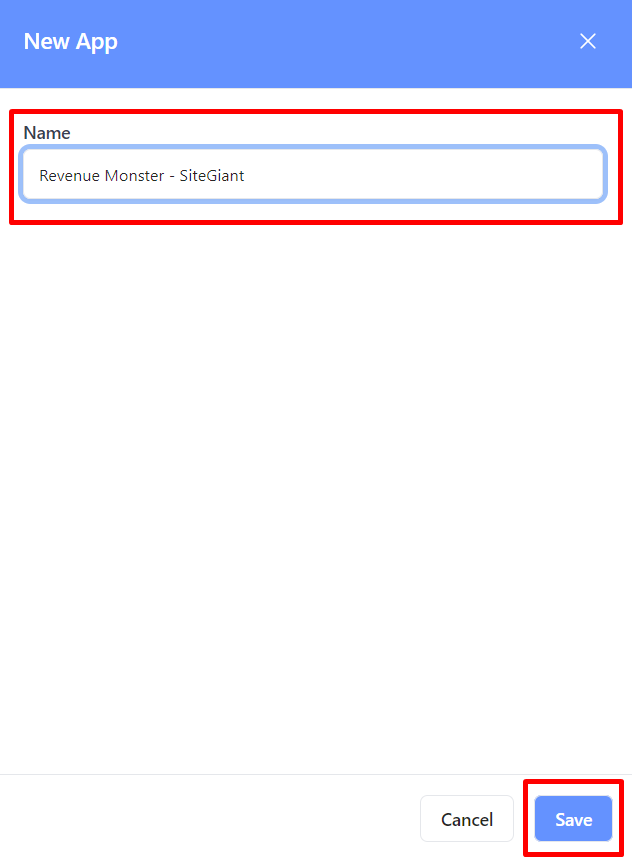
步驟二:輸入應用程式名稱(App Name) > 保存(Save)。
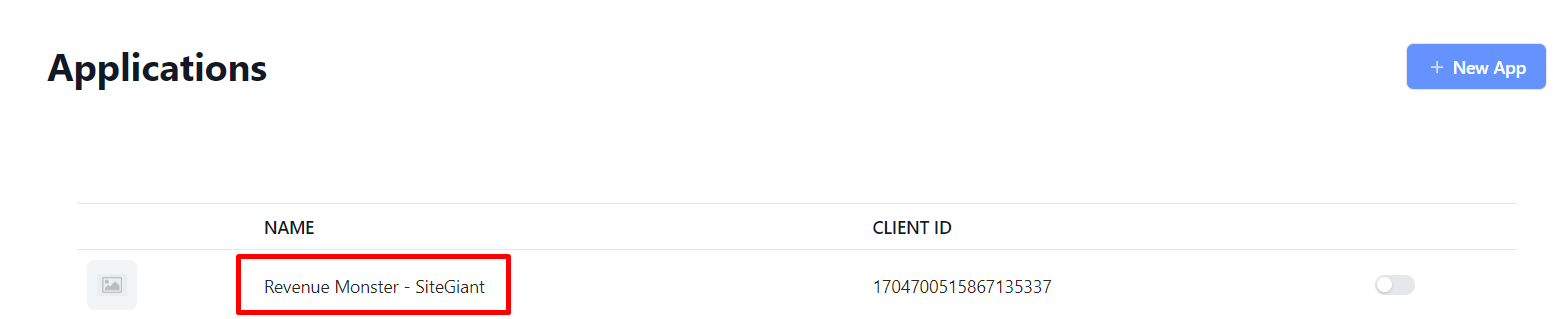
步驟三:點擊已建立應用程式。
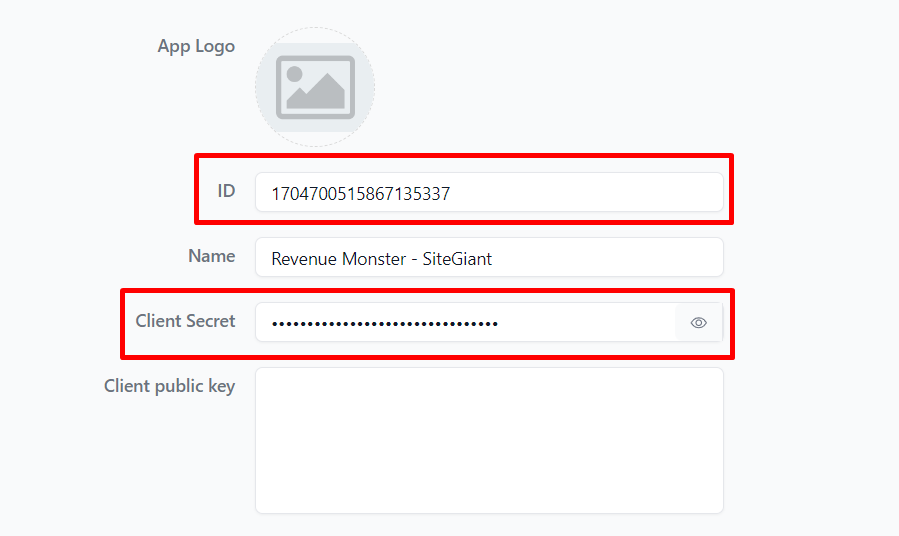
步驟四:複製 Client ID 和 Client Secret 以供稍後使用。
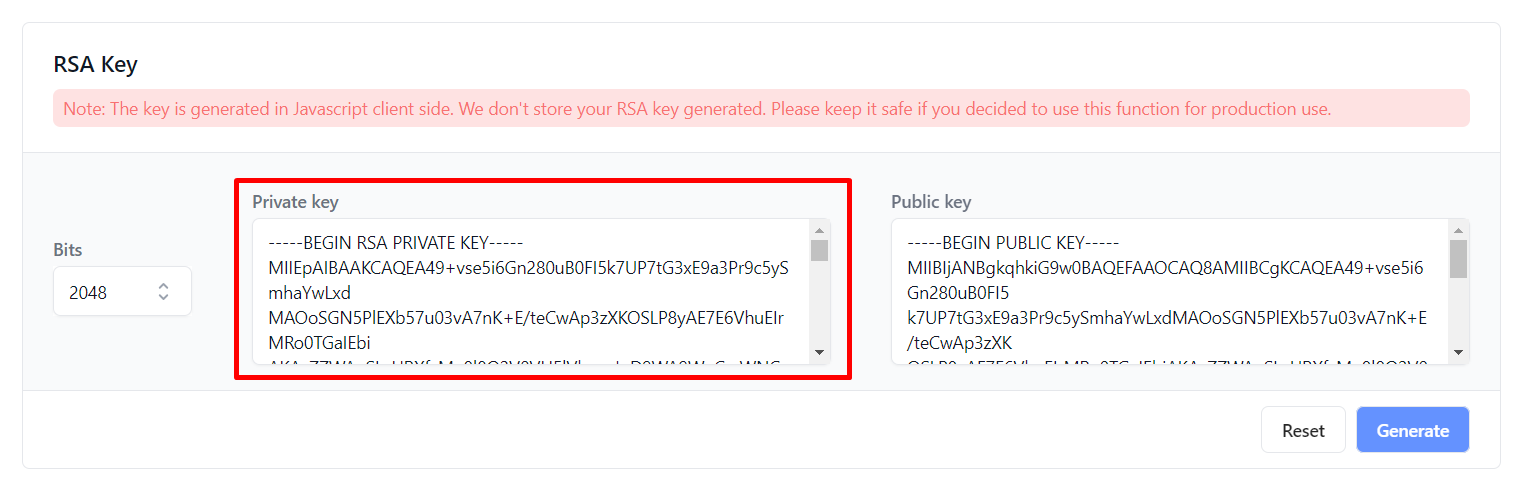
步驟五:找到 RSA Key > 點擊 Generate。

步驟六:複製 Private Key 以供稍後使用。
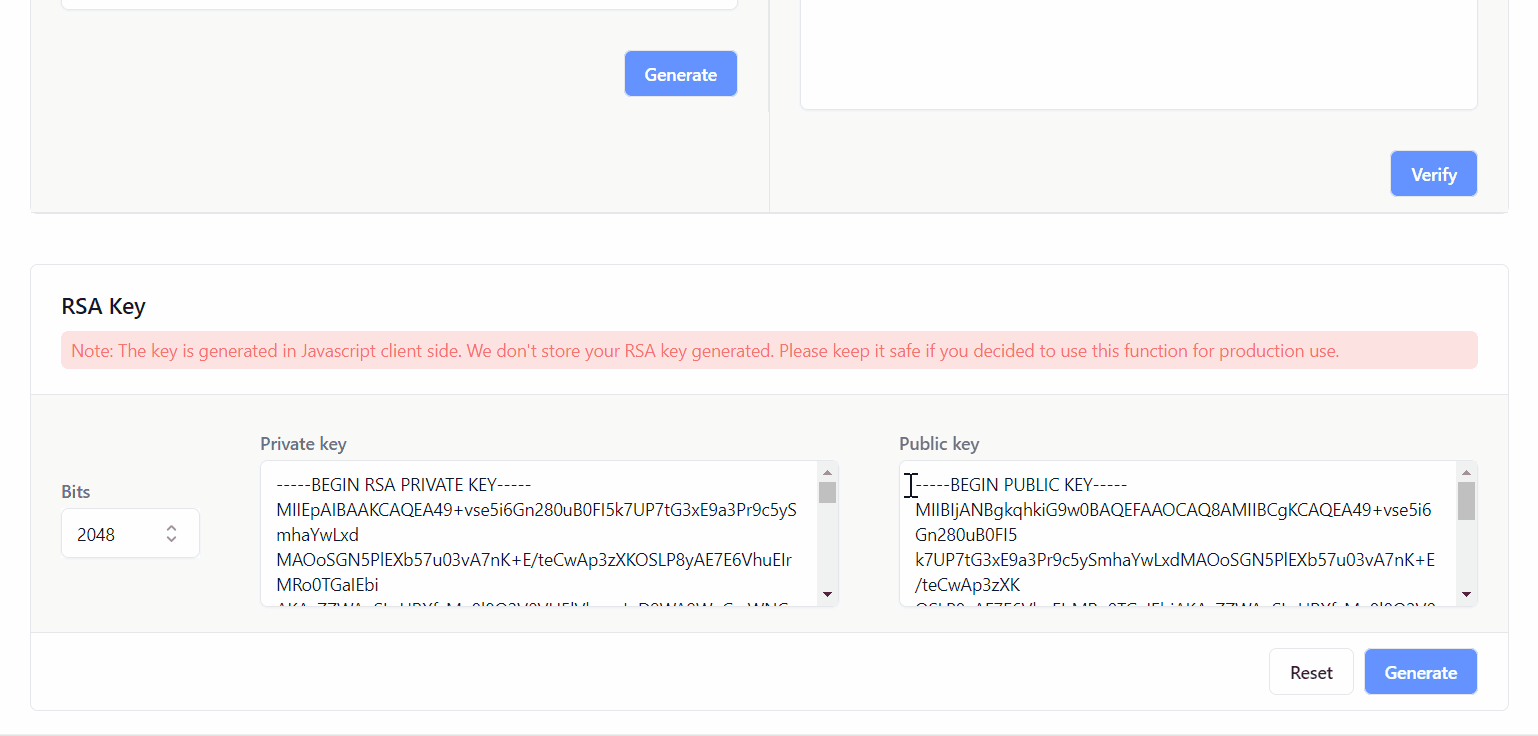
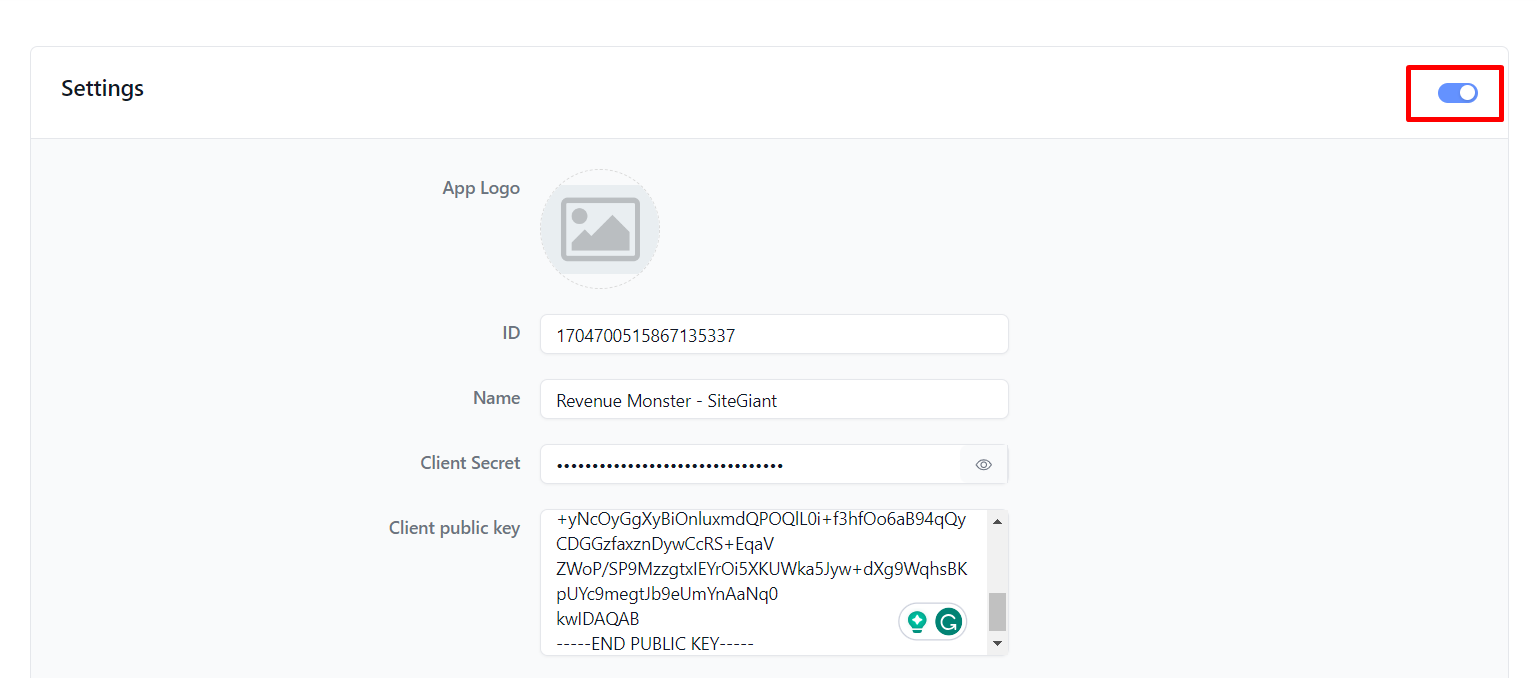
步驟七:複製 Public Key > 滑向上方 > 將其粘貼到 Client Public Key 欄位中。
步驟八:完成後,啟用 Settings 狀態。
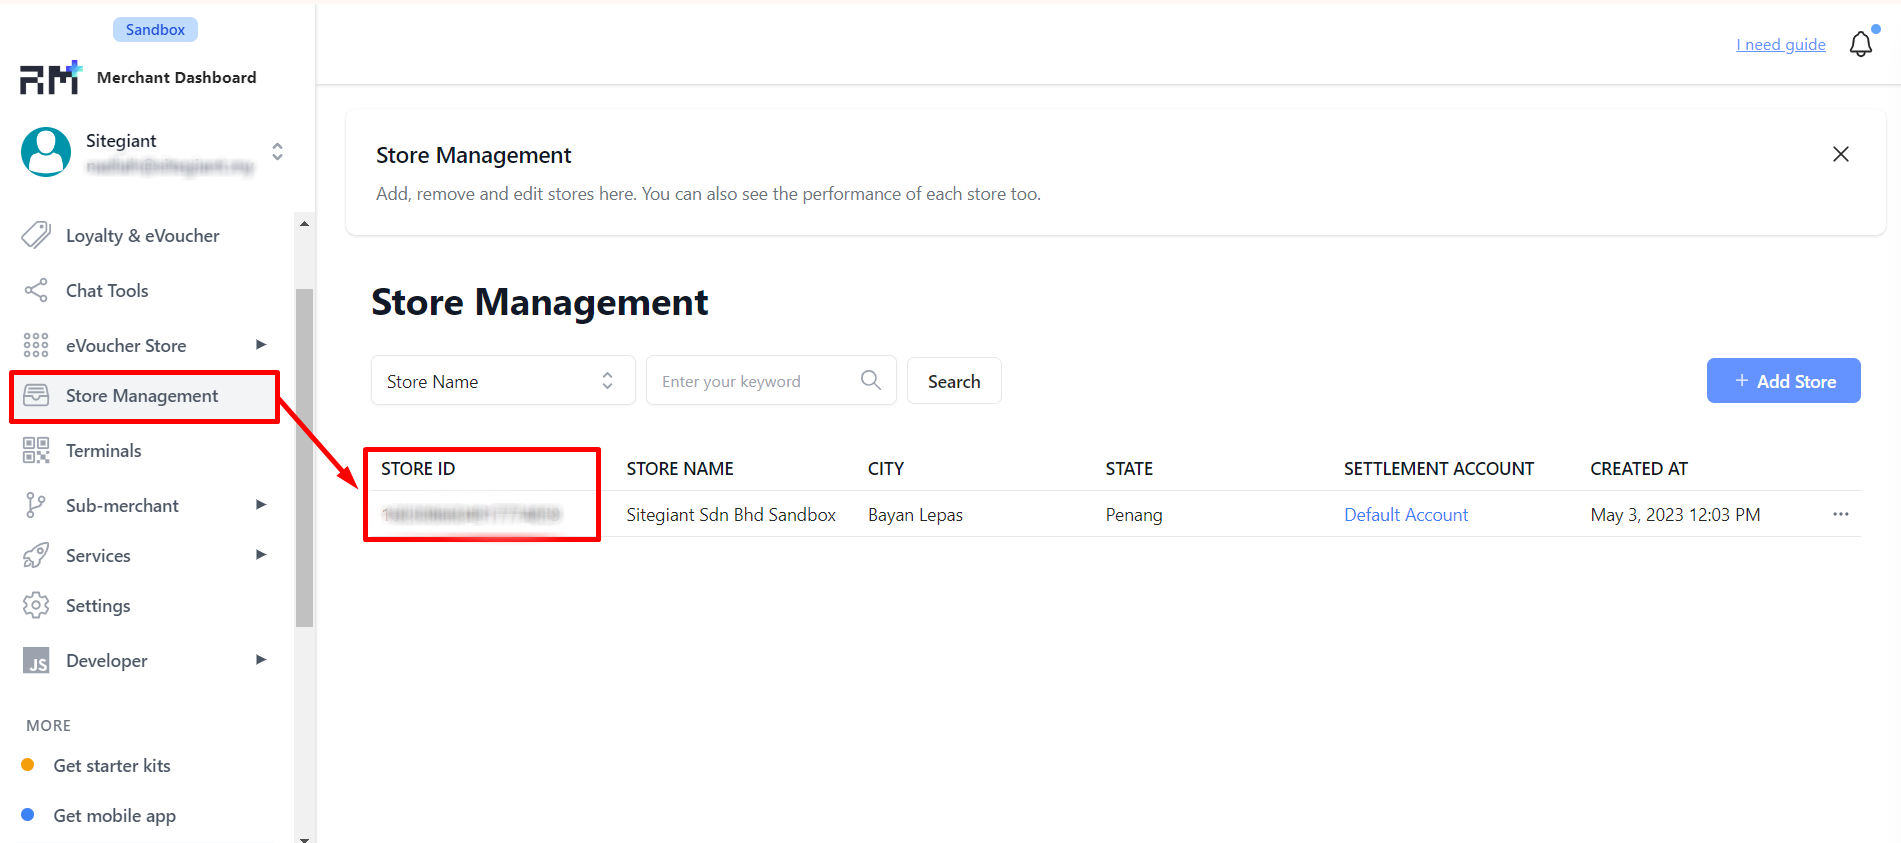
步驟九:在側邊欄中前往 Store Management > 複製 STORE ID 以供稍後使用。
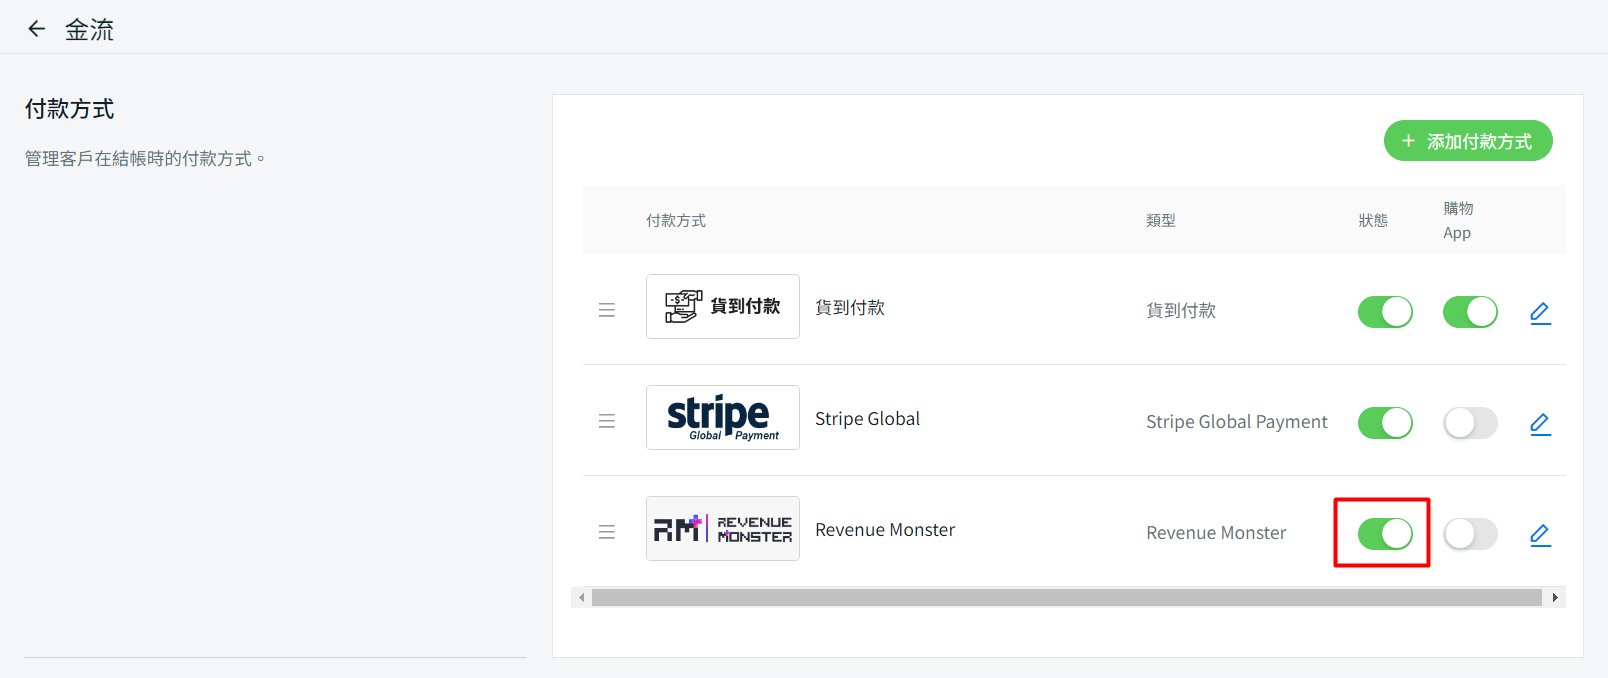
3. 設置 Revenue Monster 支付網關
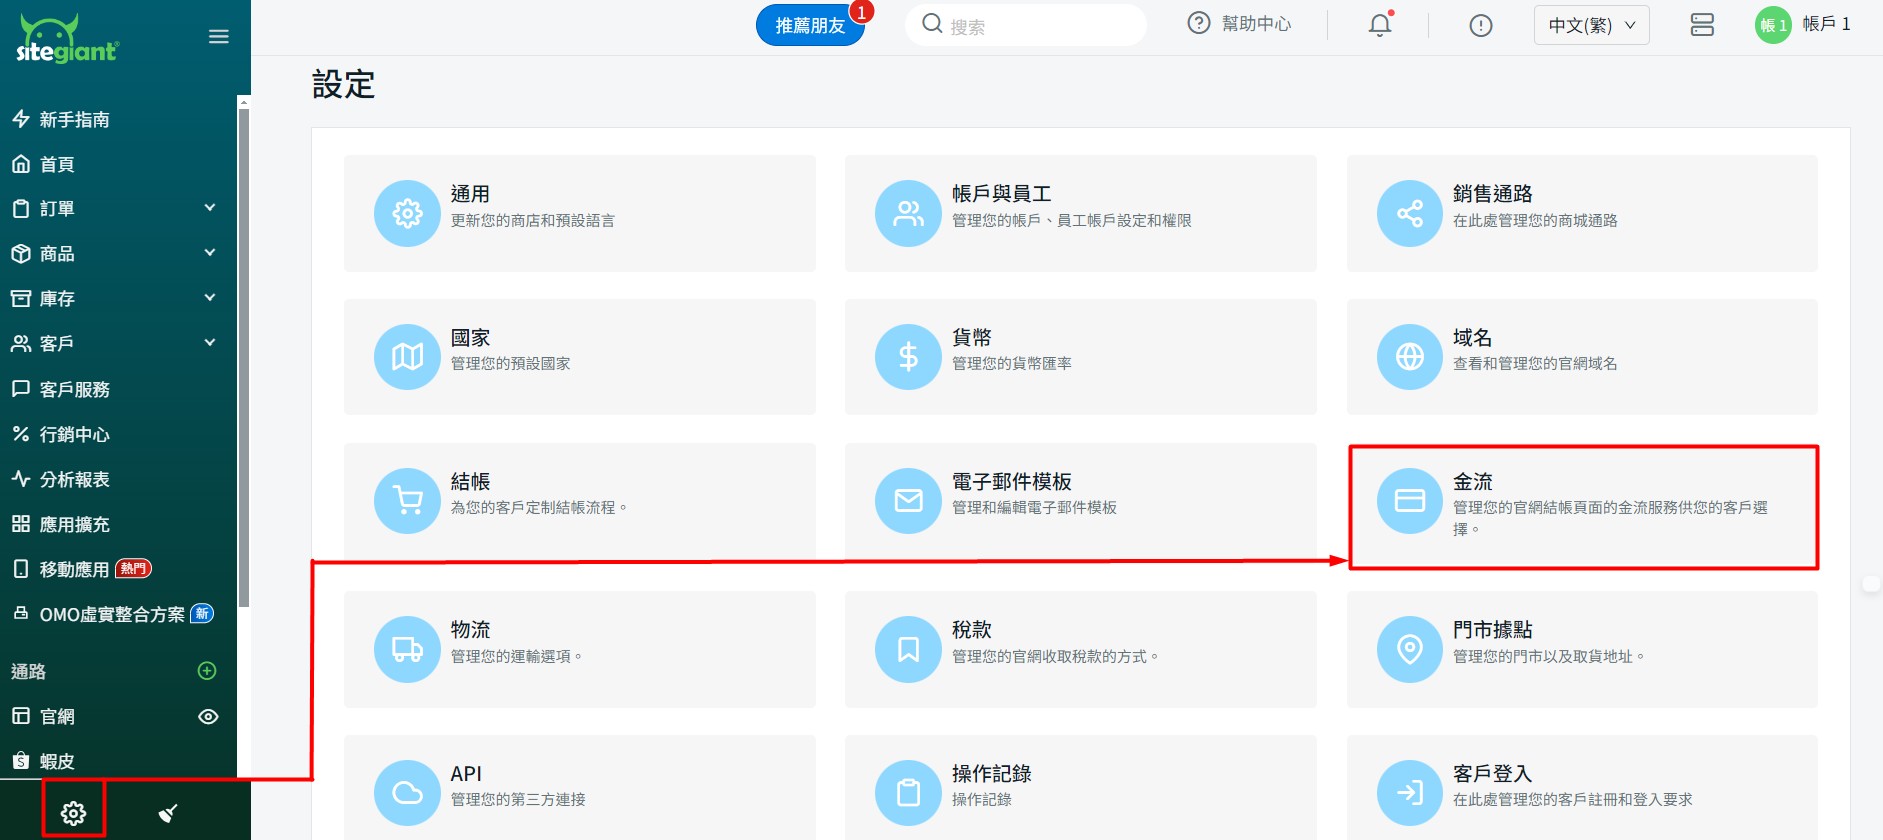
步驟一:前往設定 > 金流。
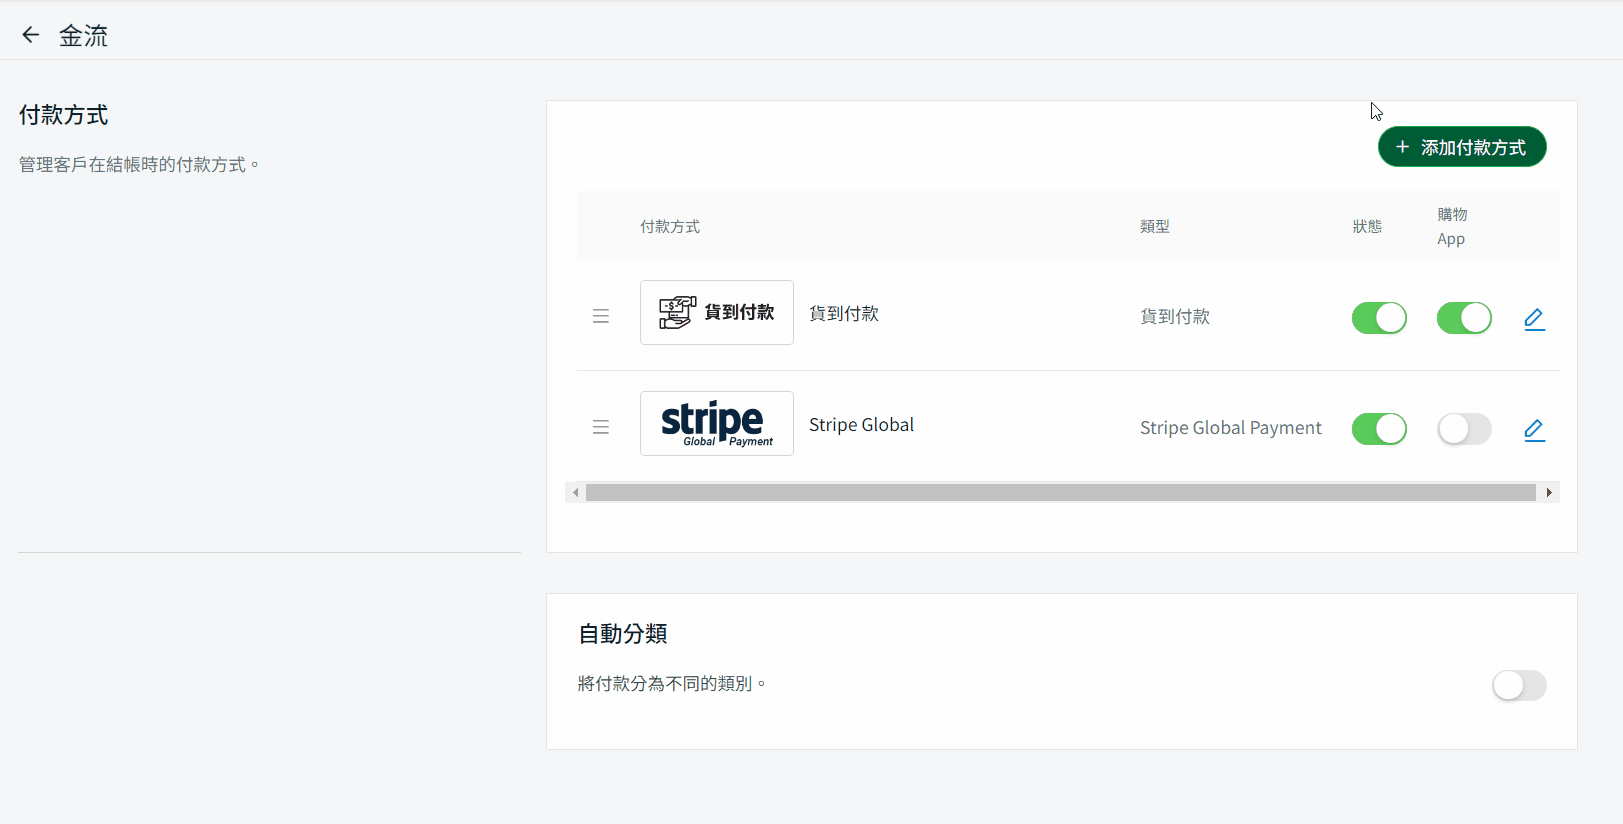
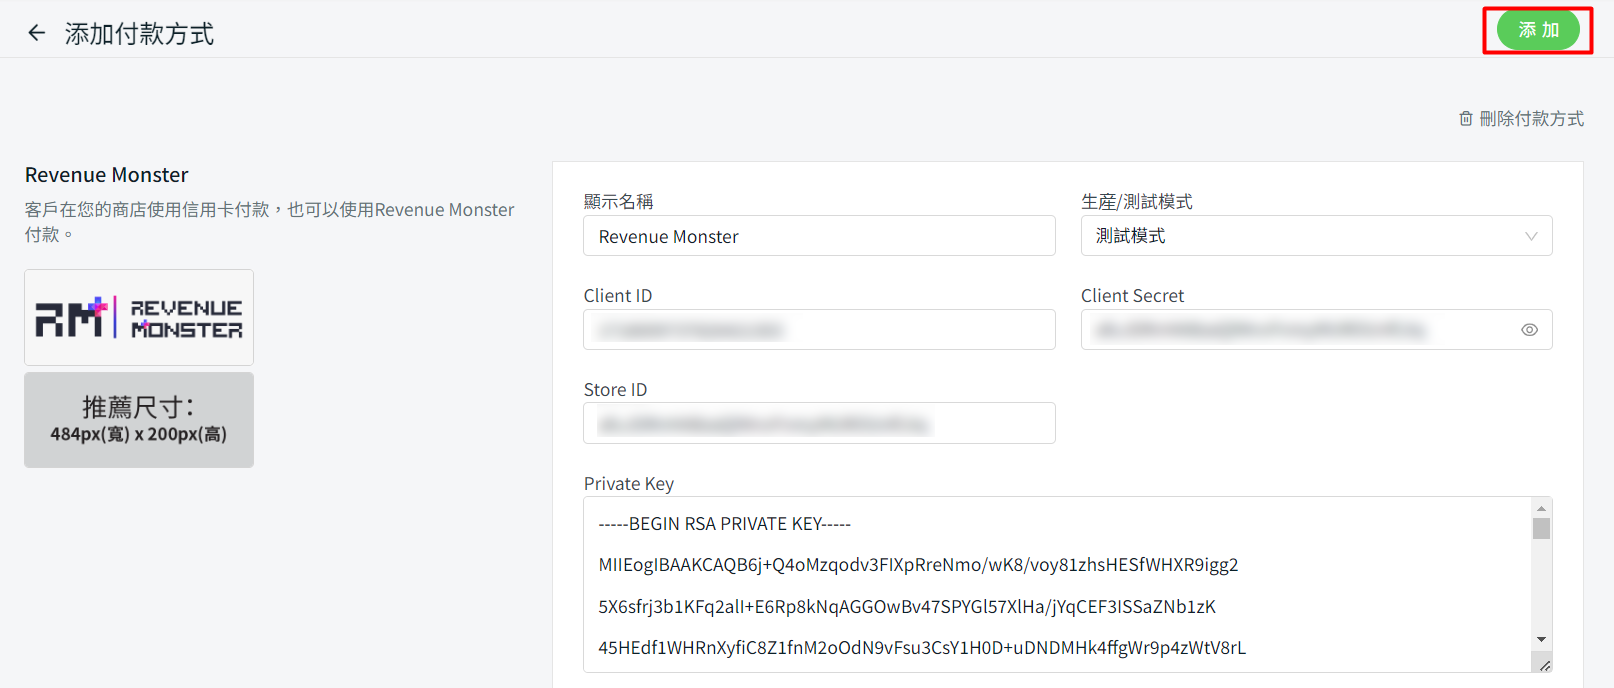
步驟二:點擊 + 添加付款方式 > 選擇 Revenue Monster > 添加付款方式。
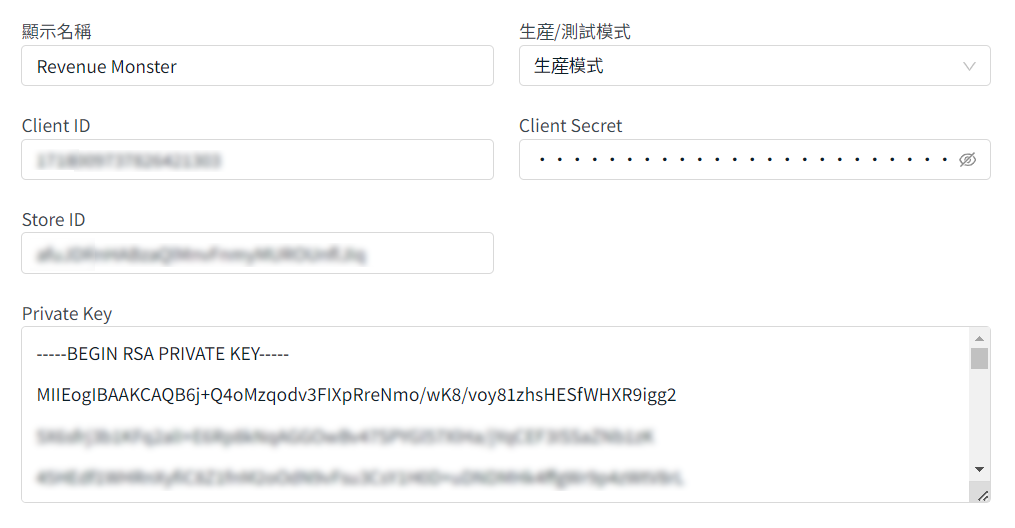
步驟三:填寫顯示名稱 > 一旦付款方式準備就緒,切換至生產模式 > 粘貼從 Revenue Monster 複製的Client ID、Client Secret、Store ID 和 Private Key。
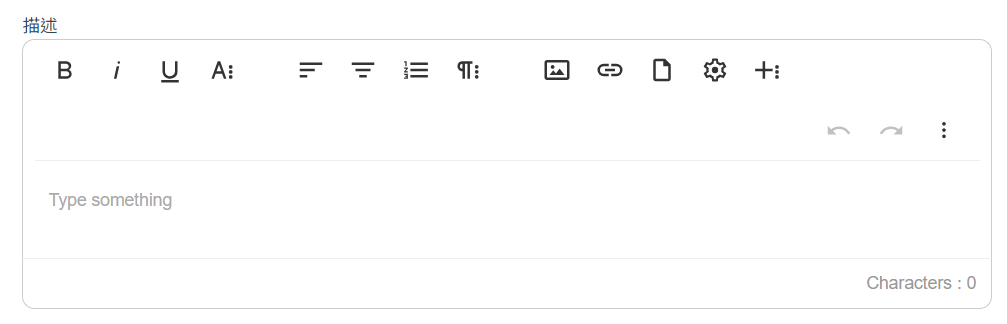
步驟四:在描述部分,您可以添加額外的備註或註釋,以在結帳流程中顯示給客戶。
步驟五:選擇客戶群組 > 填寫需要達到的最低訂單金額以使用該付款方式 > 選擇貨幣。
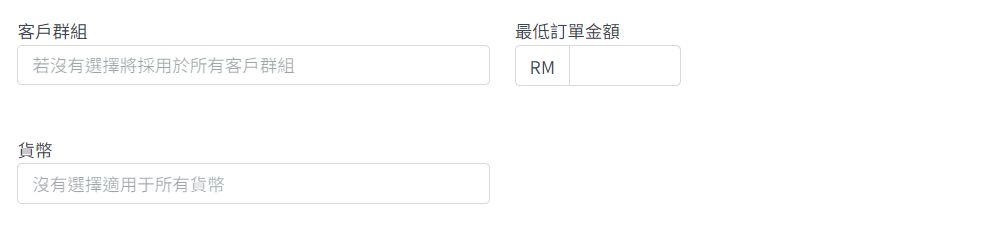
📌注意:如果沒有選擇客戶群組和貨幣,則將適用於所有客戶群組和貨幣。
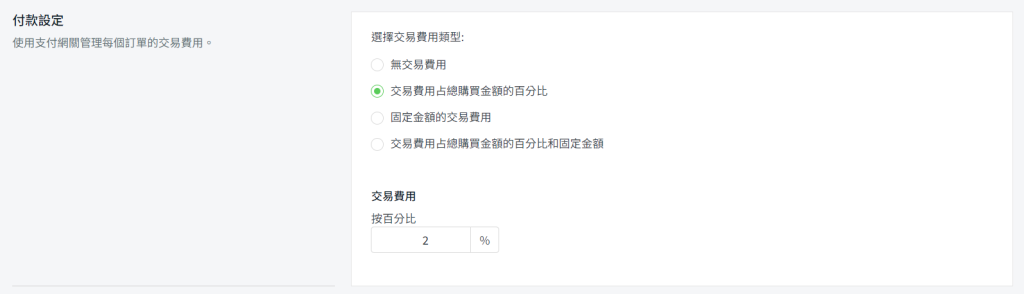
步驟六:您可以在付款設定中設置額外的交易費用(選擇性)
步驟七:完成後,點擊右上角的添加按鈕。
步驟八:確保 Revenue Monster 的狀態已啟用,以顯示在結帳頁面上。
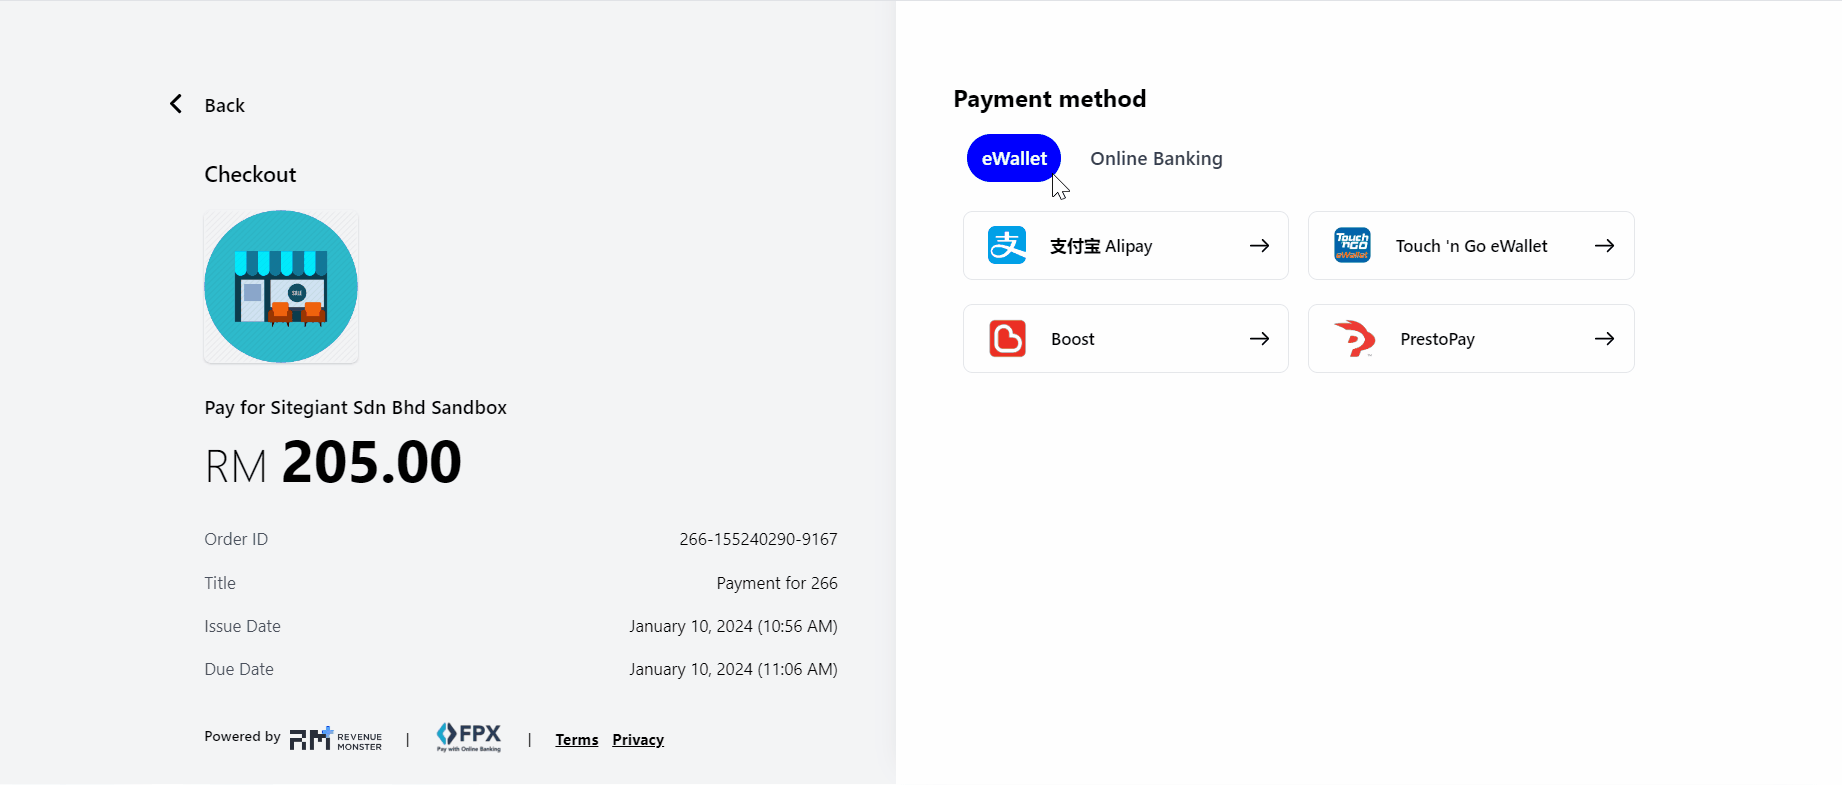
4. 測試使用 Revenue Monster 結帳(客戶角度)
步驟一:強烈建議在您的官網上進行測試結帳,以確保付款方式正常運行
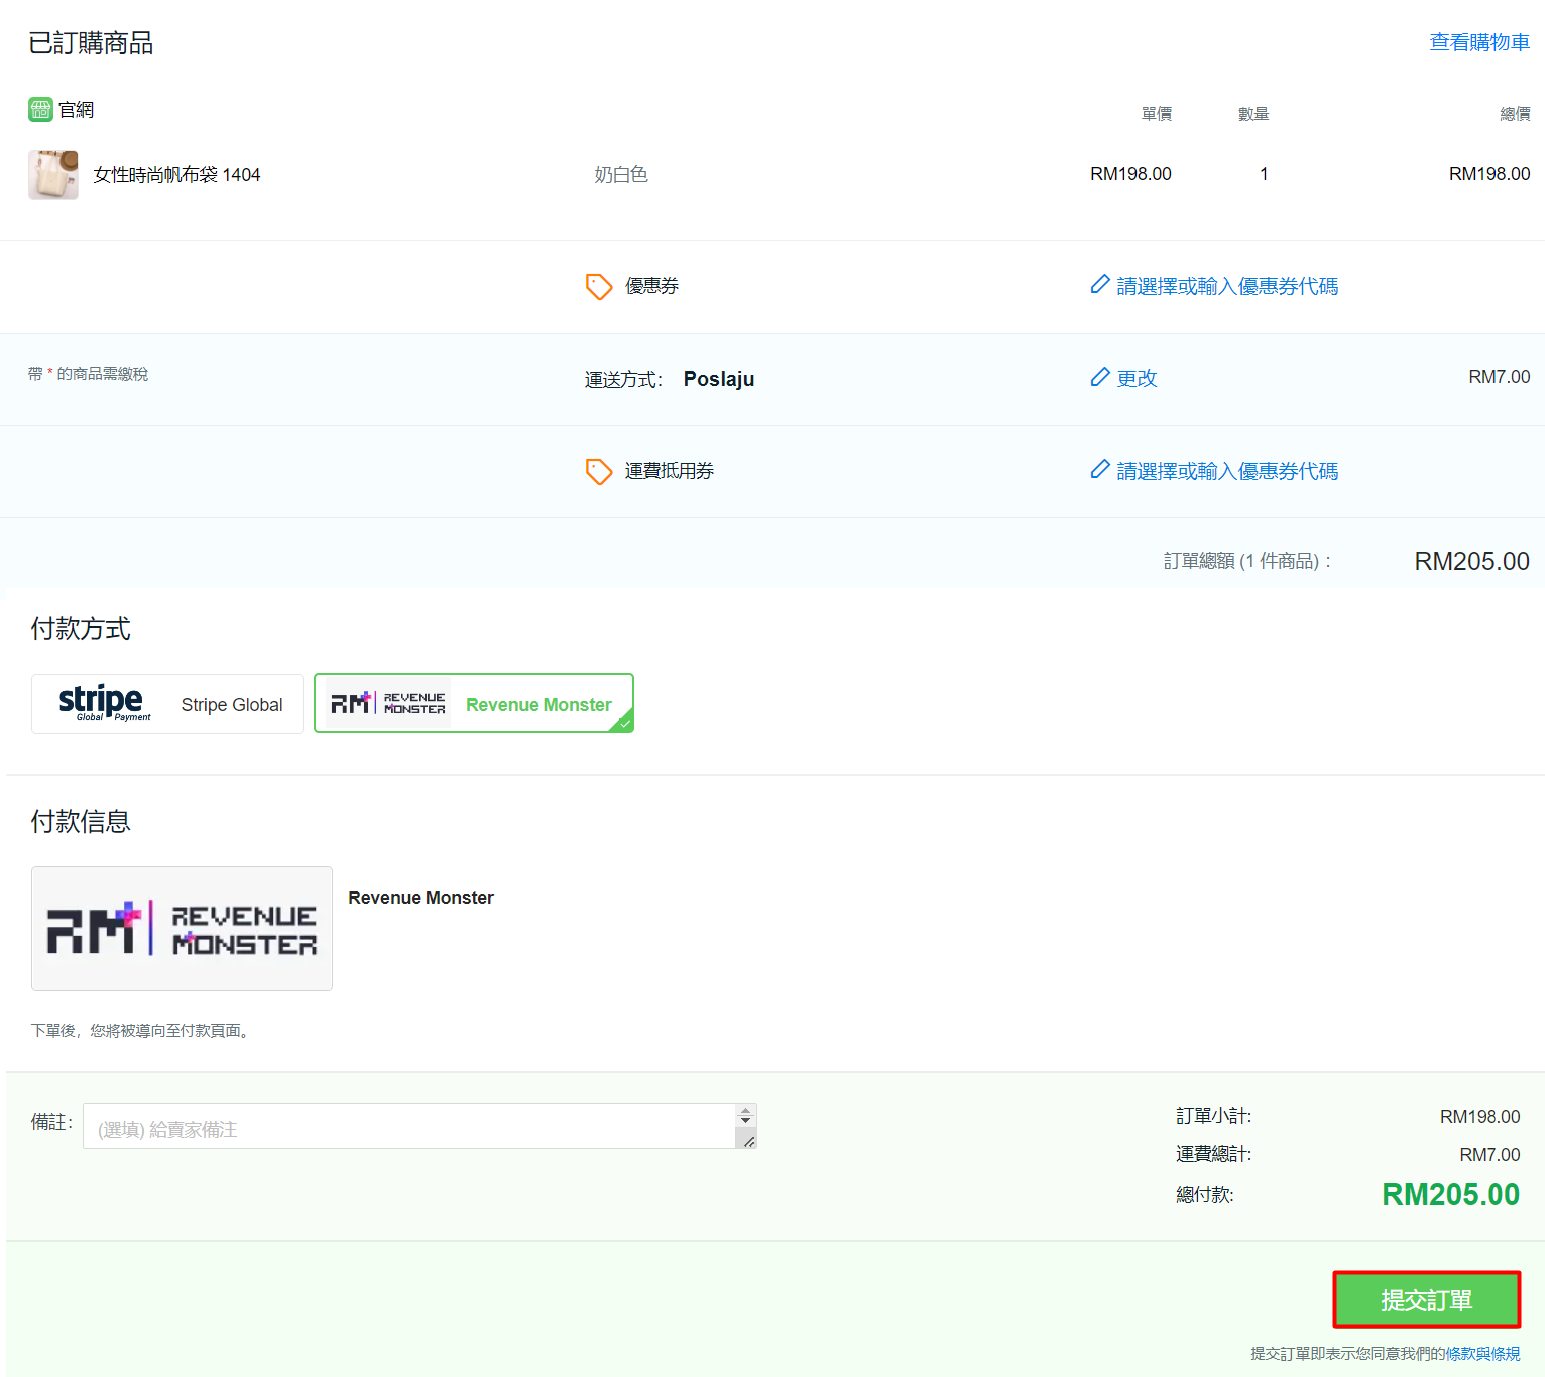
步驟二:如果頁面導向至 Revenue Monster 付款頁面,則表示您已成功串接了 Revenue Monster