1. Introduction
2. Stock In
3. Stock Out
4. Additional Information
1. Introduction
Stock In feature allows you to manage and update your inventory stock when you restock inventory items from the suppliers. You can also use it together with the Purchase Order feature when you receive stock from the suppliers and stock in the stock quantities to the inventory.
Use Stock Out feature for usage like transferring out the stock, declaring it as waste or returning it to the suppliers as long as you are deducting the stock from the Inventory.
⚠️Important Note:
1. Before starting, make sure all your products from marketplaces have performed Inventory Linking and linked with the correct inventory items.
2. Please ensure the Update Stock button is enabled in Sales Channels Settings.
2. Stock In
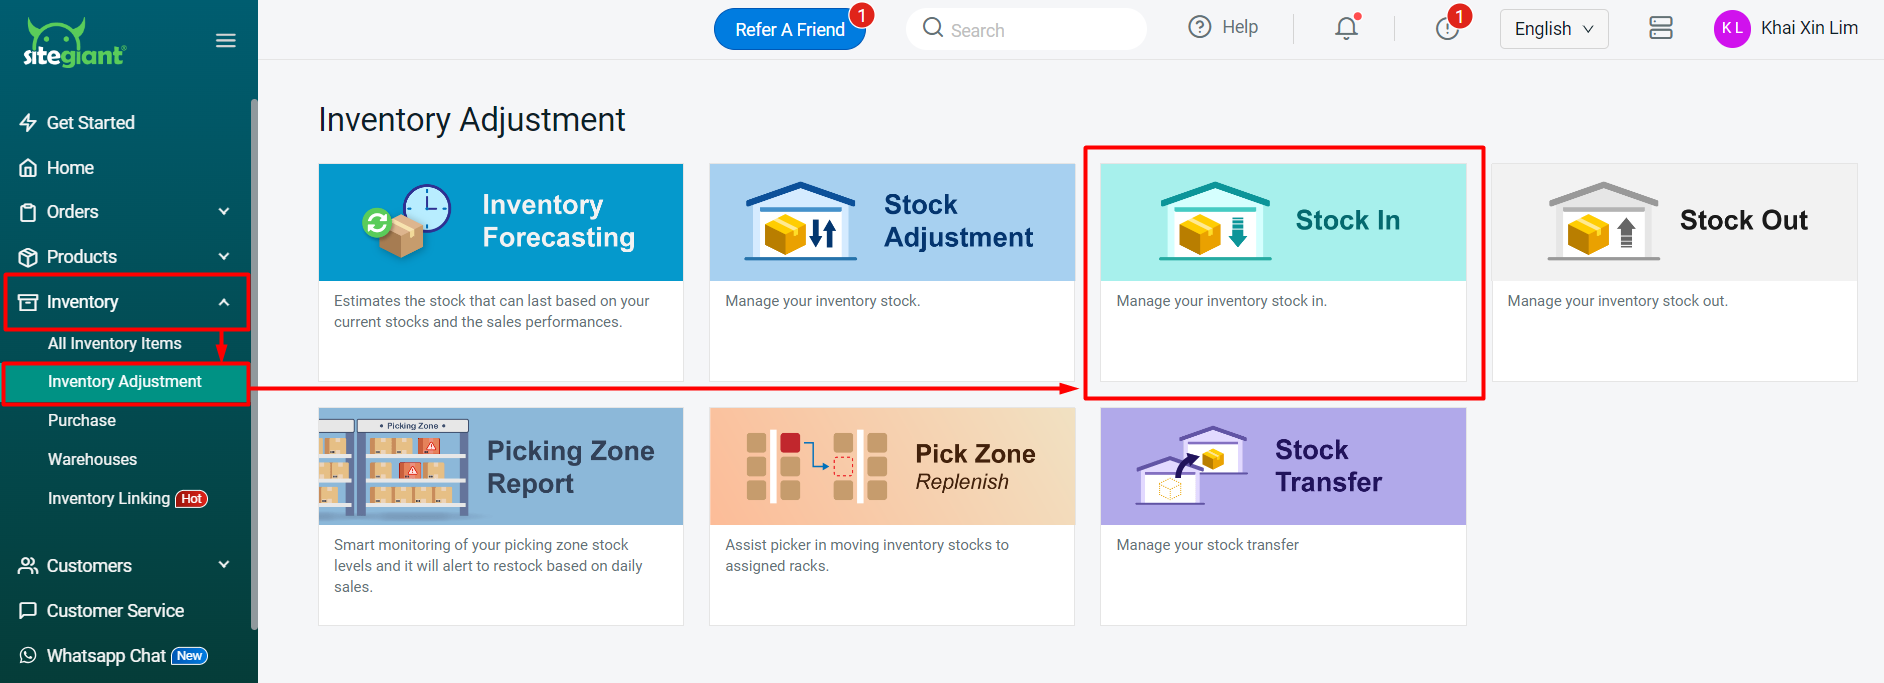
Step 1: Navigate to Inventory > Inventory Adjustment > Stock In.
Step 2: Click on the + Add Stock In button.

Step 3: Fill in Stock In Details such as Warehouse, Reason, Remark and Notes.

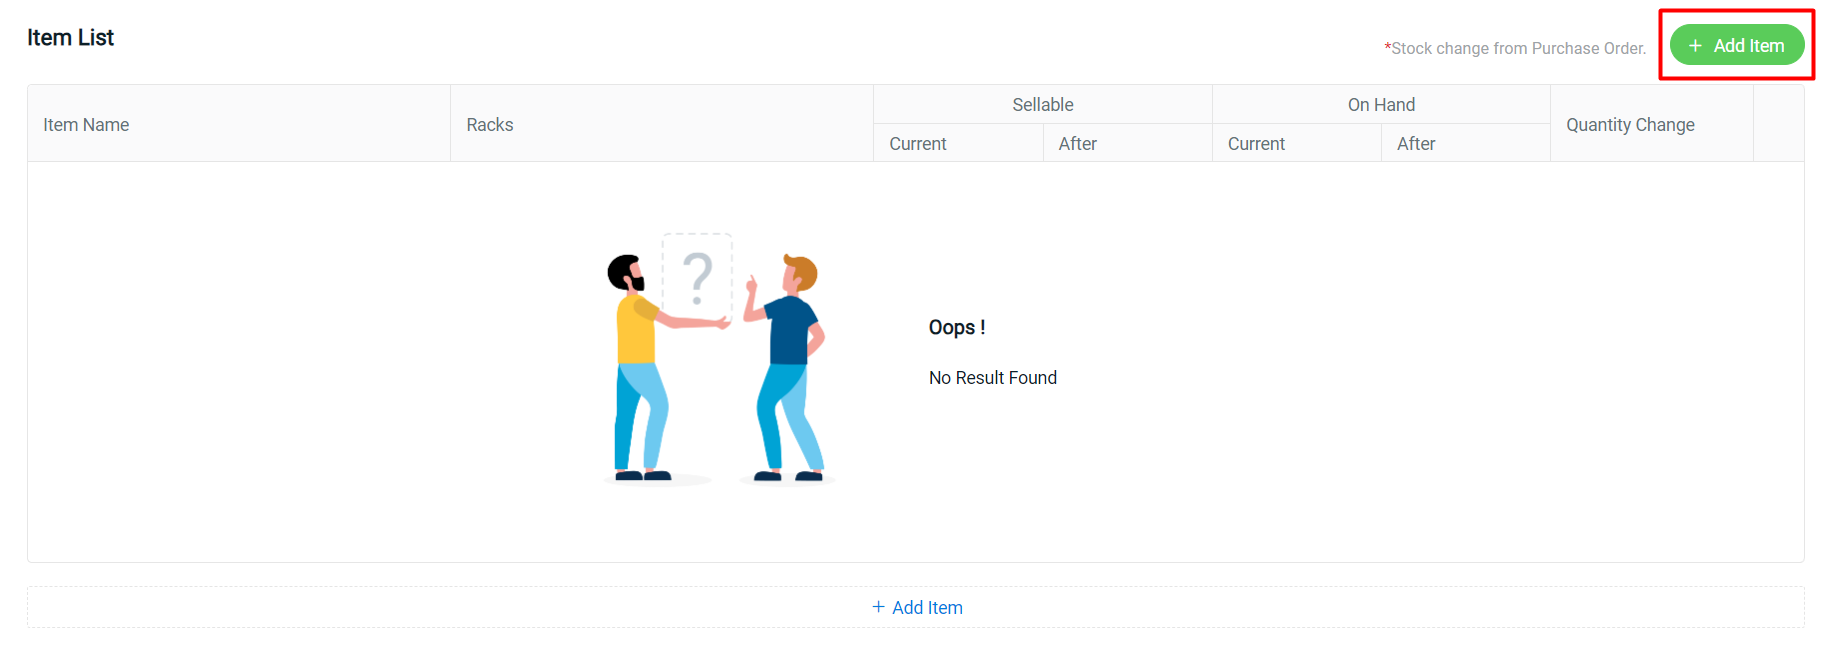
Step 4: Next, click on the + Add Item button to add inventory items to the Item List.
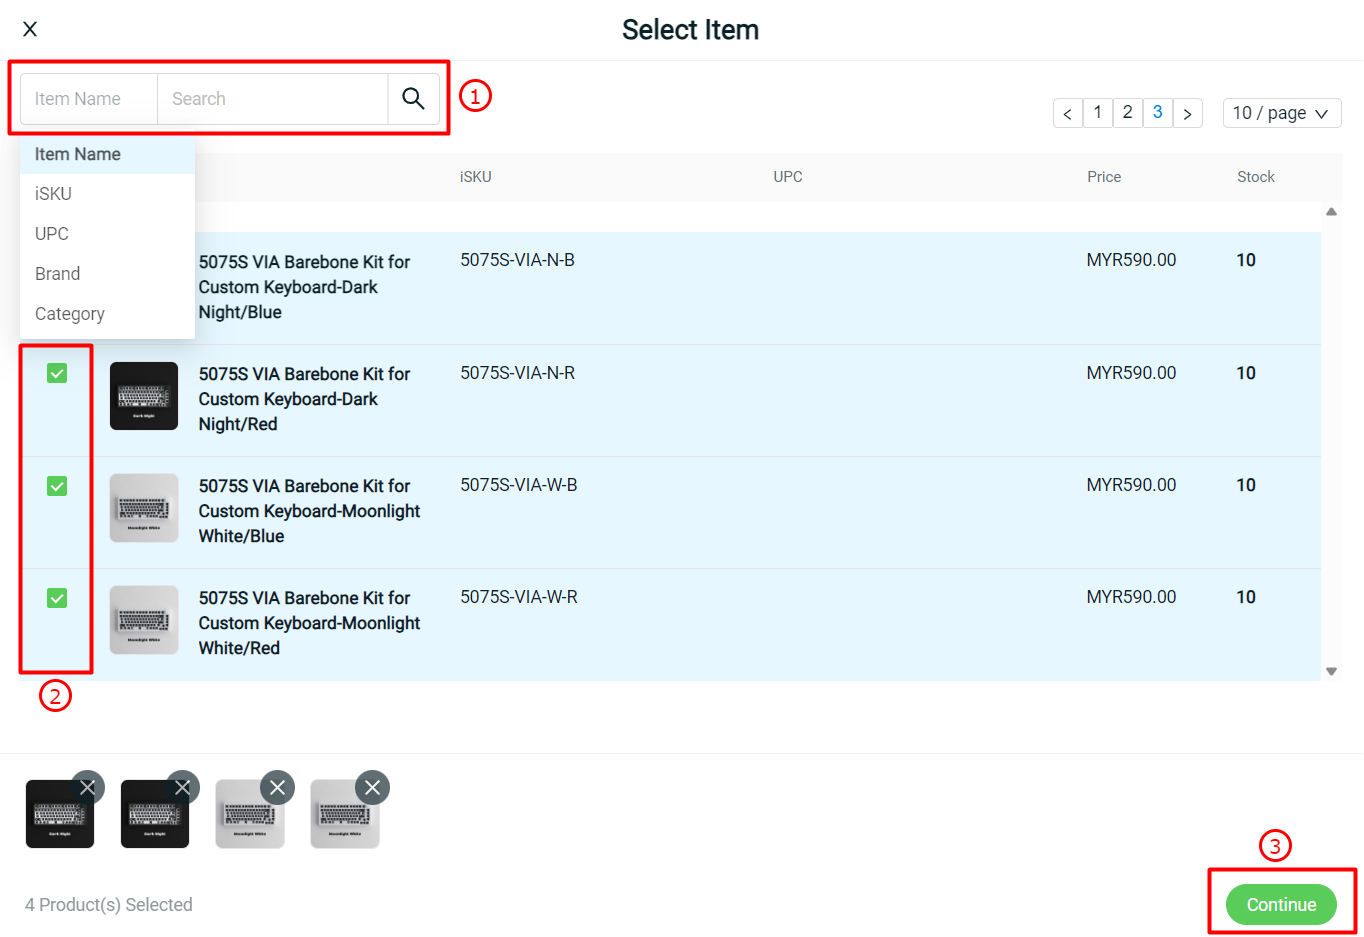
Step 5: You may search for your product item (optional) > select the item(s) > Continue.
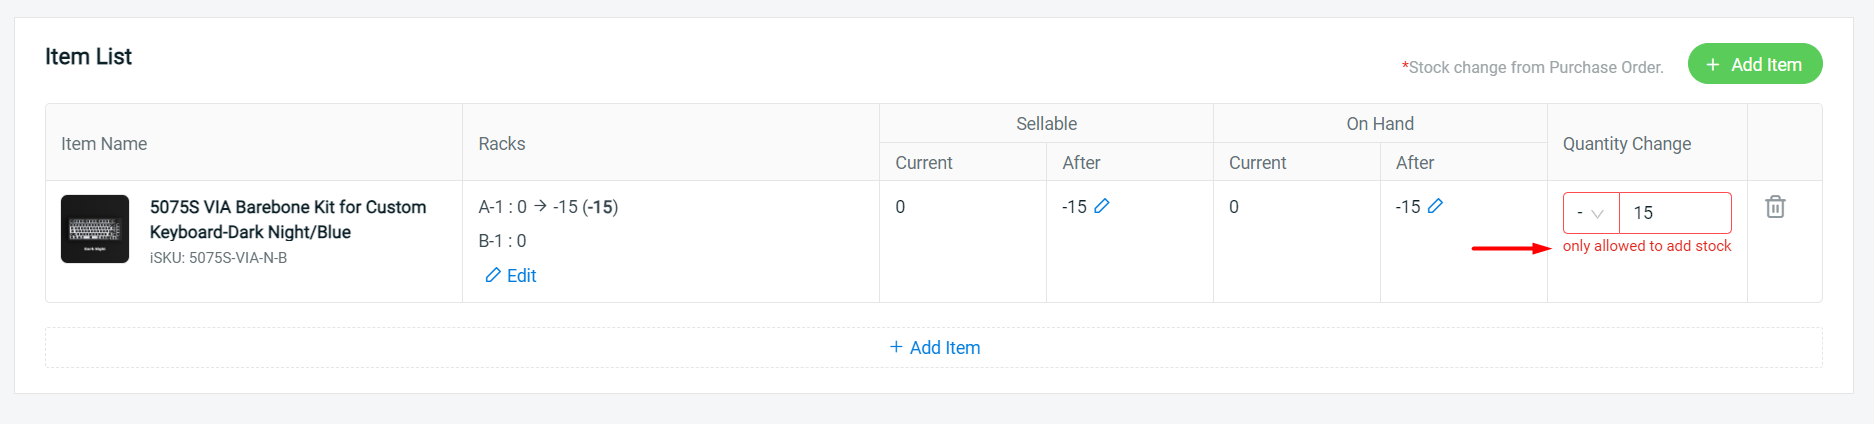
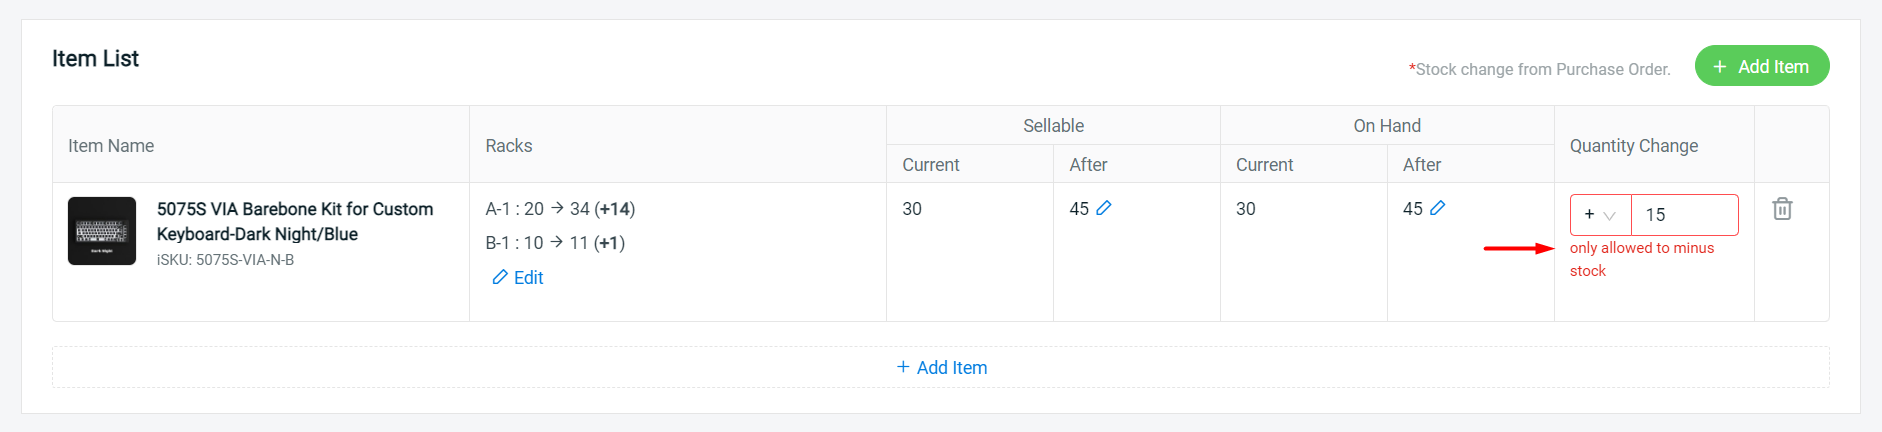
Step 6: Edit the stock quantities by Racks, Sellable (After), On Hand (After) or Quantity Change. Changing either 1 field will reflect on the others too.
📌Note: Stock In is only allowed to add stock. If you put a negative quantity, it will appear an error message.
Step 7: Once done, click on the Save button on the top right.
3. Stock Out
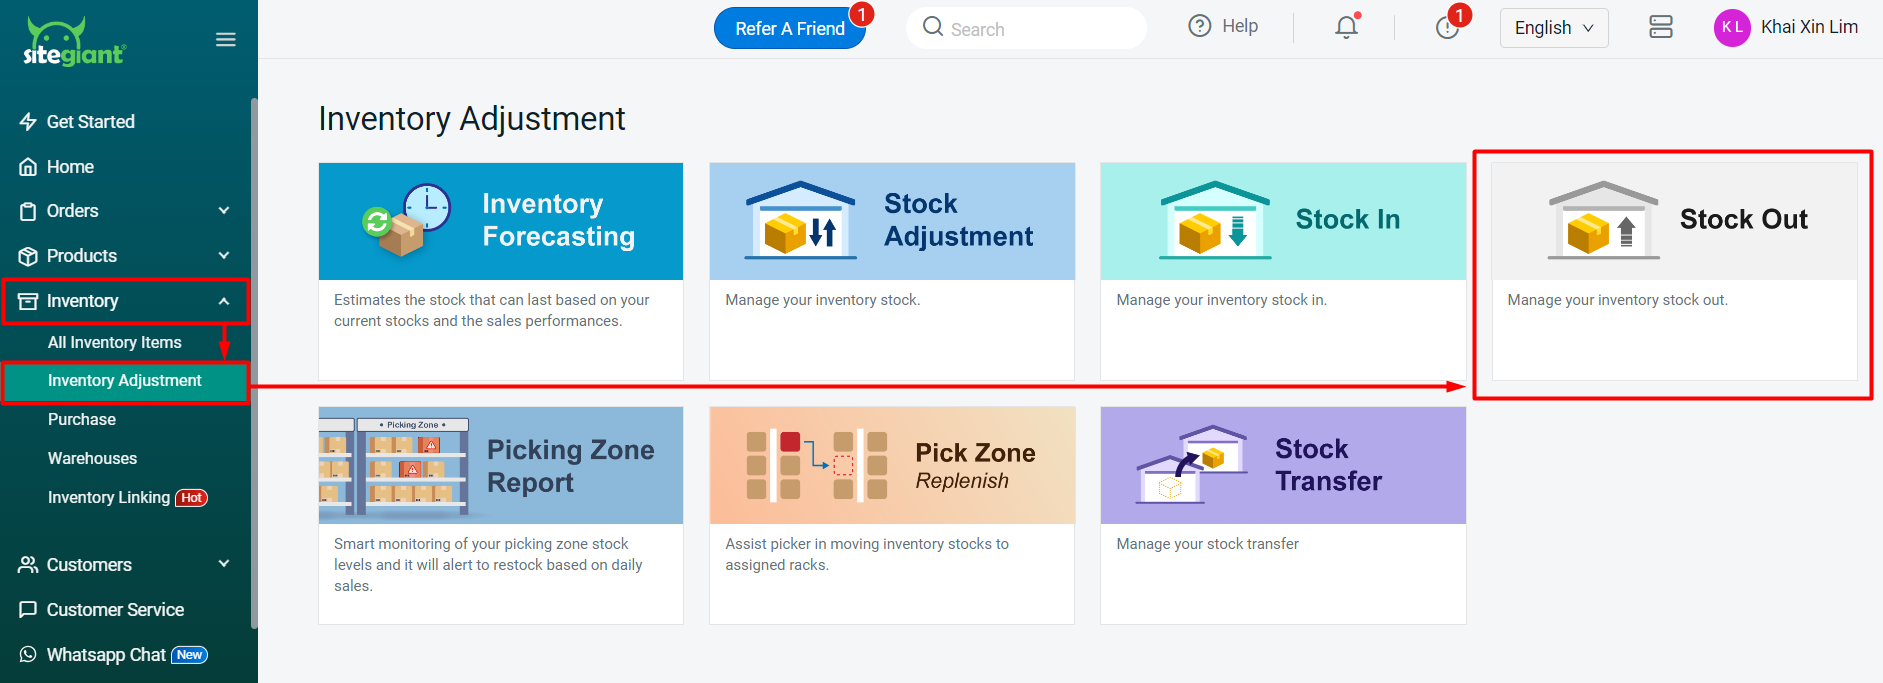
Step 1: Navigate to Inventory > Inventory Adjustment > Stock Out.
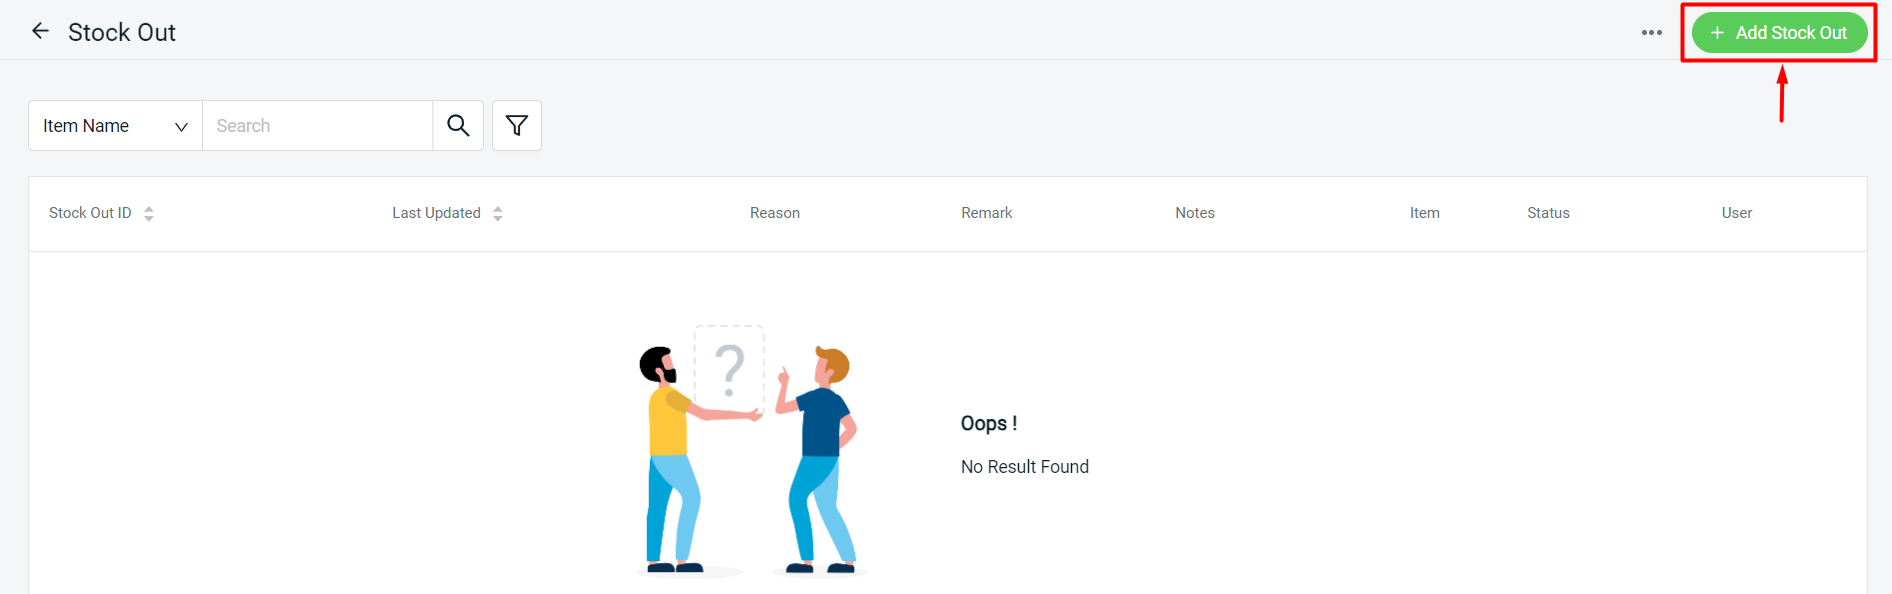
Step 2: Click on the + Add Stock Out button.
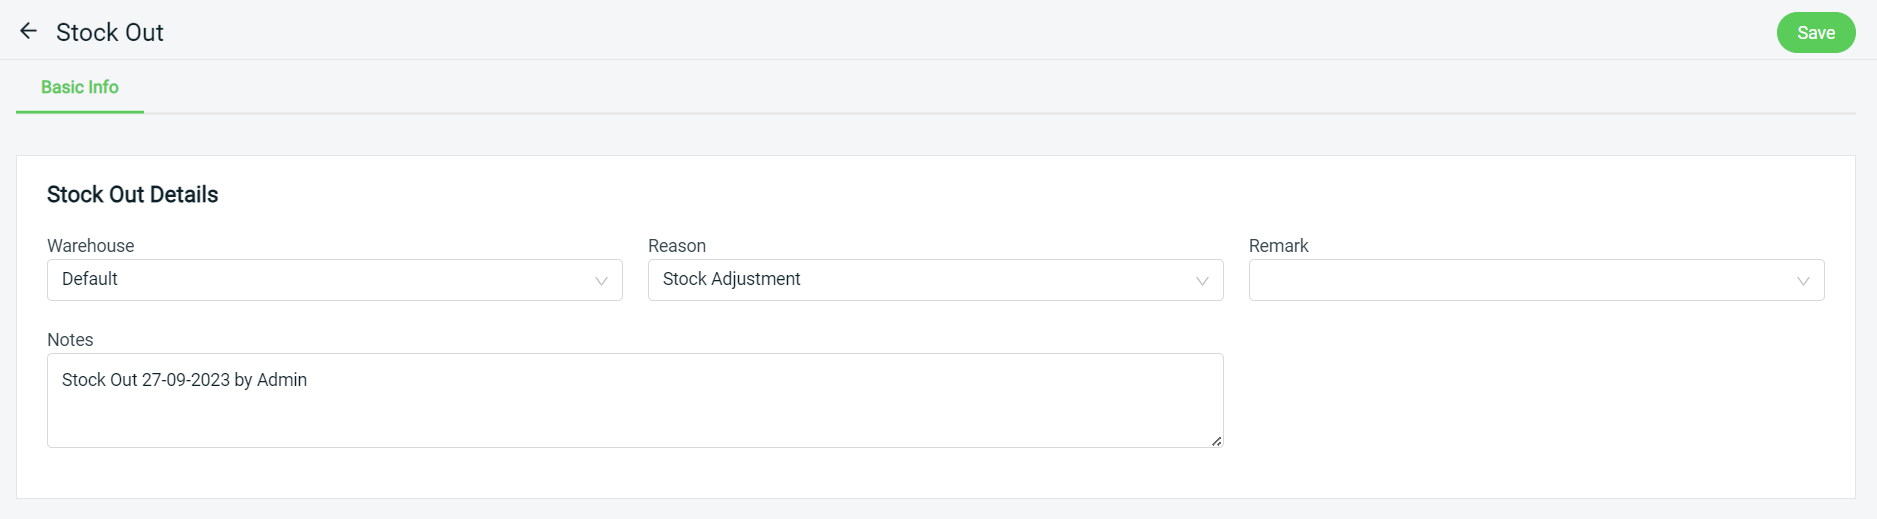
Step 3: Fill in Stock Out Details such as Warehouse, Reason, Remark and Notes.
Step 4: Next, click on the + Add Item button to add inventory items to the Item List.
Step 5: You may search for your product item (optional) > select the item(s) > Continue.
Step 6: Edit the stock quantities by Racks, Sellable (After), On Hand (After) or Quantity Change. Changing either 1 field will reflect on the others too.

📌Note: Stock Out is only allowed to minus stock. If you add quantity, it will appear an error message.
Step 7: Once done, click on the Save button on the top right.
📝Additional Information
1. Stock In / Stock Out Record
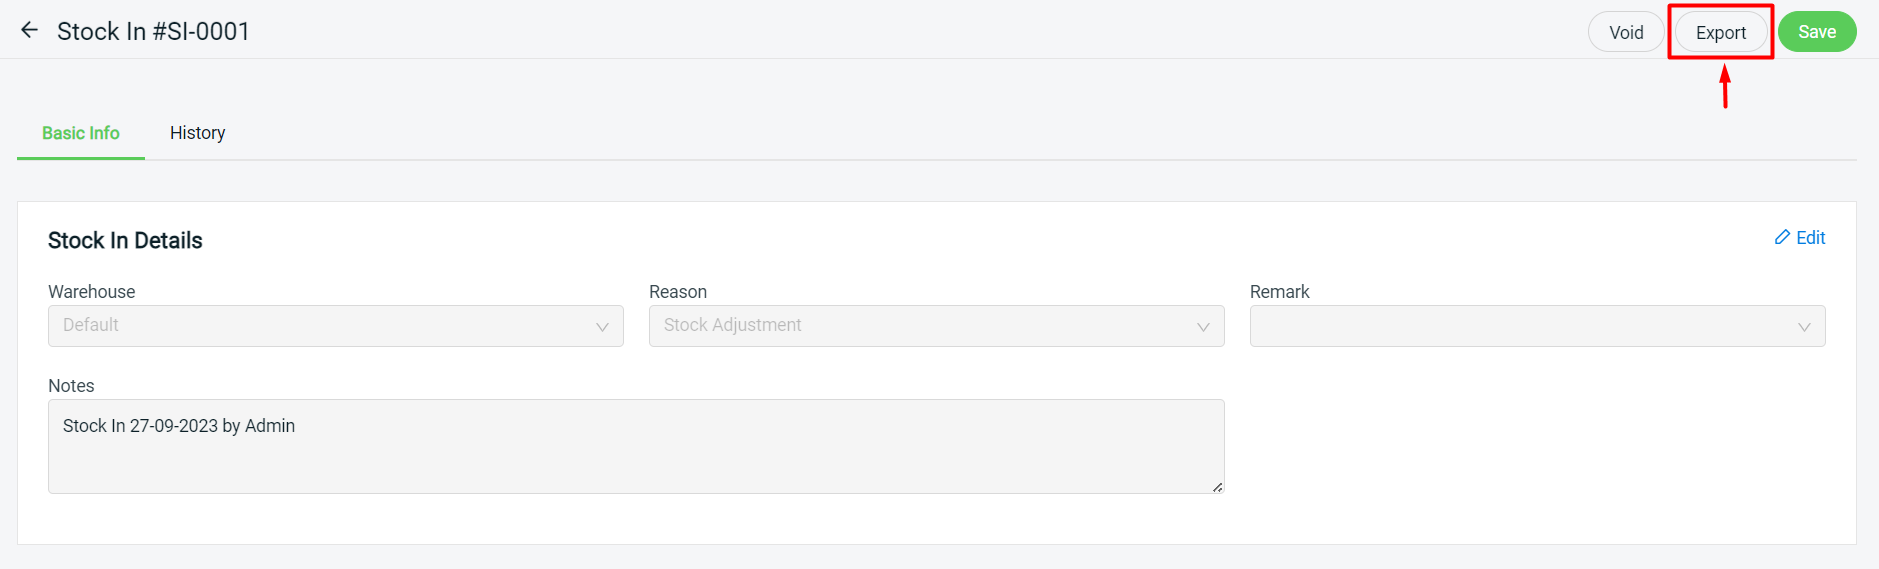
After saving the Stock In / Stock Out, an ID will be created.


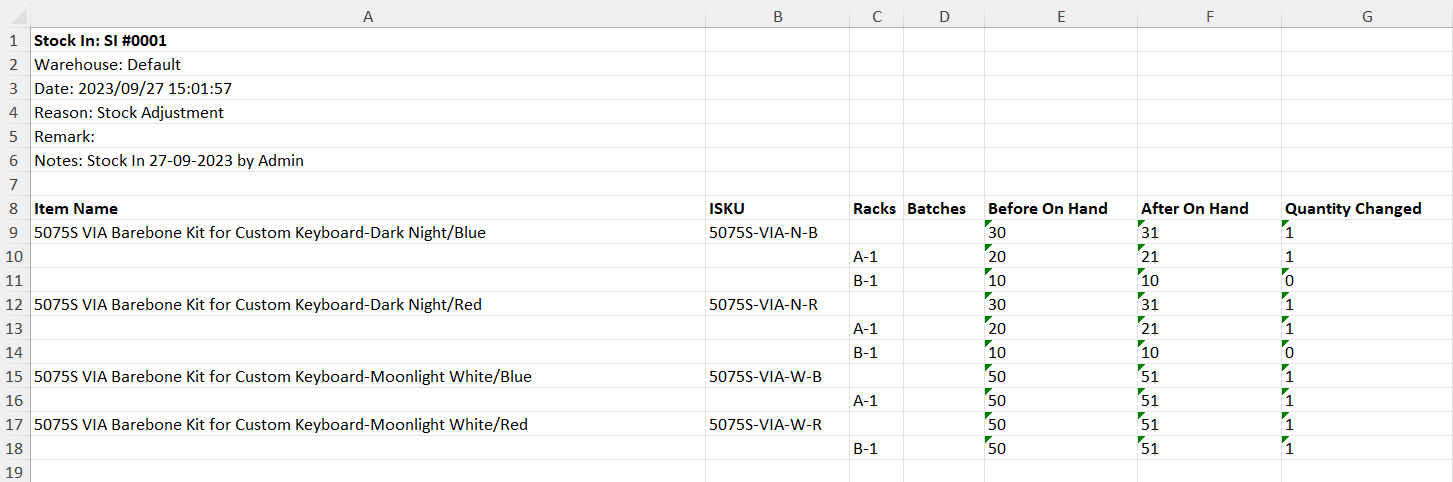
2. Export Stock In / Stock Out
You may click on the Stock In / Stock Out to Export the Excel file for further reference.

3. Void Stock In / Stock Out
Voiding the Stock In / Stock Out will revert all associated stock quantities to their previous levels.
