
1. 簡介
2. 運輸標籤設定
3. 快遞服務設定
4. 運輸標籤模板
5. 取貨單模板
6. 包裝單模板
7. 發票模板
1. 簡介
只需在快遞服務設定、運輸標籤模板、取貨單模板、包裝單模板和發票模板上進行設置,即可客製化官網及其它通路的運輸標籤。
2. 運輸標籤設定
步驟一:前往訂單 > 全部訂單。
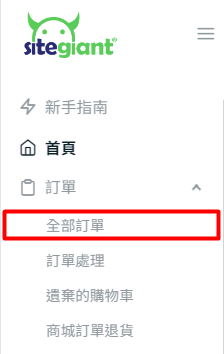
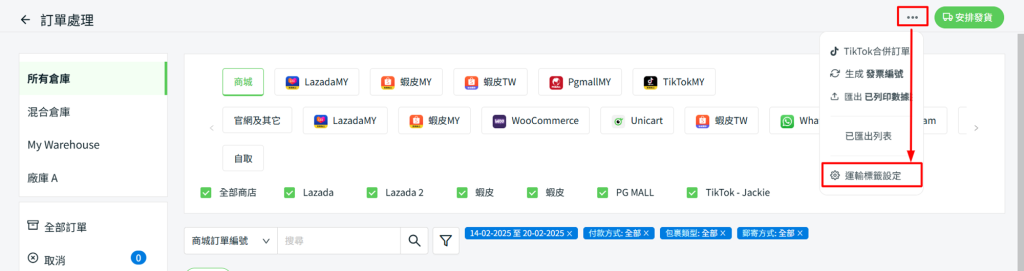
步驟二:點擊訂單處理按鈕。

步驟三:點擊更多(…) > 運輸標籤設定。
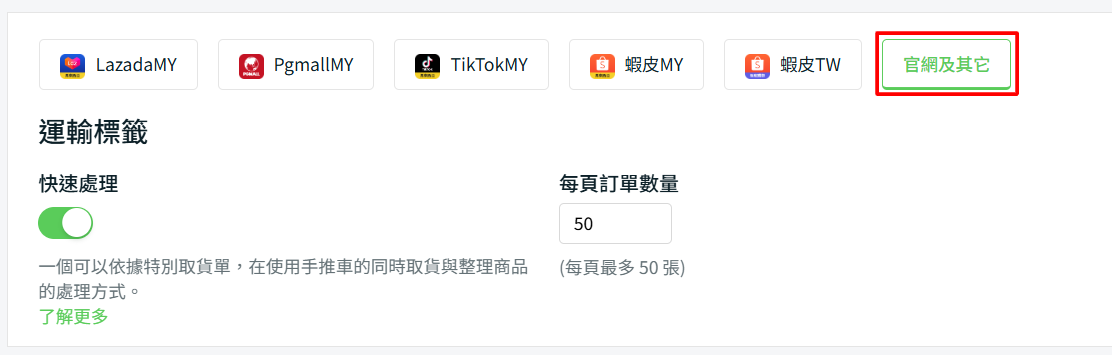
步驟四:選擇官網及其它選項。
💡提示:如何使用快速處理功能處理訂單
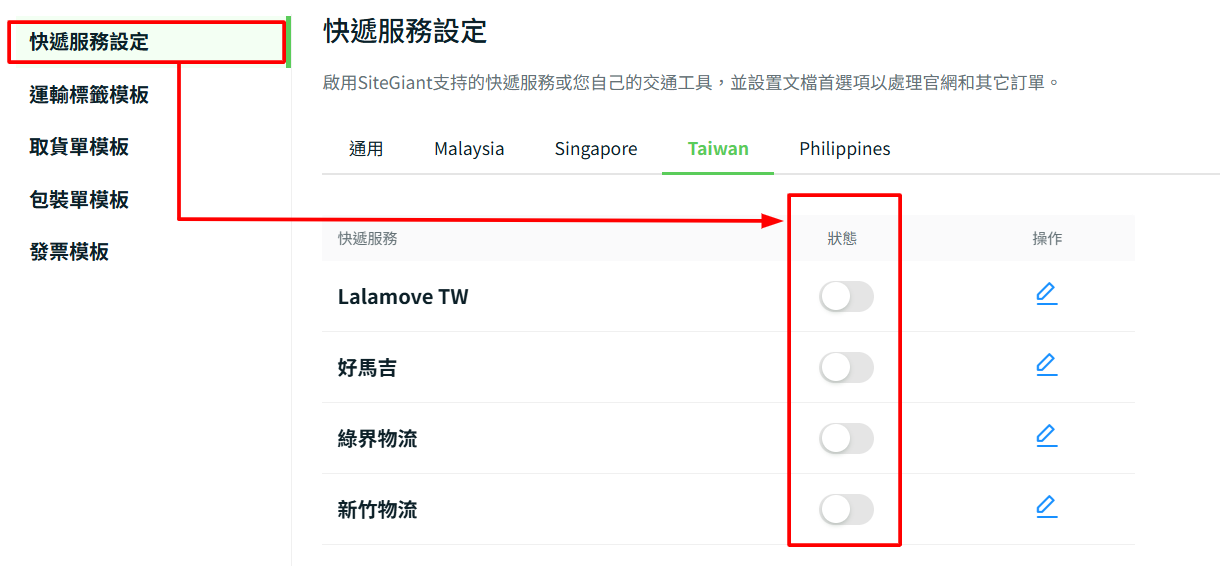
3. 快遞服務設定
步驟一:前往快遞服務設定 > 啟用您想串接的快遞服務狀態,如新竹物流。
步驟二:填寫運輸選項,例如客戶代碼,店鋪名稱和從快遞服務獲取的密鑰等。
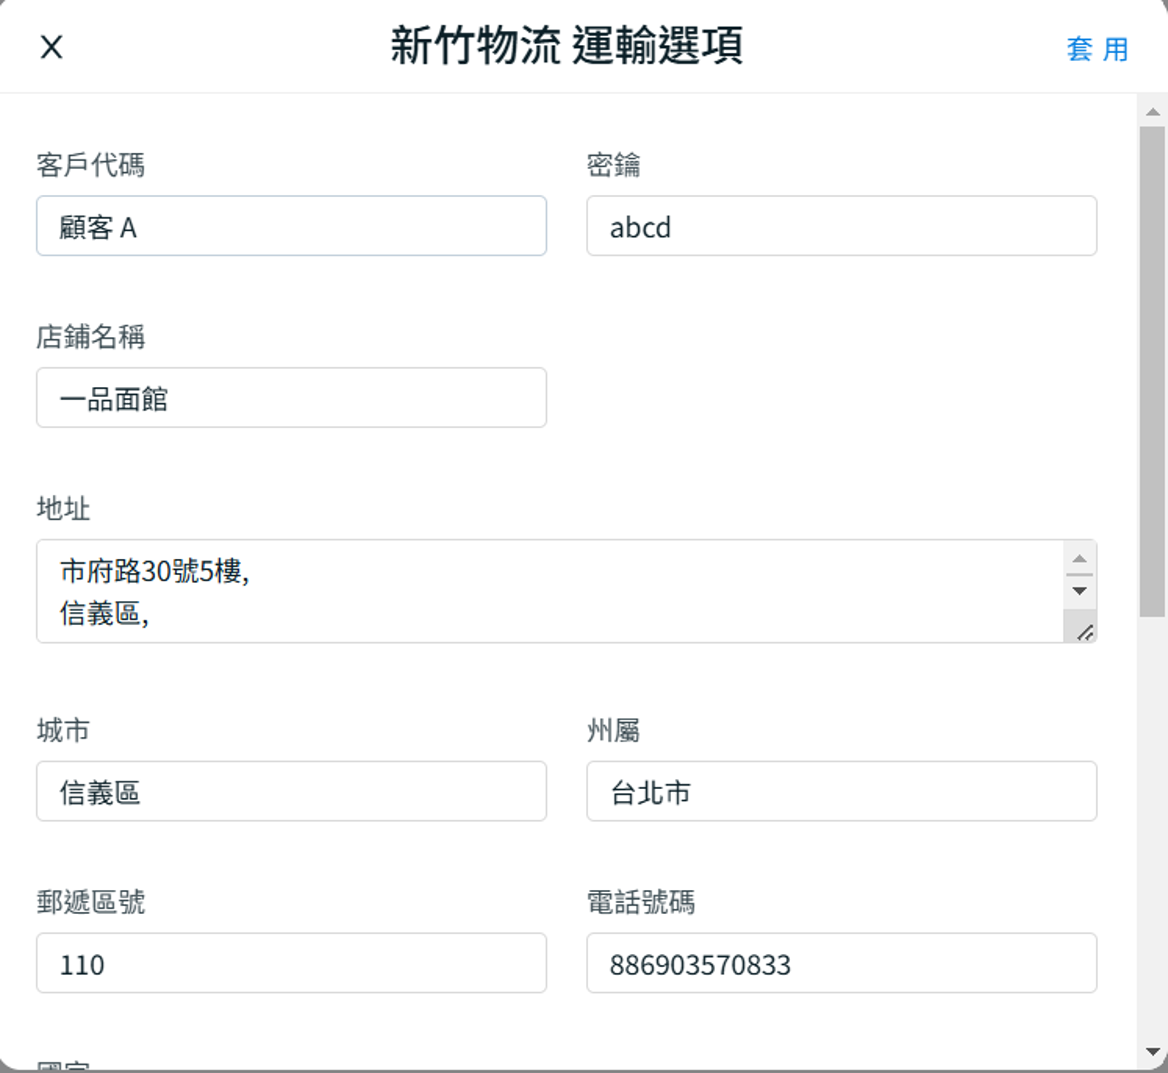
步驟三:選擇紙張尺寸 > 選擇您希望與運輸標籤一起列印的文件 > 選擇運輸標籤副本的數量 > 套用。

4. 運輸標籤模板
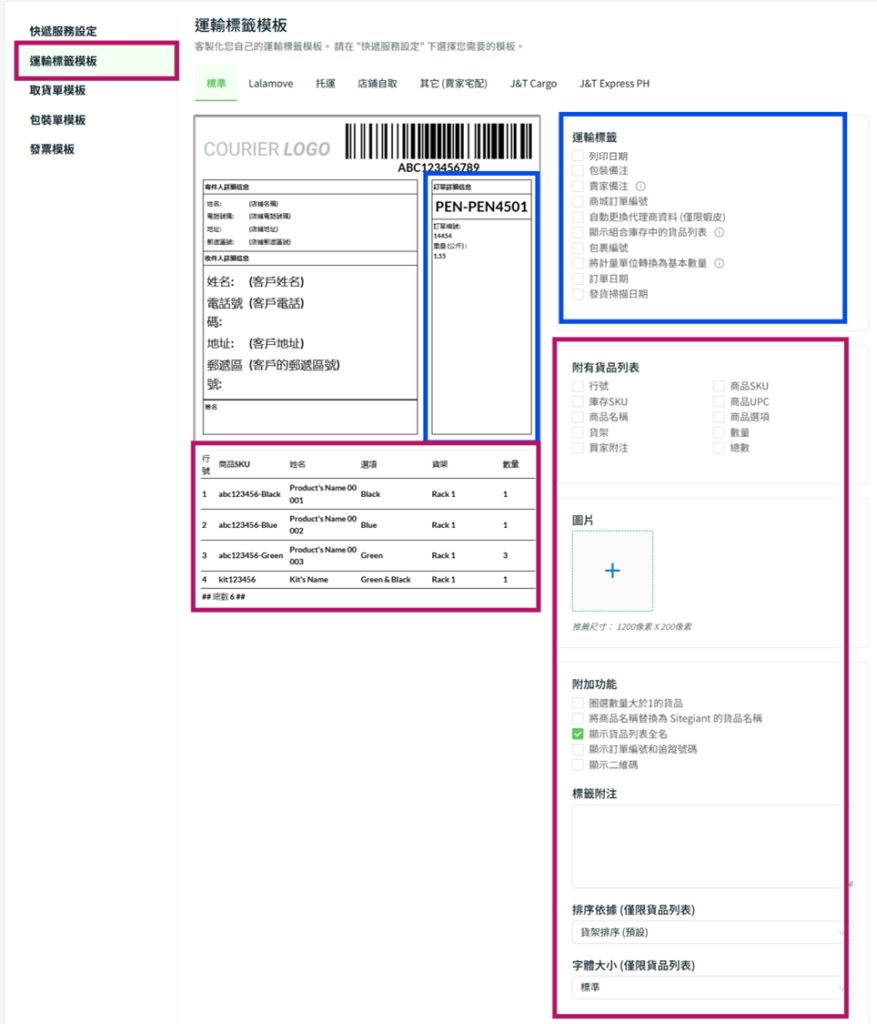
步驟一:前往運輸標籤模板 > 您可以選擇模板並客製化您喜歡的信息將其顯示於運輸標籤中。
5. 取貨單模板
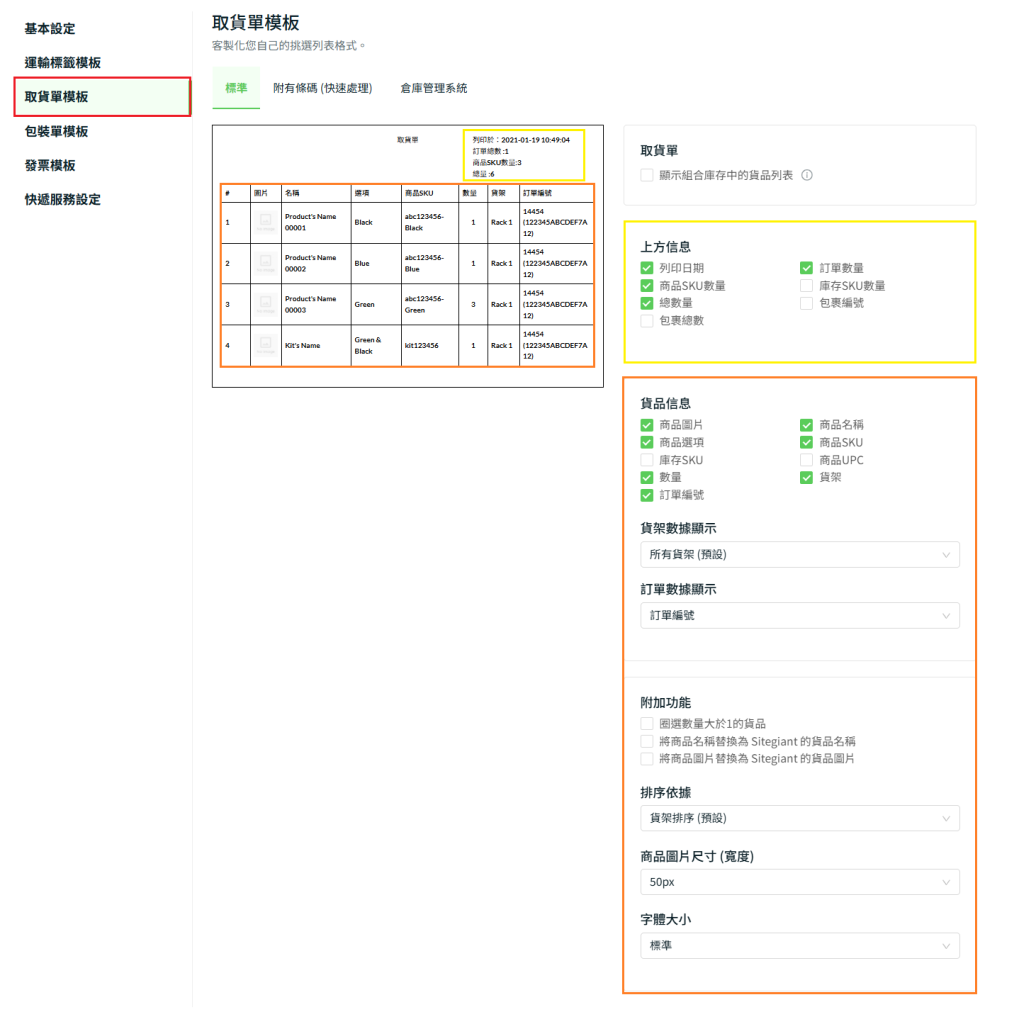
步驟一:前往取貨單模板 > 客製化您希望在取貨單中顯示的信息。
6. 包裝單模板
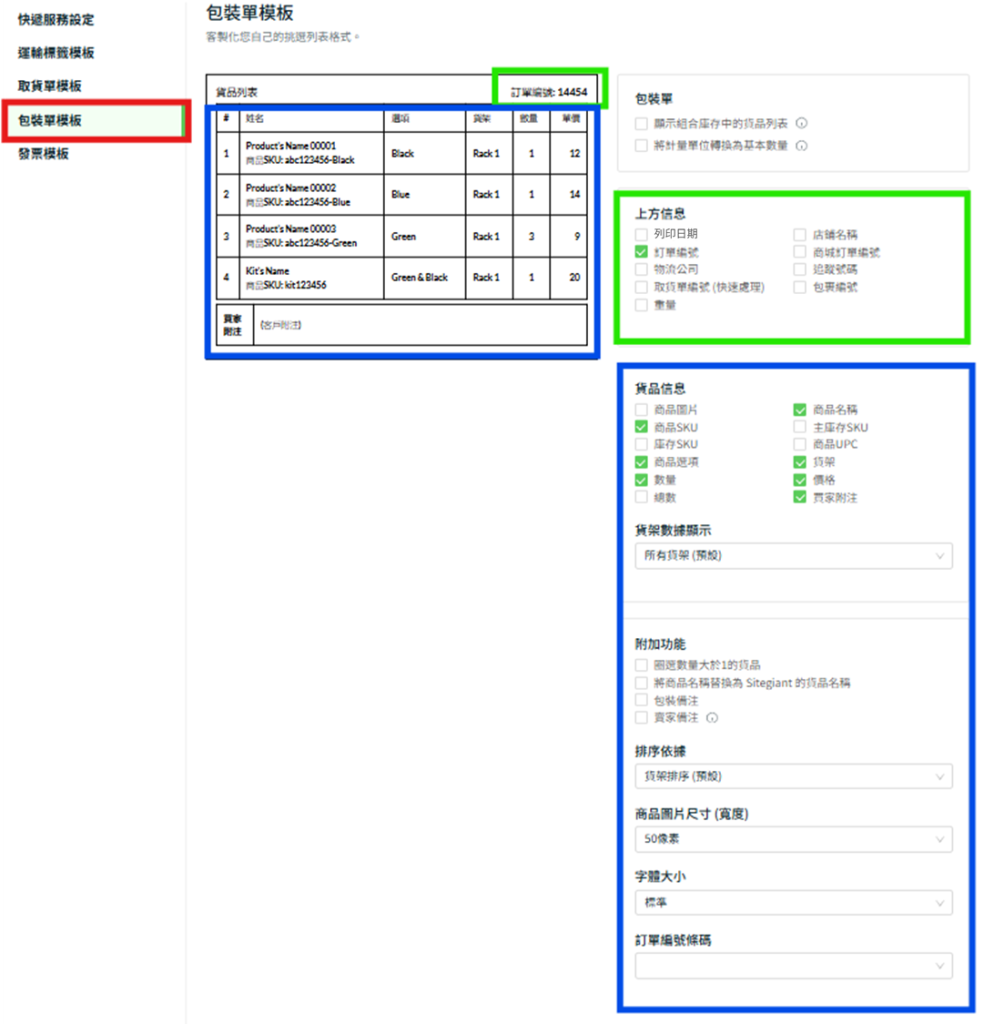
步驟一:前往包裝單模板 > 客製化您希望在包裝單中顯示的信息。
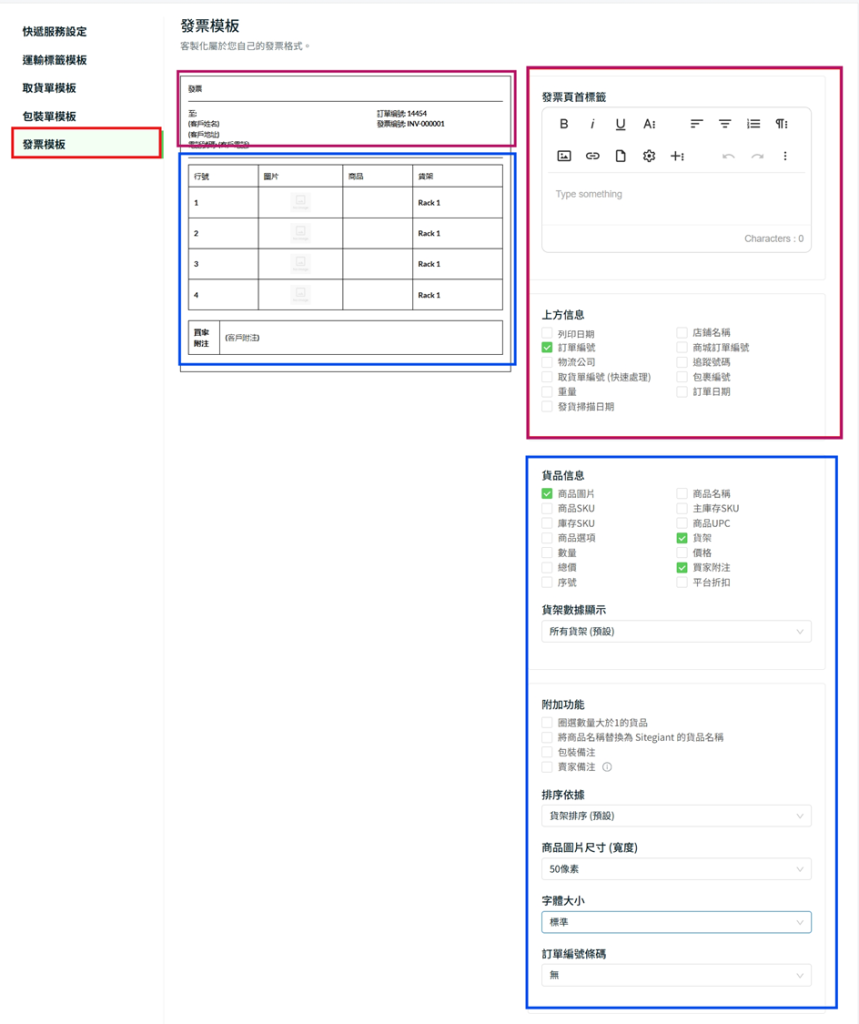
7. 發票模板
步驟一:前往發票模板 > 客製化您希望在發票中顯示的信息。
完成設置後,保存運輸標籤設定。